You can trust VideoGamer. Our team of gaming experts spend hours testing and reviewing the latest games, to ensure you're reading the most comprehensive guide possible. Rest assured, all imagery and advice is unique and original. Check out how we test and review games here
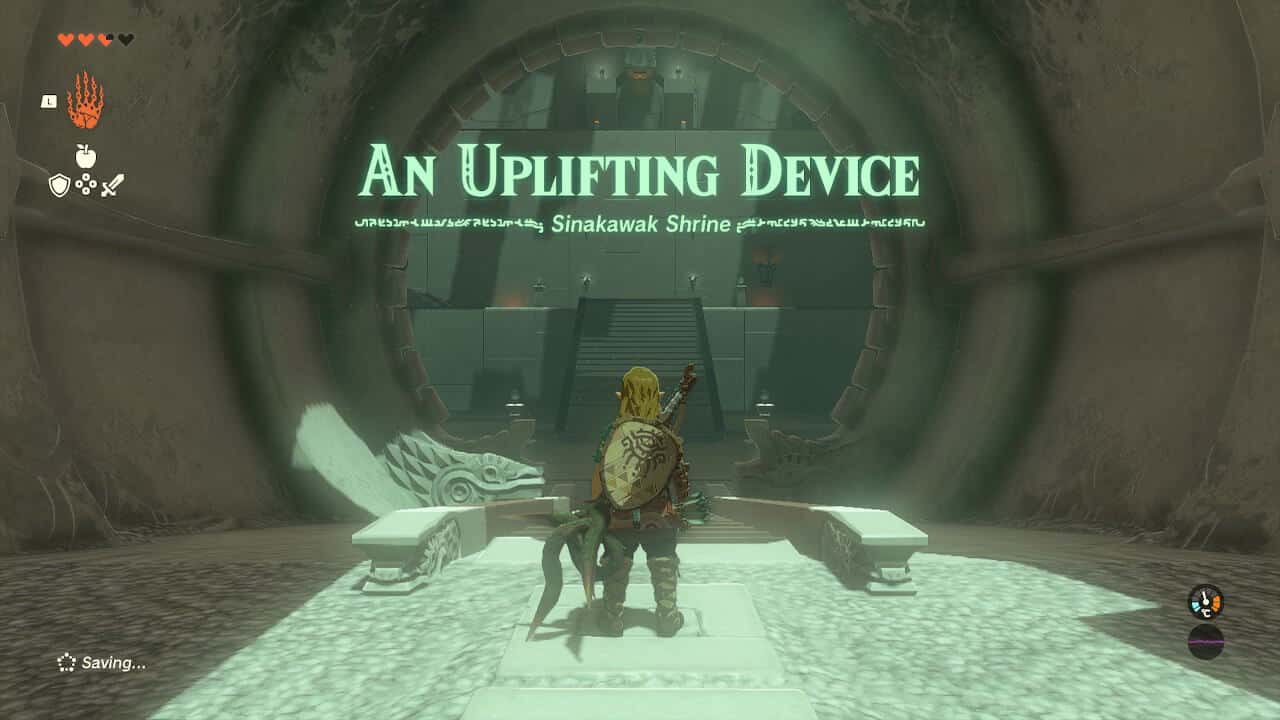
The Tears of the Kingdom Sinakawak Shrine can appear straightforward at first, but can easily go off track if you aren’t quite sure what you’re doing. Luckily, we’re here with a step by step guide to help you out in this The Legend of Zelda TotK Shrine.
You’ll probably come across this one while hunting for one of the Tears of the Kingdom Geoglyph memories, or pitching up at one of Hyrule’s Tears of the Kingdom stables. Either way, let’s go through how to beat the Tears of the Kingdom Sinakawak Shrine.
Where is the Sinakawak Shrine in Tears of the Kingdom?
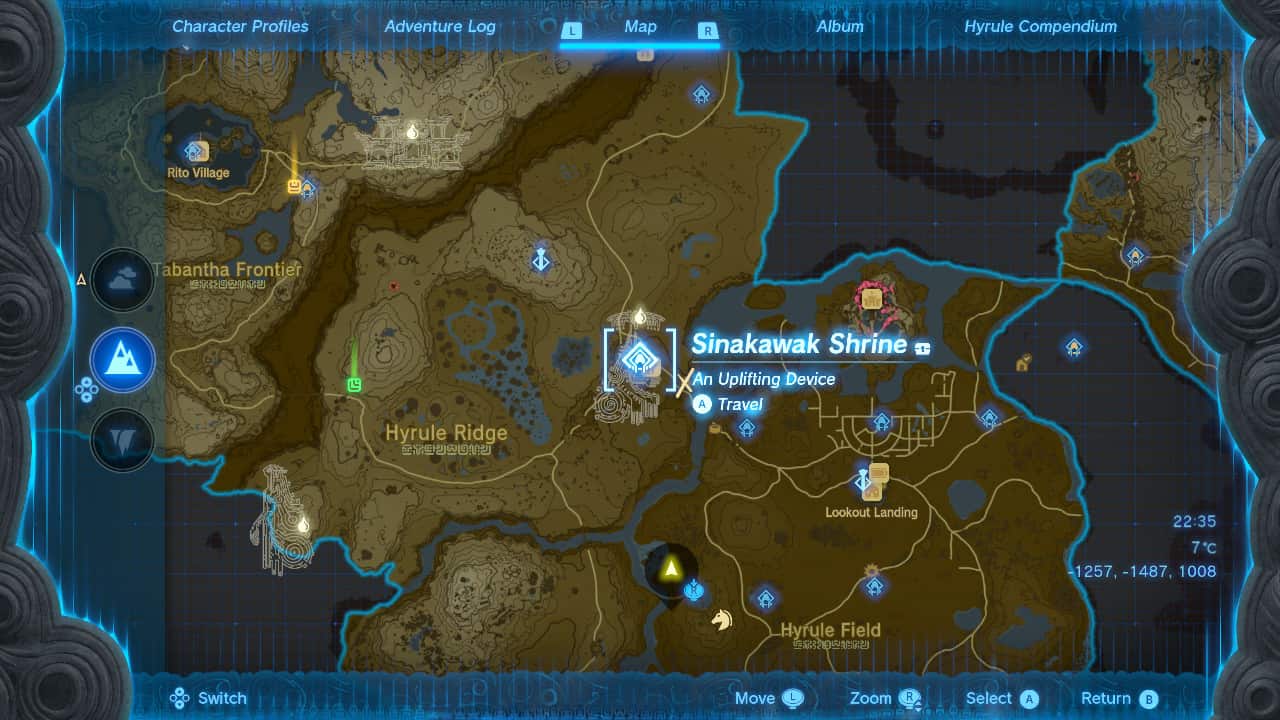
The Tears of the Kingdom Sinakawak Shrine location is in in Hyrule Ridge in Central Hyrule next to the New Serenne Stable. If you’re making your way to Rito Village from Lookout Landing, you’ll probably come across it when you pass by the stable. The coordinates of the Sinakawak Shrine are -1413, 0755, 0087.
Tears of the Kingdom Sinakawak Shrine puzzle solution and walkthrough
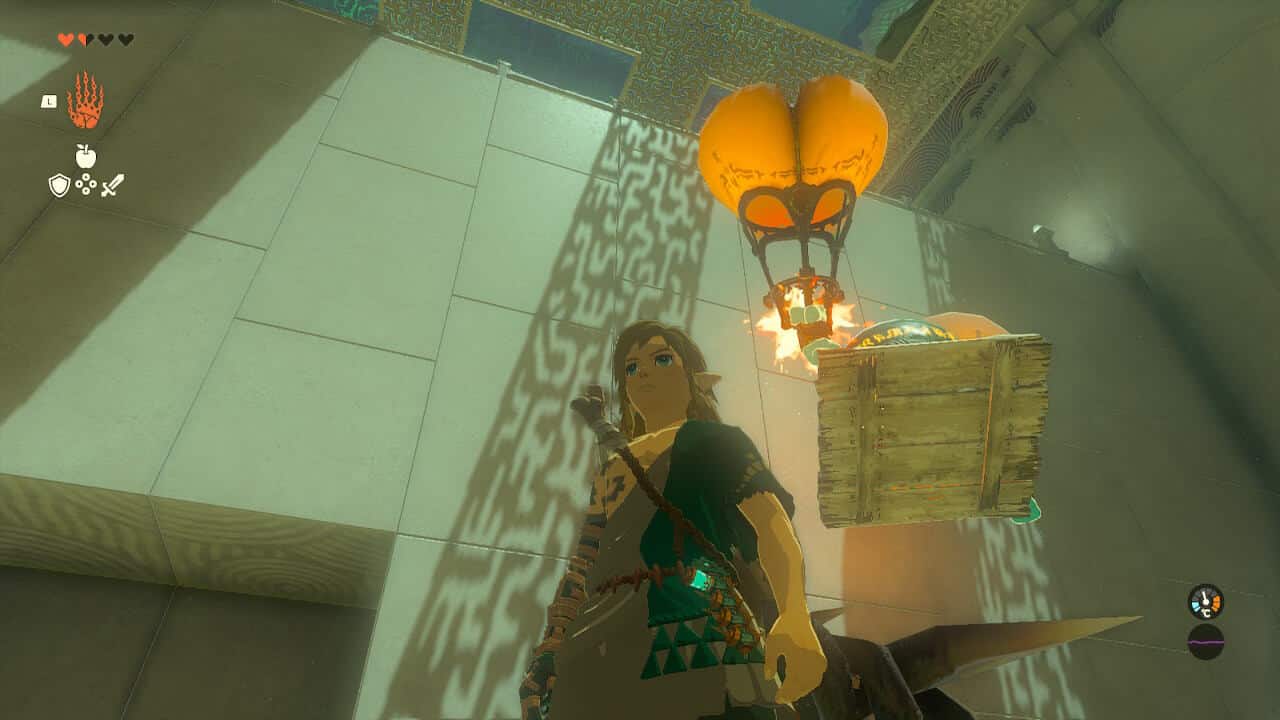
As you walk in, you’ll see the parts and devices required to make a hot air balloon around the room, as well as a tall wall in front of you. Make a balloon using Tears of the Kingdom Ultrahand by attaching a fire to a wooden platform, and then a balloon on top. Stand on the piece of wood to ride the hot air balloon to the top of the tall wall. This Shrine isn’t called ‘An Uplifting Device’ for nothing.
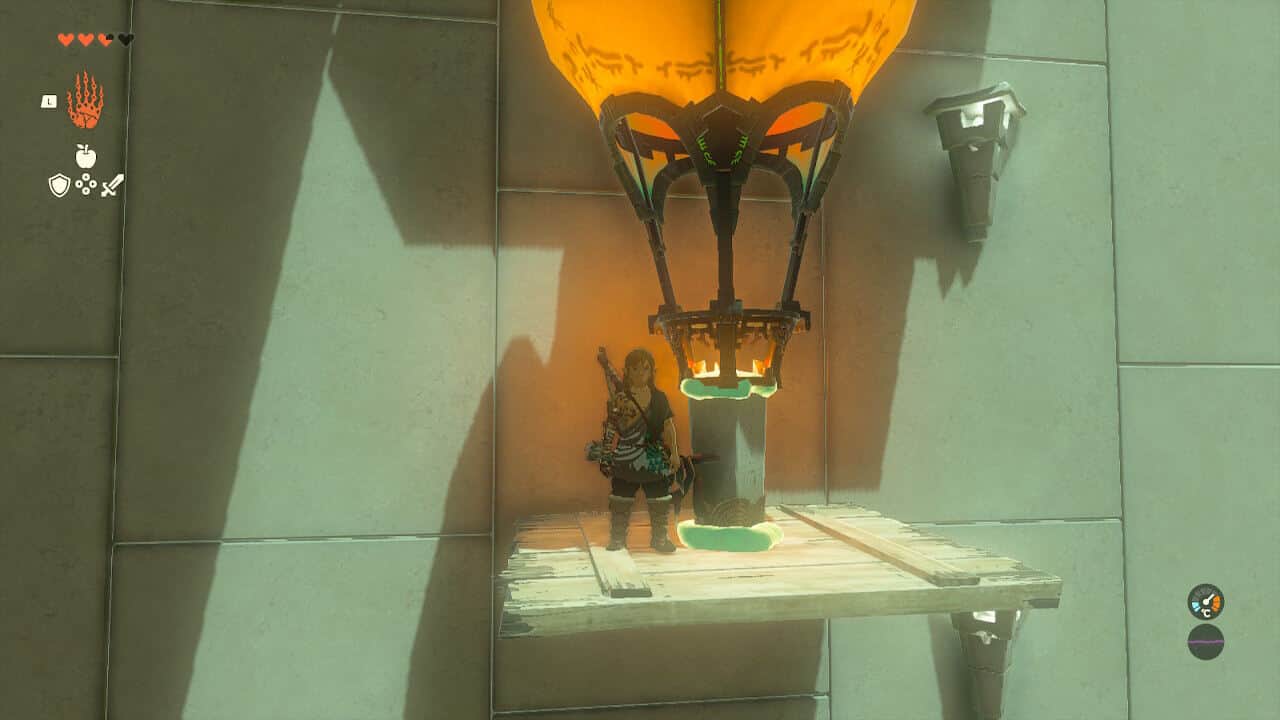
Get off, and use Ultrahand to grab the balloon. If you miss it, no worries, there are materials here to make another one. Attach another balloon to one of the fires (you won’t need a platform this time), and bring it to the door in the wall in front. Above the door is a button. Simply let go of the balloon beneath the switch, and it will float upwards to hit it and open the door.
In the next room, you’ll enter on a walkway at the very top. Jump down and walk all the way to the right, and around the corner. You’ll see a large ball with several flamethrowers on the floor. Take the large ball and attach it to the centre of the piece of wood in the next room. Take the small ball in this room and attach it to the top of the larger one. Attach two flame emitters on opposite corners of the wood, and attach a balloon on top of each flamethrower (and ignore how wonky mine looks). The flames will be powerful enough to lift the larger ball up to the top of the room.
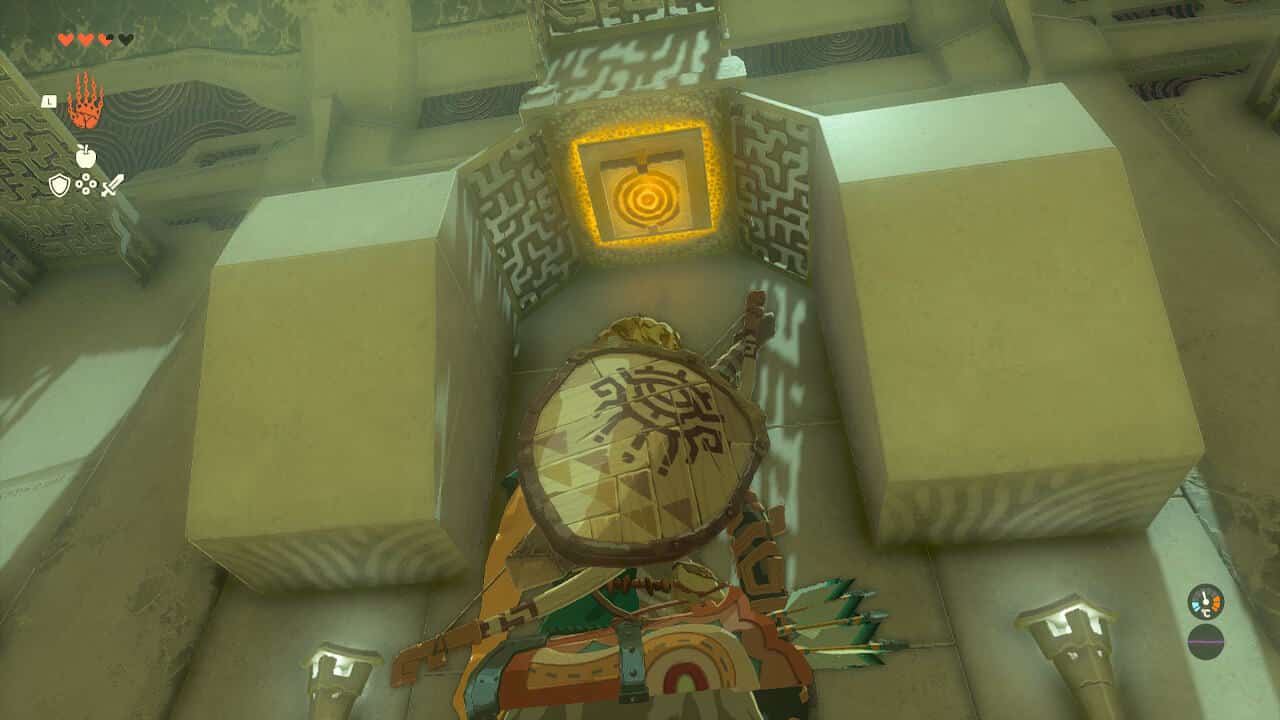
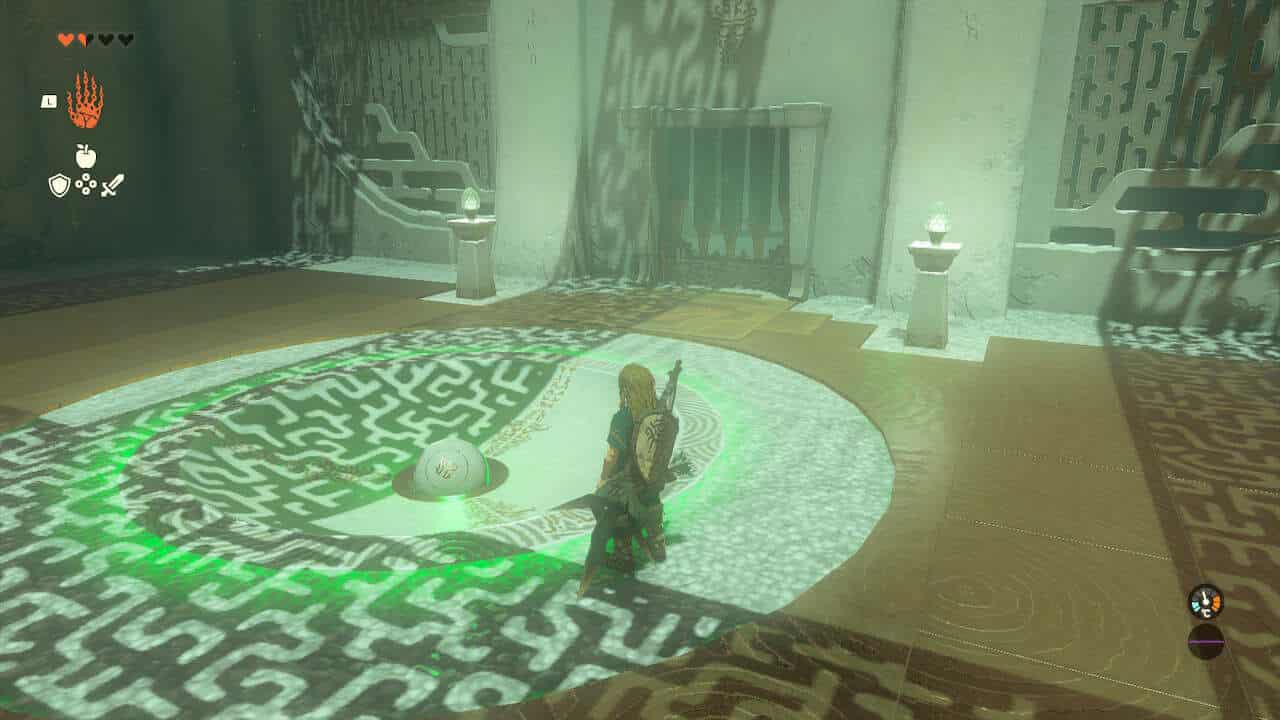
Use Tears of the Kingdom Ascend in the gap in the wall in front of you, and again to reach the walkway. Detach the balls and bring them to the end of the room where there are two holes in the floor in front of two gates. Place the large ball in its hole to open a room with a treasure chest containing an opal. Place the smaller ball in its hole to open the room containing the Shrine. Interact with it to complete the Shrine.
That’s all you need to know for the Sinakawak Shrine and get a Light of Blessing you can put towards your next heart container or stamina. If you’re looking for more Shrines, our Tears of the Kingdom Shrine locations list is a good place to start. And if you’re struggling with Tears of the Kingdom Gloom Hands, we’ve got a guide for that too.
About the Author

The Legend of Zelda: Tears of the Kingdom
-
UnknownUnknown
- Platform(s): Nintendo Switch
- Genre(s): Action, Action Adventure, Adventure