You can trust VideoGamer. Our team of gaming experts spend hours testing and reviewing the latest games, to ensure you're reading the most comprehensive guide possible. Rest assured, all imagery and advice is unique and original. Check out how we test and review games here
The Tears of the Kingdom Jonsau Shrine is a bit of an oddity, as it’ll require you to consider water physics in some unique ways. It’s one of the more unique Shrines in The Legend of Zelda TotK that’ll probably have you scratching your head at first, but we’ll sort you out with all of the solutions.
We also have a guide on Tears of the Kingdom Shrine locations to help you track them all down. If you want to get Link kitted out with his main blue tunic, take a look at our Tears of the Kingdom Champions Tunic location guide.
Where to find the Tears of the Kingdom Jonsau Shrine
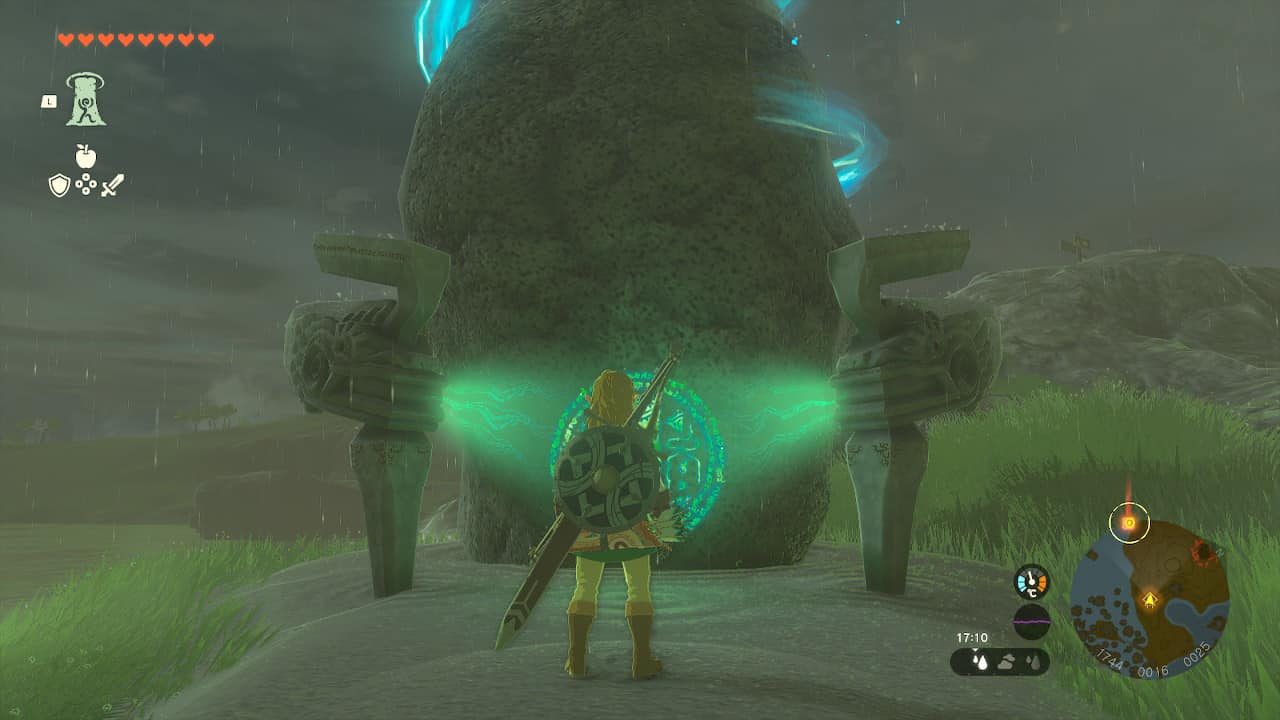
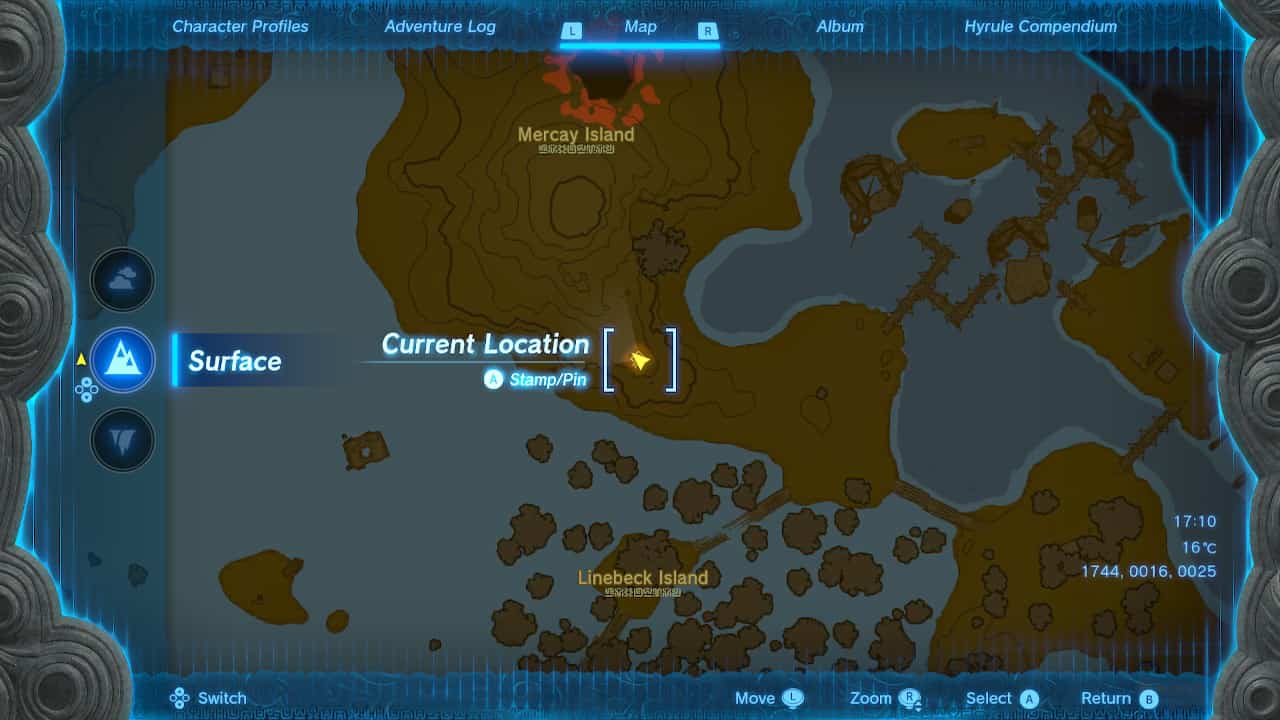
The Tears of the Kingdom Jonsau Shrine location is in the Lanayru Wetlands, north of Kakariko Village, in the Lanayru region of Hyrule. The coordinates are 1744, 0017, 0025.
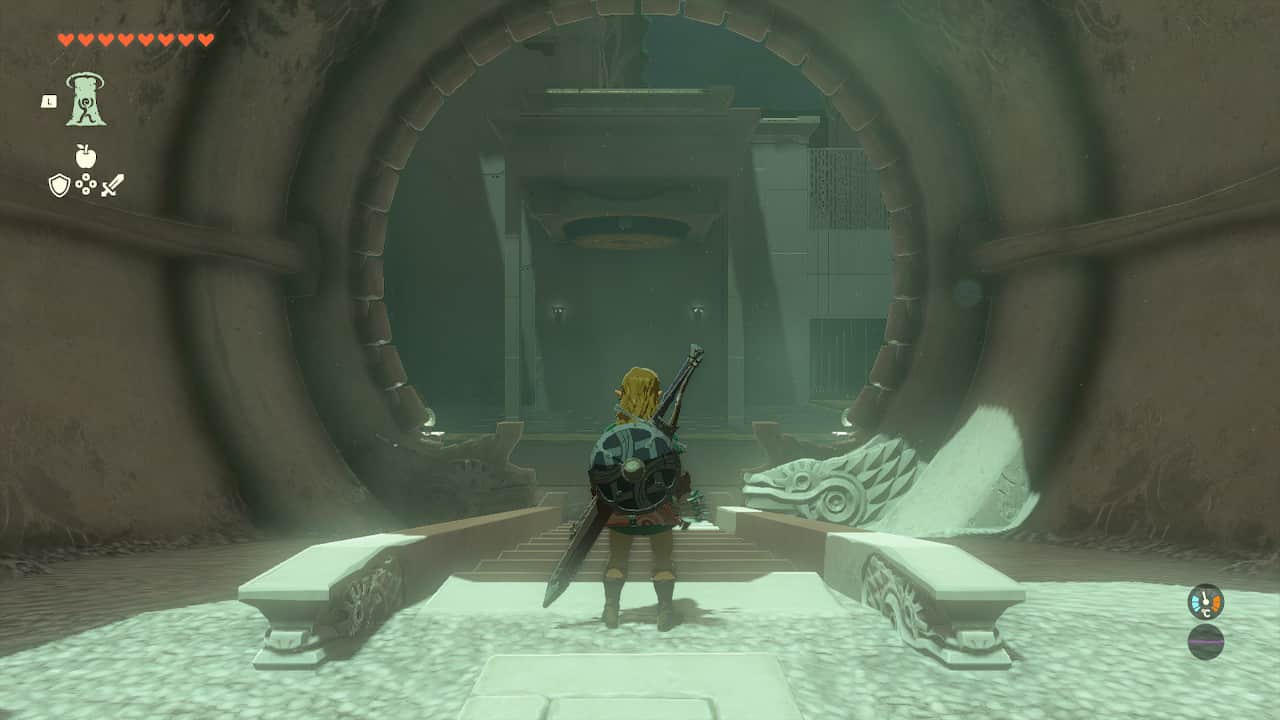
Tears of the Kingdom Jonsau Shrine puzzle solutions and walkthrough
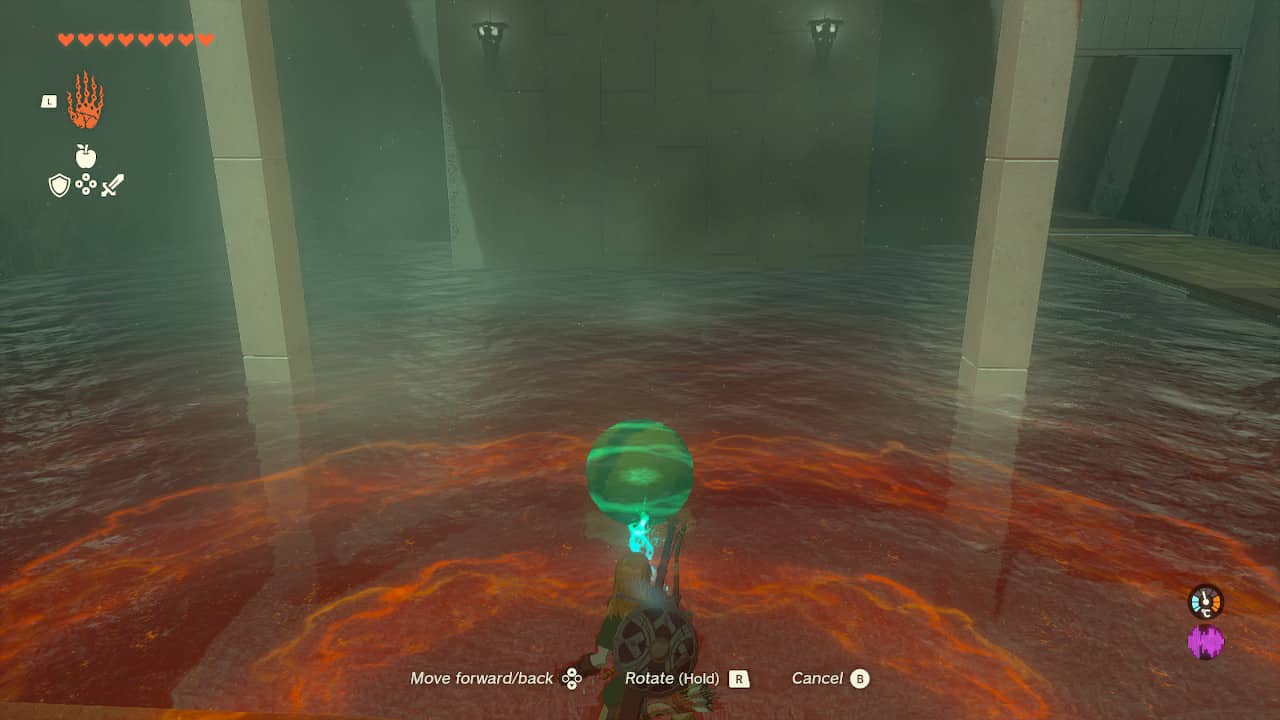
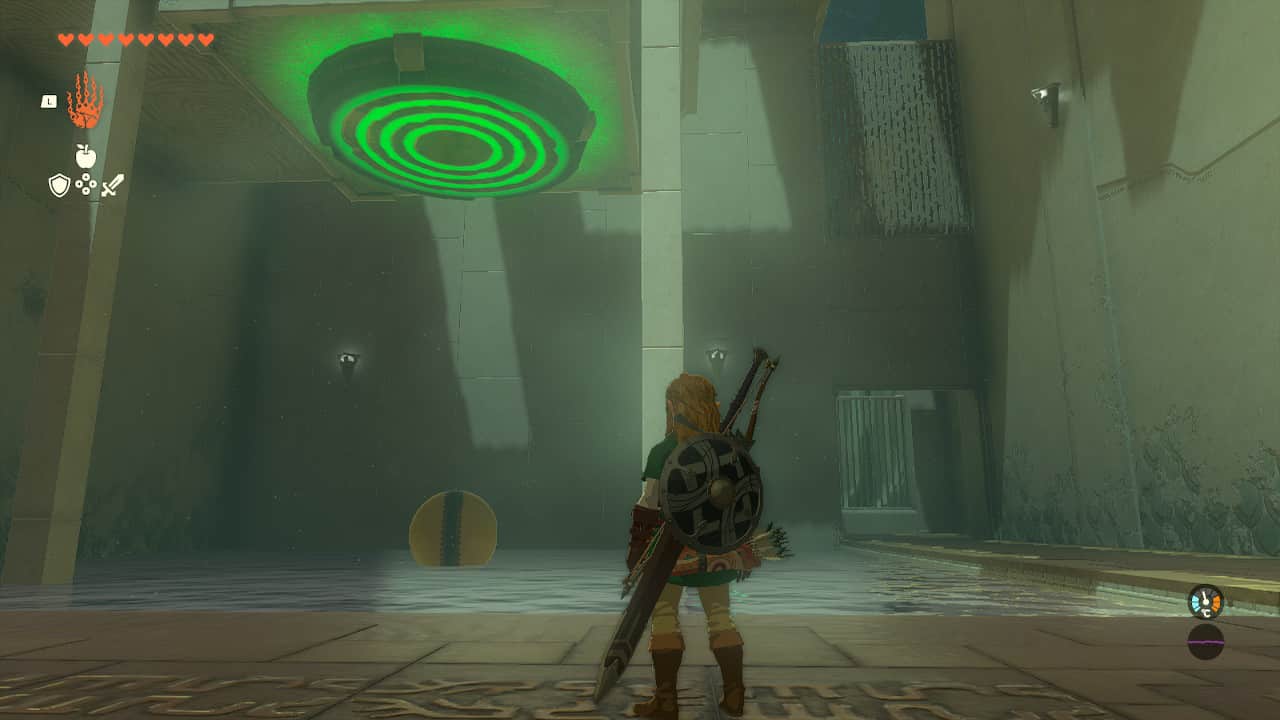
In the first room of the Shrine you’ll notice two things – a rubber ball in a body of water, and a target sign above it. You can’t get the height to lift the ball to the target, and bouncing the ball against the water doesn’t work either. You need to grab the ball and drag it as deep into the water as it’ll go with the Tears of the Kingdom Ultrahand ability, and then let go while it’s submerged. The ball will shoot upwards and smack into the target, opening the gate to the next room of the shrine.
Going forward, there’s a path that leads round with water surrounding it. You’ll want to bring the rubber ball with you. Before anything, use Ultrahand and you’ll see an optional treasure chest just under the water level. You can scoop it out if you want. Around the corner is a weak Construct enemy – take it out, and keep moving around the path. Once in the next room, you’ll find a near identical puzzle but with a stone slab floating in the water near a target on the ceiling. Grab the rubber ball and use the same method from above. It’ll again hit the target and open the next gate.
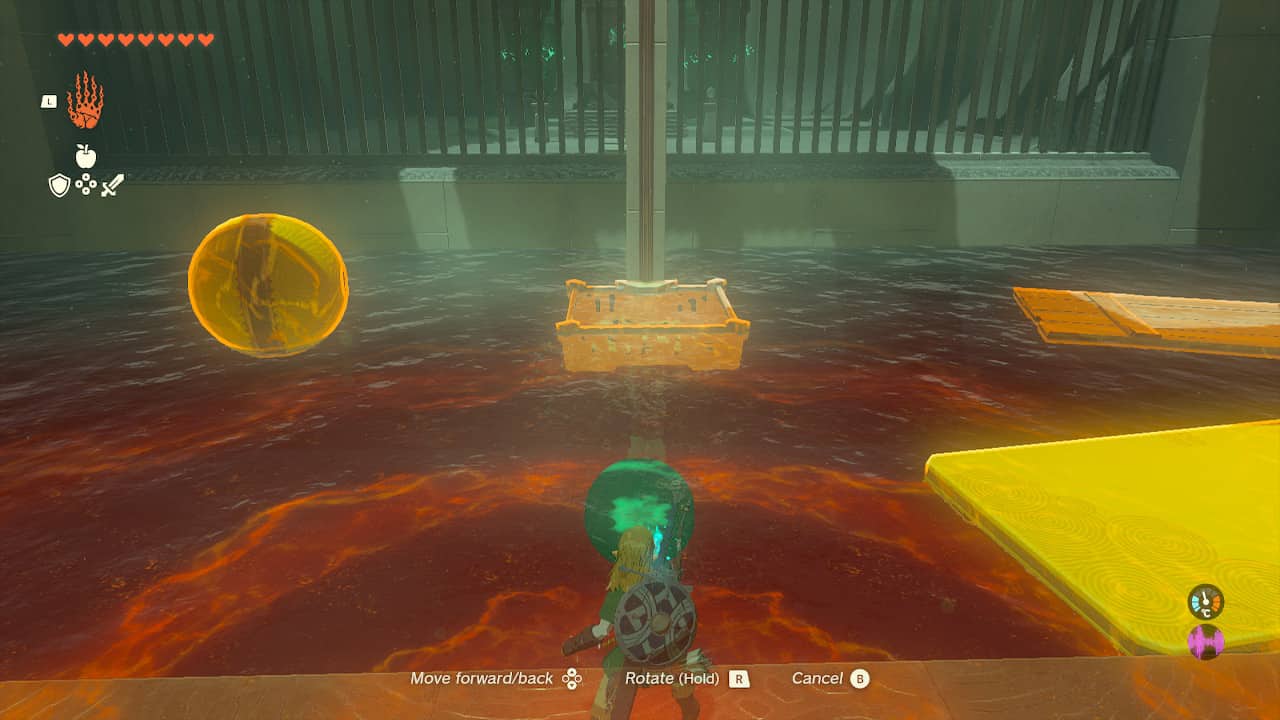
Going into the next room for the final puzzle and you’ll see another body of water with a rubber ball already in it, and a platform leading straight up with a wooden plank and a smaller metal platform on it. You probably know what to do here: grab a rubber ball, push it into the water, and let go so it flings into the plank and small platform. The plank should come off the platform with the small platform dropping into the water.
For this step, repeat the same method by pushing the rubber ball into the water so it springs upwards, but place the ball underneath the small platform. It’ll shoot upwards and come back down. Run over to the platform and cast Tears of the Kingdom Recall on it. This will send both the platform and Link into the air, and you to the end of the Shrine. Simply drop down, grab the Light of Blessing, and you’ve done it.
If you’ve increased Link’s heart count but you’re still not feeling strong enough, take a look at our Tears of the Kingdom best armor guide. We also have a guide for all of the Tears of the Kingdom Great Fairy locations so you can track down exactly where to get your equipment upgraded.
About the Author

The Legend of Zelda: Tears of the Kingdom
-
UnknownUnknown
- Platform(s): Nintendo Switch
- Genre(s): Action, Action Adventure, Adventure


