

Video Gamer is reader-supported. When you buy through links on our site, we may earn an affiliate commission. Prices subject to change. Learn more
Struggling to follow the distortions on the scanner in the Starfield Into the Unknown main quest? After you find Andreja, break free a few artifacts with your cutter, chat to Matteo and return to dock at The Eye, you’re tasked by Vladimir Sall on the space station with tracking down yet another artifact, this time on the planet Procyon III. Once there, you’re left with some pretty vague instructions to follow distortions on the scanner.
To save you roaming around aimlessly during this main story quest, much like we did during our playthrough, we’ll explain how to follow distortions on the scanner in the Starfield Into the Unknown quest. We also have the Starfield Lair of the Mantis puzzle solution if the underground base is causing you trouble, how to find the combination for the Almagest Jackpot, an Alternating Currents quest walkthrough, and an explainer on how to persuade Leah Casler in Starfield. And if you’re looking to build your own base with Starfield outposts, you’ll need to know how to get Starfield adaptive frames.
How to follow distortions on the scanner in Starfield
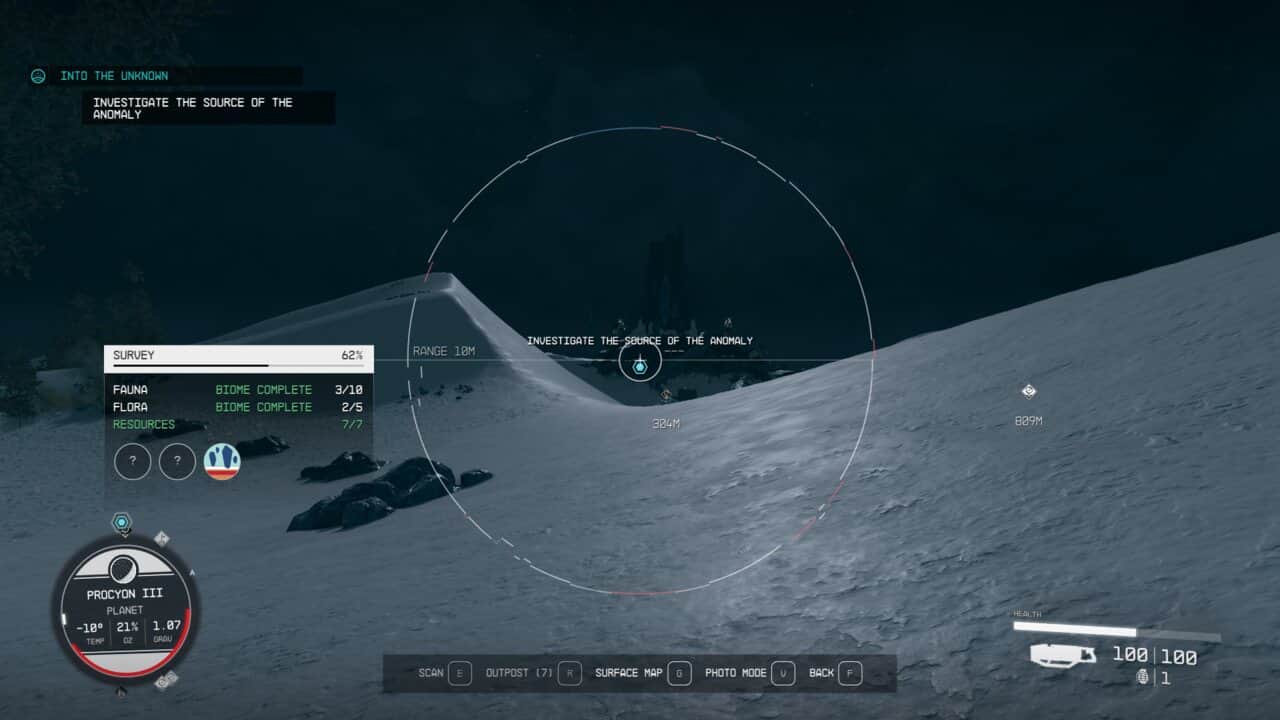
When you land at the scanner anomaly on Procyon III, fire up your scanner and spin it around the planet until you spot the perimeter of the scanner circle starts to quiver and distort. Press F on PC or the LB button on Xbox to open up your hand scanner. The line on your HUD will change colour as well, with portions alternating between red and blue. Pay close attention to this perimeter and head in that particular direction, pulling up the scanner every so often to make sure the distortions are still there. There are also audio clues as the crackles intensify when you’re on the right path.
Tom’s Tips
Before heading off, see how far left and right the distortion of the scanner goes. Aim roughly for the middle of that area and head in that direction.
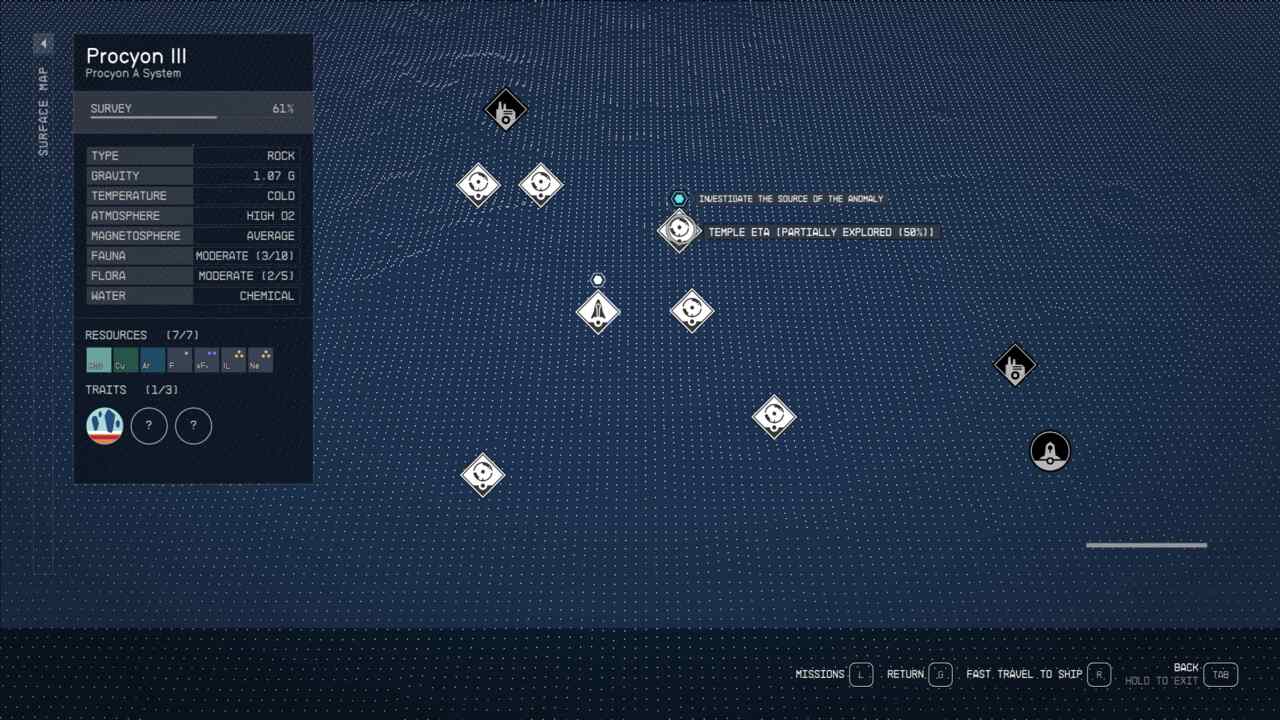
You can go to the Gravitational Anomalies that spawn at random locations around the landing site to start if you want, but you’ll want to head to the location on the surface map above. The Anomalies also involve quite a trek and there appear to be several bugs linked to the objective, which can typically be fixed by returning to orbit in your ship and then landing at the anomaly landing zone.
Once you reach a certain distance from the next objective, your quest marker will lock on and point you towards a particular location. Once you reach the spot on the map, you’ll uncover Temple Eta, an ancient structure and the source of the anomaly. The mission objective will switch to ‘investigate the source of the anomaly’ and you’ll get a new quest marker pointing to a door at the base of the temple.
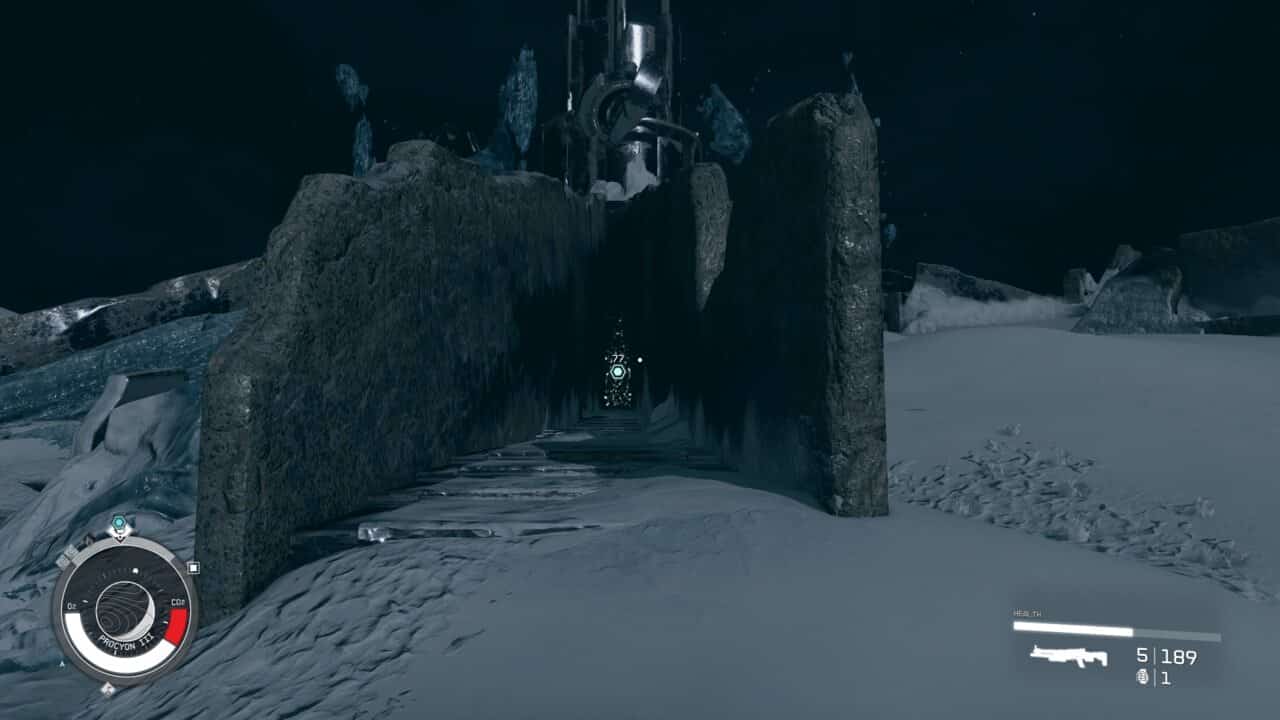
Head inside to a cave-like chamber with spinning rings at the centre and you’ll enter zero gravity. You’ll see small clusters of shimmering light pop up around the temple room. Fly up to them one after the other to intensify the movement of the metal rings, until they slow down and form a portal. Head through the entrance.
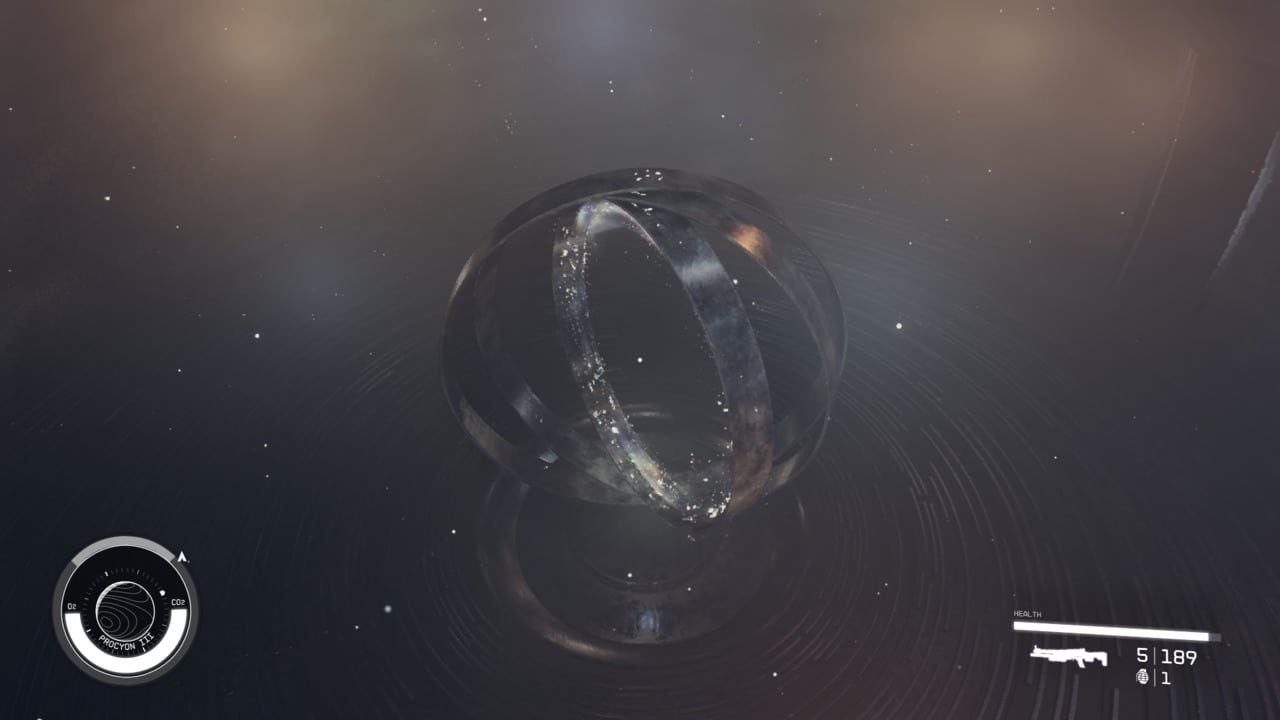
You’ll see a collecting of rings floating in the centre of a room. You, too, will begin to float, and you’ll see little sparkling balls of light hovering in the air. Fly directly into them, and each time you do, the rings in the room will react. You’ll have to do this around five times, and once you’ve hit enough balls of light, the rings will settle. Fly into the centre of the rings and watch the ensuing cutscene.
Spoiler warning for the end of the quest.
Once you’ve received your first power – the Anti-Gravity Field power – from the anomaly on Procyon III, head back to Jemison and The Lodge, where you’ll find all of the Constellation members awaiting your return. Make sure you’ve equipped your unique power in the powers menu, and use it in front of Vladimir and continue with the dialogue to complete the quest.
That covers how to follow distortions on the scanner in Starfield. Check out our Starfield companions and Starfield romance guides to get to know some of the game’s NPCs. If you’re looking for some better gear, our Starfield best spacesuits guide is for you, while our Starfield ship manufacturers and Starfield best reactors will help you build yourself a great ship. And if you need quest help, check out the Starfield Echoes of the Past cache and Starfield Delivering Devils quest guides too.
Starfield Into the Unknown FAQs
How do you follow distortions on the scanner in Starfield?
In the Into the Unknown quest, the edges of your scanner will distort when you’re point in the right direction. Walk towards the direction where these distortions happen.
How do you unlock powers in Starfield?
Powers are first unlocked during the Into the Unknown main mission.