You can trust VideoGamer. Our team of gaming experts spend hours testing and reviewing the latest games, to ensure you're reading the most comprehensive guide possible. Rest assured, all imagery and advice is unique and original. Check out how we test and review games here
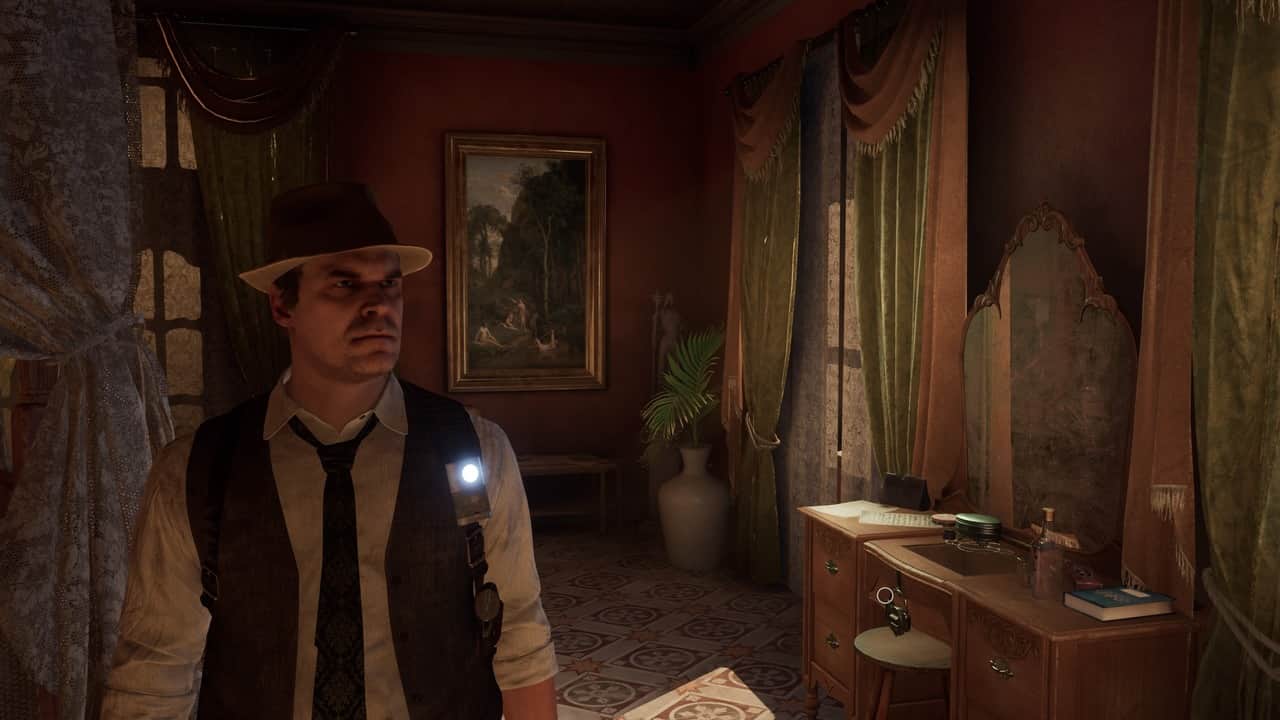
Looking for the Alone in the Dark Perosi’s Room puzzle solution? Chapter 2 takes you up to Perosi’s Room and to a desk shut tight by a padlock. Finding the right code and opening it takes a few steps and can get a little tricky.
We’ll walk you through how to solve the Alone in the Dark Perosi’s Room puzzle. For more help exploring Derceto, check out the full chapter list, our tips and tricks beginner’s guide, the Astronomical Clock puzzle solution, how to get the shotgun, and all the Broken Plate locations throughout the manor.
How to solve the Perosi’s Room lock puzzle
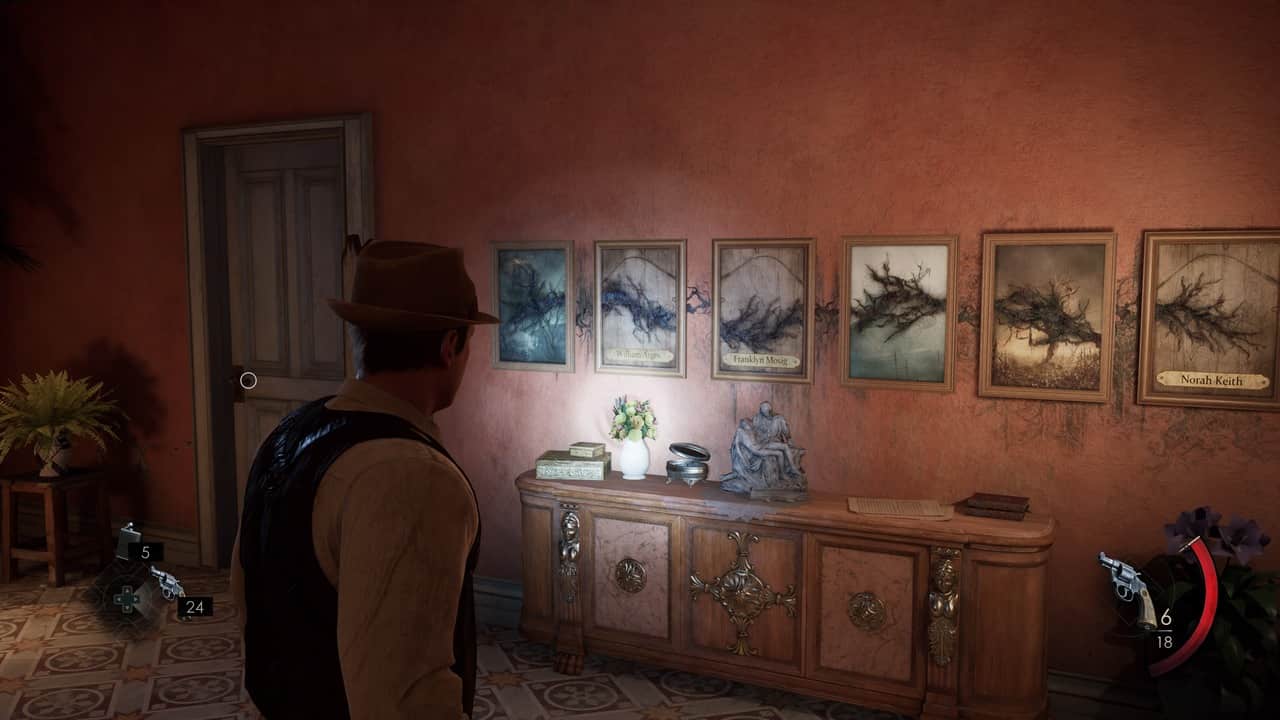
First, head to the row of six paintings on the wall behind the divider on your left when you enter Perosi’s Room. The goal here is to flip the painting so that the rot runs continues from the first to the last picture. Flip the second, third, and six paintings with the names William Arges, Franklyn Mosig, and Norah Keith on them, respectively.
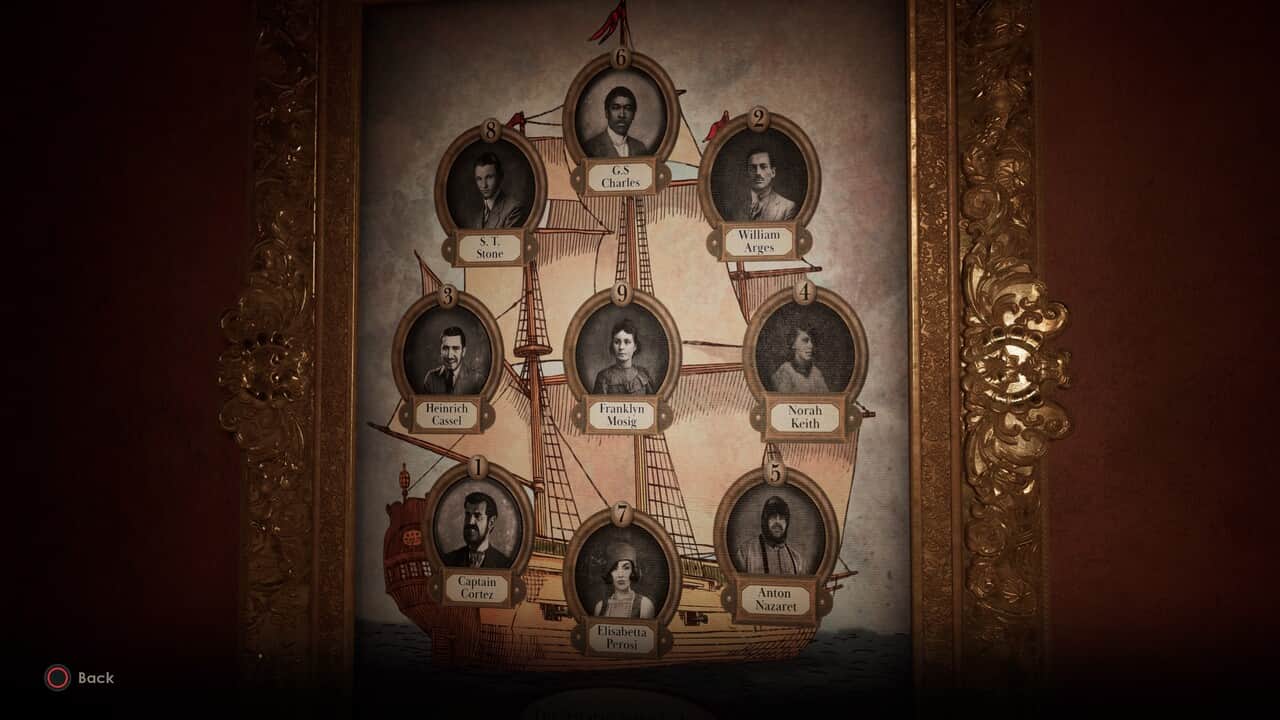
Next, head over to the painting of the ship surrounded by portraits with the golden trim. Interact with it and you’ll see numbers above each portrait. Take the names from the paintings you just turned over and note down the numbers. Here they are for ease:
- William Arges – 2
- Franklyn Mosig – 9
- Norah Keith – 4

Next, pick up Perosi’s Journal on the lounging chair behind the bed at the back of the room. Open it in your inventory and tap View to zoom in. You’ll see a set of zodiac signs arranged on a disc. Above some of them are numbers – 1 is Aquarius, 10 is Scorpio, and 11 Sagittarius. You can figure out the number associated with the other symbols by adding one for each one. It works out as below:
- Aquarius – 1
- Pisces – 2
- Aries – 3
- Taurus – 4
- Gemini – 5
- Cancer – 6
- Leo – 7
- Virgo – 8
- Libra – 9
- Scorpio – 10
- Sagittarius – 11
Use numbers obtained from the ship painting to find the corresponding zodiac sign:
- William Arges – 2 – Pisces
- Franklyn Mosig – 9 – Libra
- Norah Keith – 4 – Taurus

Go to the lock on the dresser and enter the symbols per the image just above – Pisces, Libra, and Taurus – to unlock it and get a Broken Plate.
That’s all there is to finding the Alone in the Dark Perosi’s Room puzzle solution. For more Alone in the Dark guides, check out the full cast list and voice actors, how to save, the Clerk’s Office safe code, our tips and tricks beginner’s guide, the Attic talisman puzzle solution, and all the Alone in the Dark Lagniappe locations scattered throughout Dercator and beyond.
About the Author

Alone in the Dark
-
UnknownUnknown
- Platform(s): PC, PlayStation 5, Xbox Series S, Xbox Series X
- Genre(s): Action, Horror


