

Video Gamer is reader-supported. When you buy through links on our site, we may earn an affiliate commission. Prices subject to change. Learn more
Looking for the Alone in the Dark Astronomical Clock puzzle solution? Standing as a centrepiece in the Gallery on the Second Floor, the Astronomical Clock poses a bit of a head-scratcher for sweaty sleuth Carnby. There’s some ground work involved, namely tracking down two Broken Pieces to actually have a go at cracking the clock, then a two stage puzzle to get through.
We’ll walk you through how to find the Alone in the Dark Astronomical Clock puzzle solution. You’ll need both Broken Plates for this one, so check out how to get the first one by solving the Perosi’s Room zodiac sign puzzle.
How to solve the Astronomical Clock Broken Piece puzzle
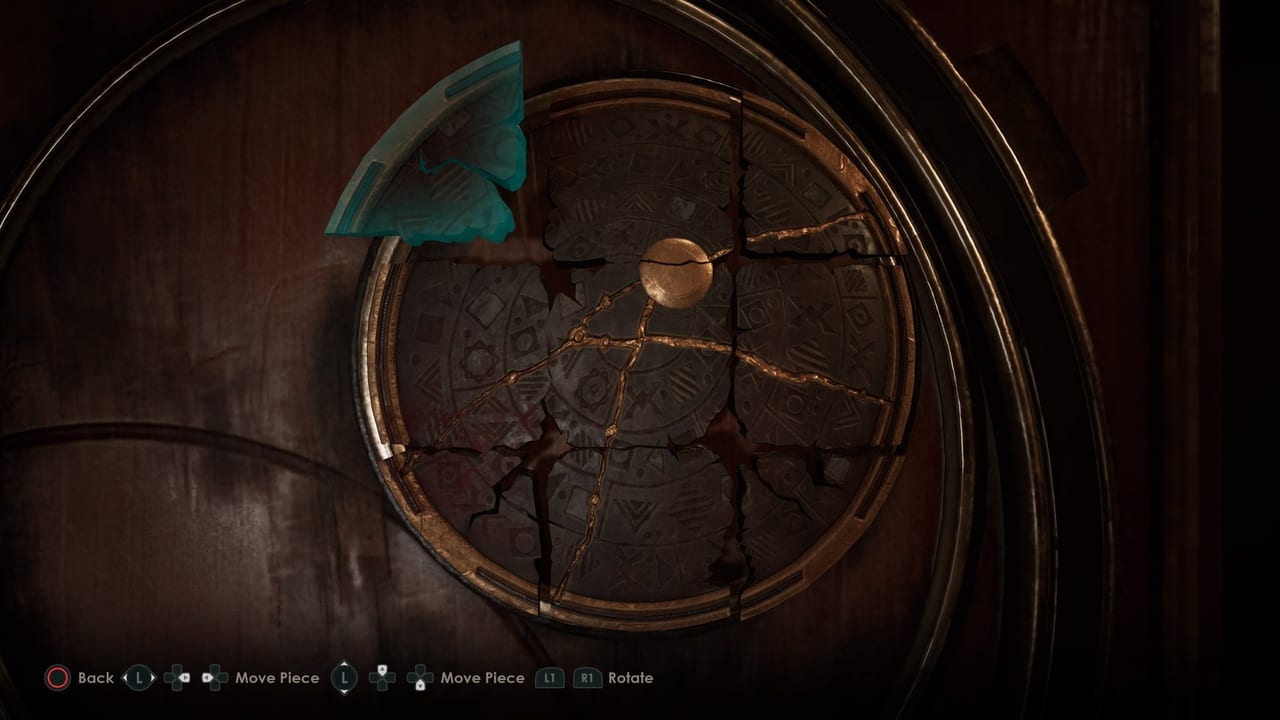
To solve the Astronomical Clock Broken Piece puzzle, place down the two Broken pieces obtained from the Kitchen Garden and Perosi’s Room to complete the image. Check the image above for the exact position of each piece, but the general idea is to ensure the continuity of the golden streak in all pieces. If you’re after the pieces, check out all the Alone in the Dark Broken Piece locations.
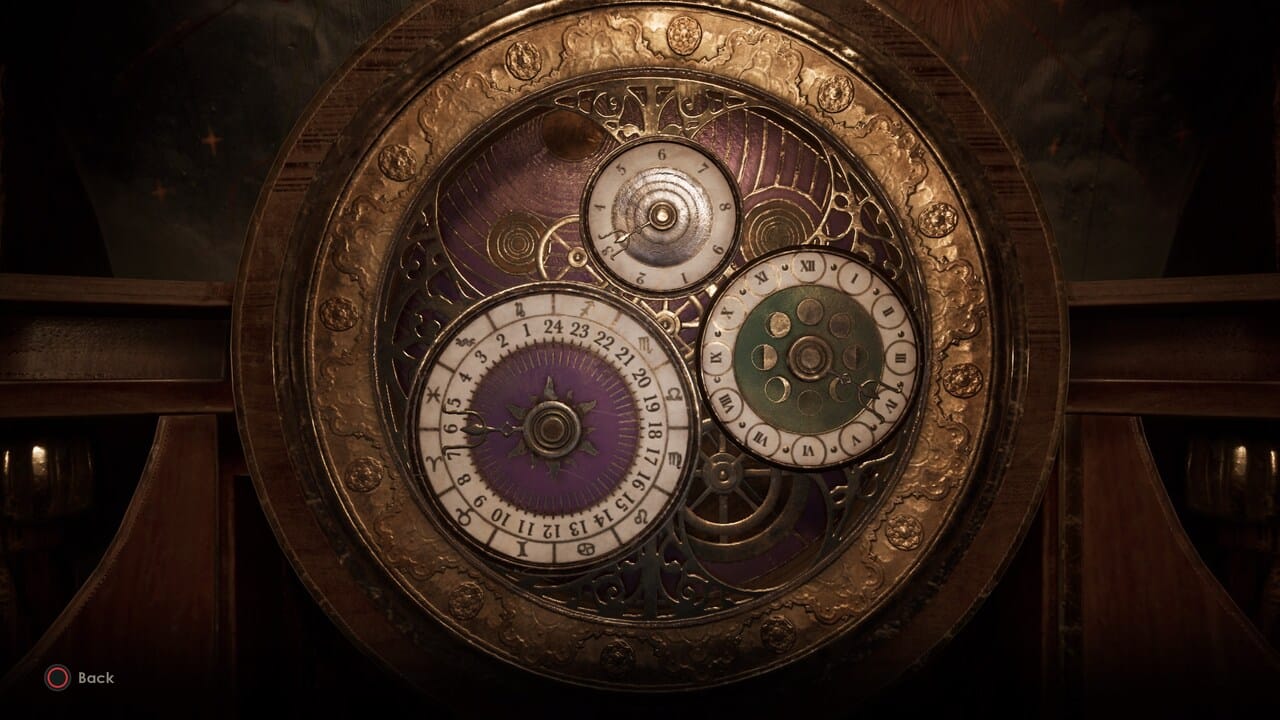
After solving the piece puzzle, interact with the clock above. The solution is similar to the first talisman puzzle in Miss Jackson’s seance parlor in the French Quarter in Chapter 1. You’ll see three discs of different sizes. The dial on each one is tuned to a specific number, as follows:
- Small disc – 3
- Medium disc – 4 (IV in Roman numerals)
- Large disc – 6

Jump back to the talisman and adjust the three discs so that the numbers listed on the right match up with these on the clock – 346. Check the image above for the correct arrangement. Solving the puzzle then points you to Jeremy Hartwood’s Room for you to continue your investigation.
That’s all there is to solving the Alone in the Dark Astronomical Clock puzzle. For more Alone in the Dark guides, check out the full chapter list, how to save, our tips and tricks guide, the Clerk’s Office safe code, and all the Lagniappe locations to complete all 15 sets.