
You can trust VideoGamer. Our team of gaming experts spend hours testing and reviewing the latest games, to ensure you're reading the most comprehensive guide possible. Rest assured, all imagery and advice is unique and original. Check out how we test and review games here
Looking for the Alone in the Dark Cassandra’s Room lock puzzle solution? After a brief chat with Ruth, Detective Carnby is left to figure out yet another puzzle involving a locked desk and zodiac symbols to further his investigation. This one involves medicine bottles and a bit of running around Derceto.
We’ll walk you through how to find the Alone in the Dark Cassandra’s Room lock puzzle solution. For more Alone in the Dark help, check out all the Lagniappe locations, the full chapter list, our tips and tricks beginner’s guide, and how to get the shotgun.
How to solve the Alone in the Dark Cassandra’s Room lock puzzle
To solve Cassandra’s room puzzle in Alone in the Dark, you’ll need to find the right zodiac signs to enter into the padlock. The correct sequence of signs is hidden behind a puzzle involving a tray and medicine bottles at the back of the room. Your first task is to find the two missing bottles.
Pick up the bottle of Margrave Liniment on the table with the typewriter in the middle of Cassandra’s Room. Next, go to the Mezzanine via the Servant’s Stairs on the Second Floor. You can open the door using the Palette Knife.

Head to the Stairwell by taking the right path around the Mezzanine. Go down the Stairwell into the Grand Parlor. Grab the Medicine Box Key from the top of the broken piano at the centre of the room. Head down to the first floor, then into Lottie’s Room and use the key to unlock the Medicine box and grab the bottle of Dr. Jenkins Lozenges.
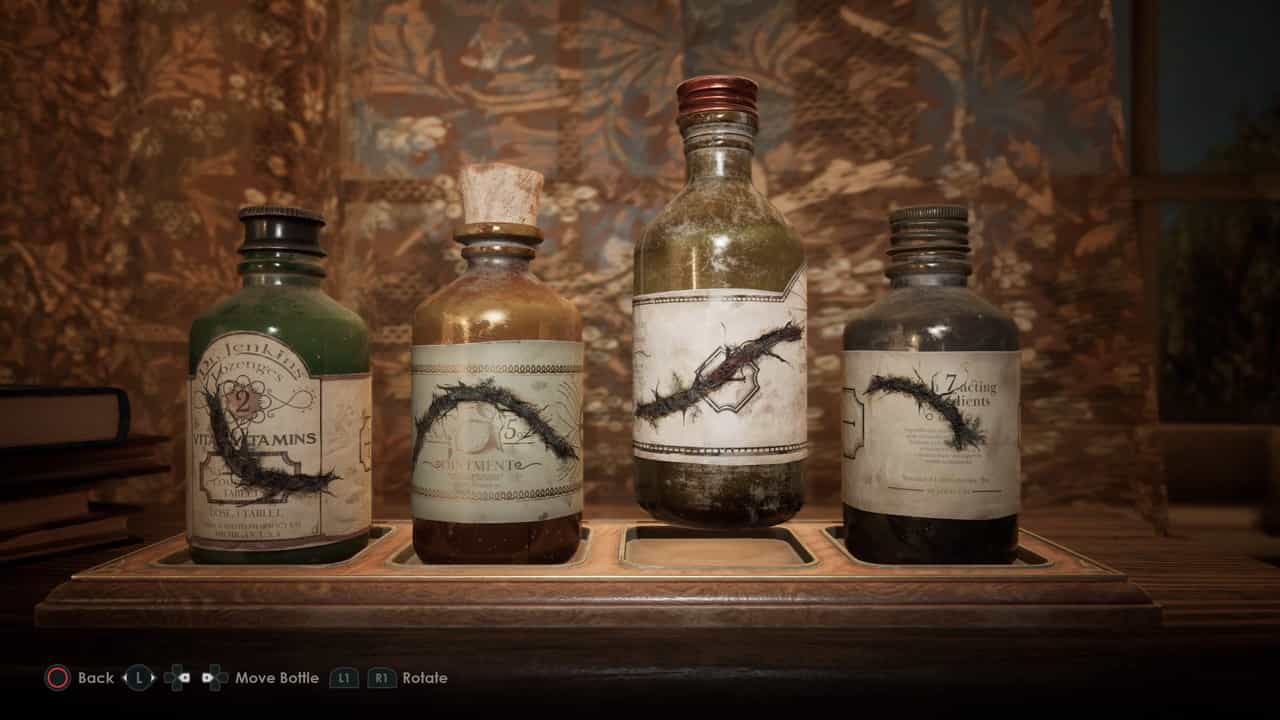
Return to Cassandra’s Room on the Second Floor and interact with the bottle tray at the back of the room. The goal here is to make the trail of rot run through all four bottles. Place the Dr. Jenkins Lozenges in the first left-hand slot, the Ointment in the second, the Jackson’s Universal Remedy in the third, and the Margrave Liniment in the last spot. Rotate them so that the rot is facing towards you.
Note that three of the bottles have numbers. For easier reading, here’s the correct order starting from the left and the numbers for each bottle:
- Dr. Jenkins Lozenges – 2
- Ointment – 5
- Jackson’s Universal Remedy
- Margrave Liniment – 7
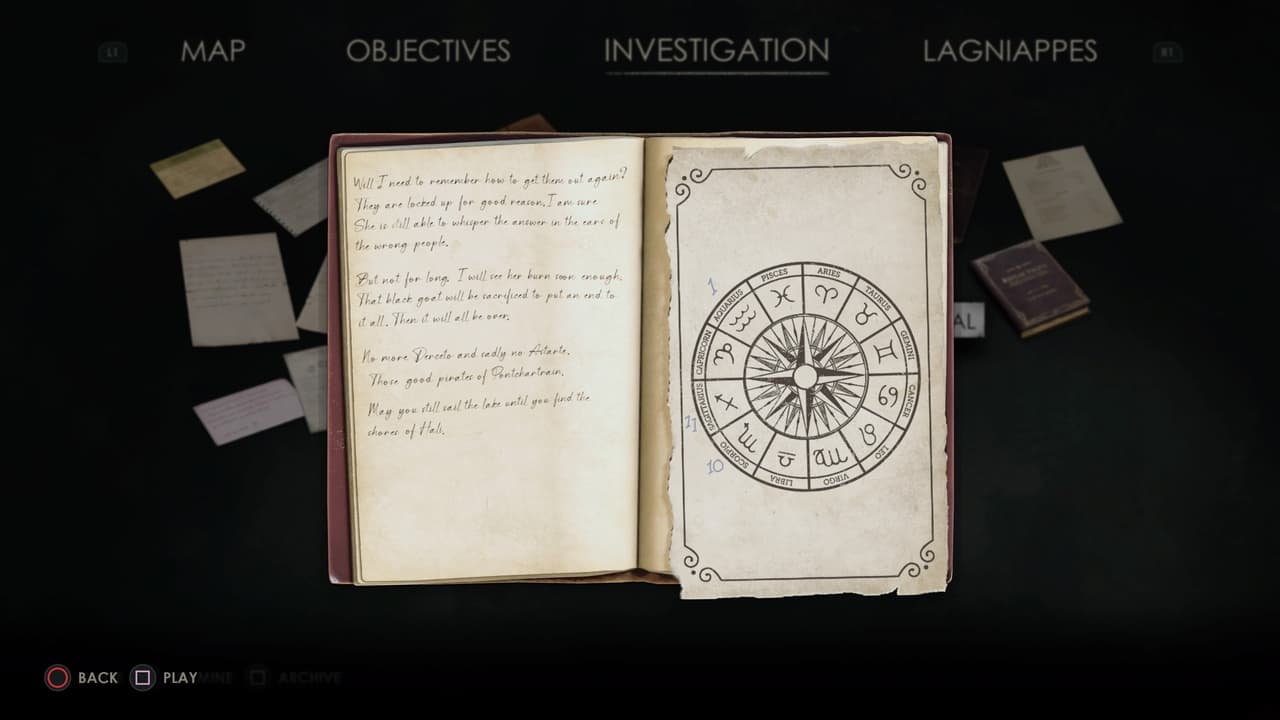
Pull up Perosi’s Journal in your inventory and consult the zodiac disc to see what sign each number is referring to. You should get:
- Pisces
- Gemini
- Leo
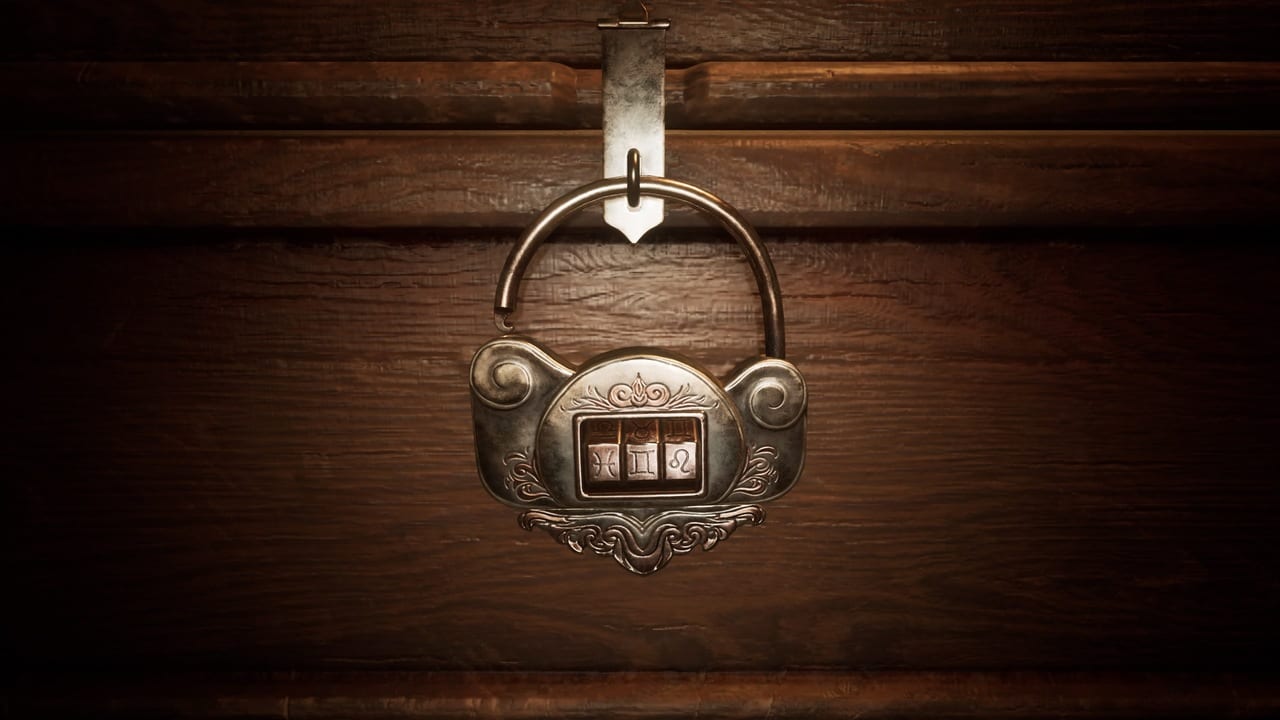
Head over to the padlock and enter the symbols in that order to unlock the desk. Check the image above for how the symbols should line up on the lock. Inside, you’ll find a Broken Plate, used in the Boiler Room decorative plate puzzle.
That’s all there is to solving the Alone in the Dark Cassandra’s Room puzzle. For more guides, check out how to solve the Astronomical Clock puzzle, the Pregtz Warehouse safe code, and the Alone in the Dark Perosi’s Room puzzle solution if you haven’t done so already.
About the Author

Alone in the Dark
- Platform(s): PC, PlayStation 5, Xbox Series S, Xbox Series X
- Genre(s): Action, Horror