You can trust VideoGamer. Our team of gaming experts spend hours testing and reviewing the latest games, to ensure you're reading the most comprehensive guide possible. Rest assured, all imagery and advice is unique and original. Check out how we test and review games here
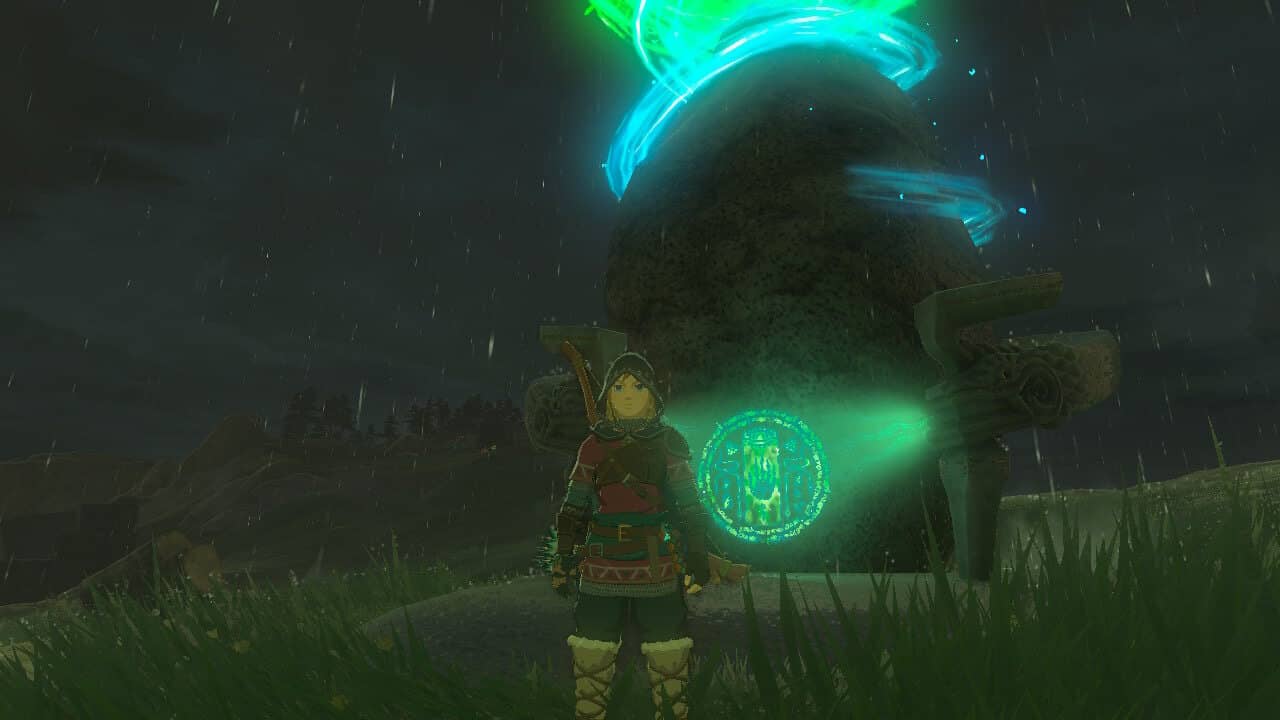
Struggling to solve the Tears of the Kingdom Runakit Shrine? ‘Built to Carry’ as it’s called in-game, the Runakit Shrine throws several puzzles your way to test your problem-solving skills. The main aim of this The Legend of Zelda TotK Shrine is to transport a large ball around a network tracks connecting several platforms of different heights.
We’ll explain how to solve the Tears of the Kingdom Runakit Shrine, how to get the treasure chest, and snag that precious Light of Blessing. If you’re after more shrines to boost your health and stamina, we’ve got all the Tears of the Kingdom Shrine locations. Otherwise, get the lowdown on all the Tears of the Kingdom Skyview Tower locations so you can fast travel between them much quicker.
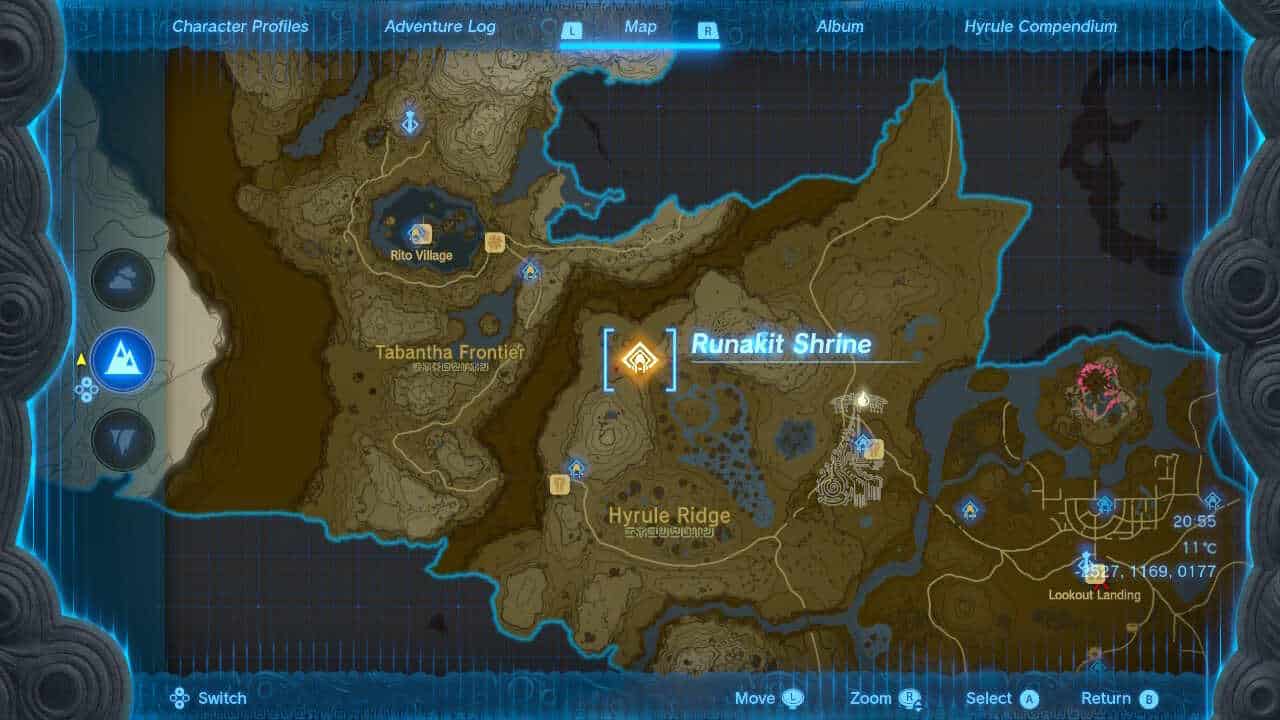
Tears of the Kingdom Runakit Shrine location
The Tears of the Kingdom Runakit Shrine is located west of the Lindor’s Brow Skyview Tower, northeast of Tabantha Bridge Stable in Hyrule Ridge region, Central Hyrule, at the coordinates -2526, 1169, 0177. It’s sandwiched between Upland Lindor to the north, Ludfo’s Bog to the southeast, and Mount Rhoam to the south.
Tears of the Kingdom Runakit Shrine puzzle solution
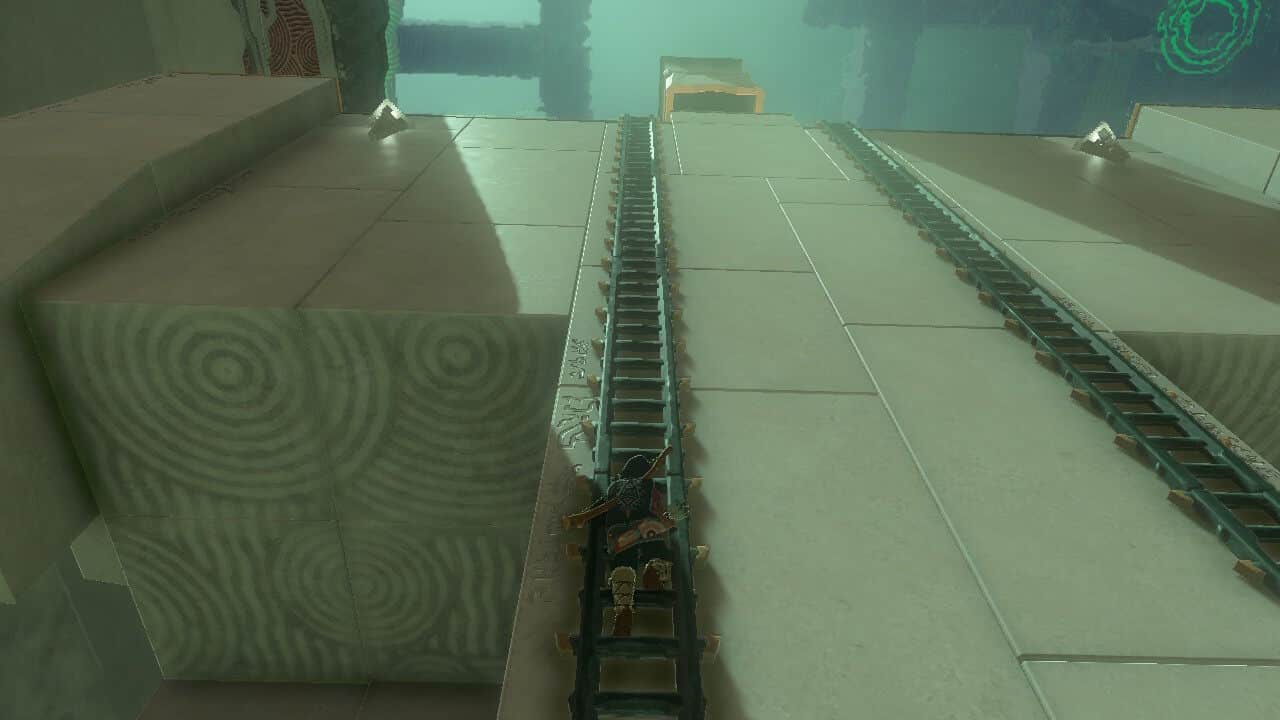
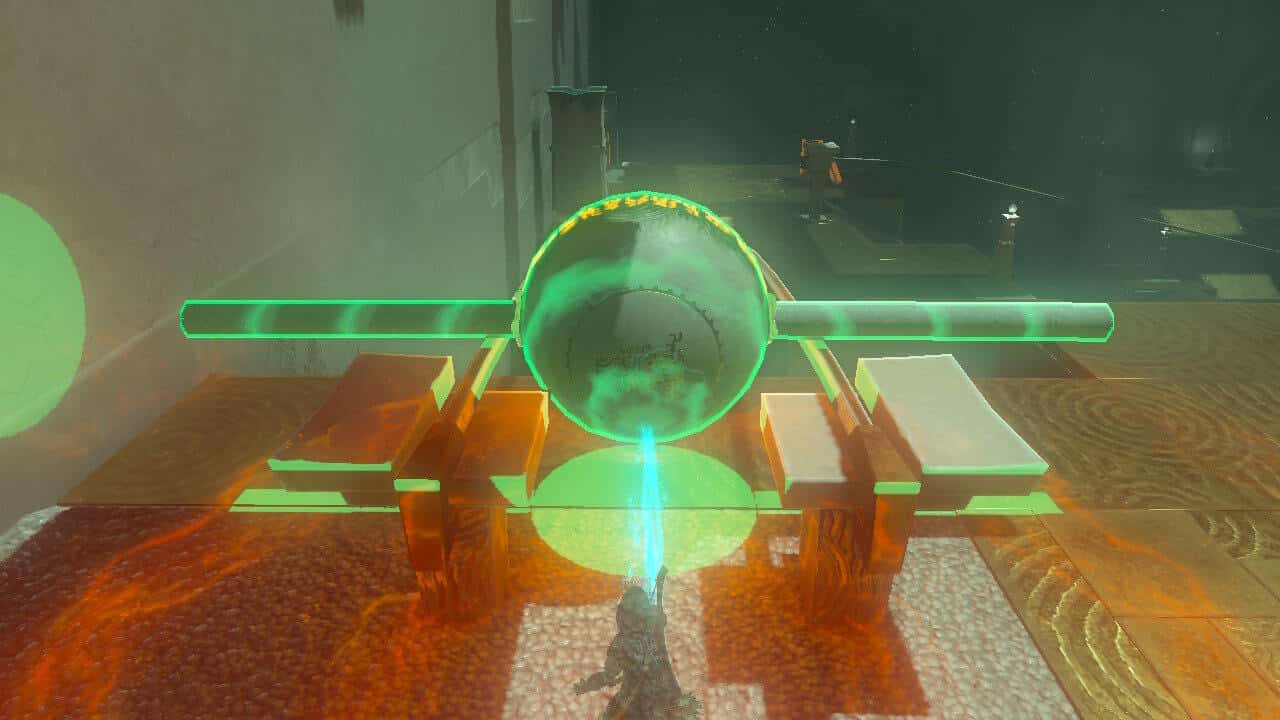
As you enter the Tears of the Kingdom Runakit Shrine, note the large ball on the elevated platform ahead of you. To start, glide over to the ladders leading up to the ball. Use the Ultrahand ability to grab the ball and place it on the tracks. Let go and the ball will roll down to the middle platform.
Glide over to the lower platform. Though there’s another set of tracks leading to yet another even lower platform, they are too far apart and the ball will drop off. Use Utrahand to stick the logs lying around to the ball. There are several options here: you can create one long log and attach it below the ball, or alternatively, place two on each side of the ball. Use Ultrahand to pop the ball with the logs attached onto the tracks, rolling it down to the next platform.
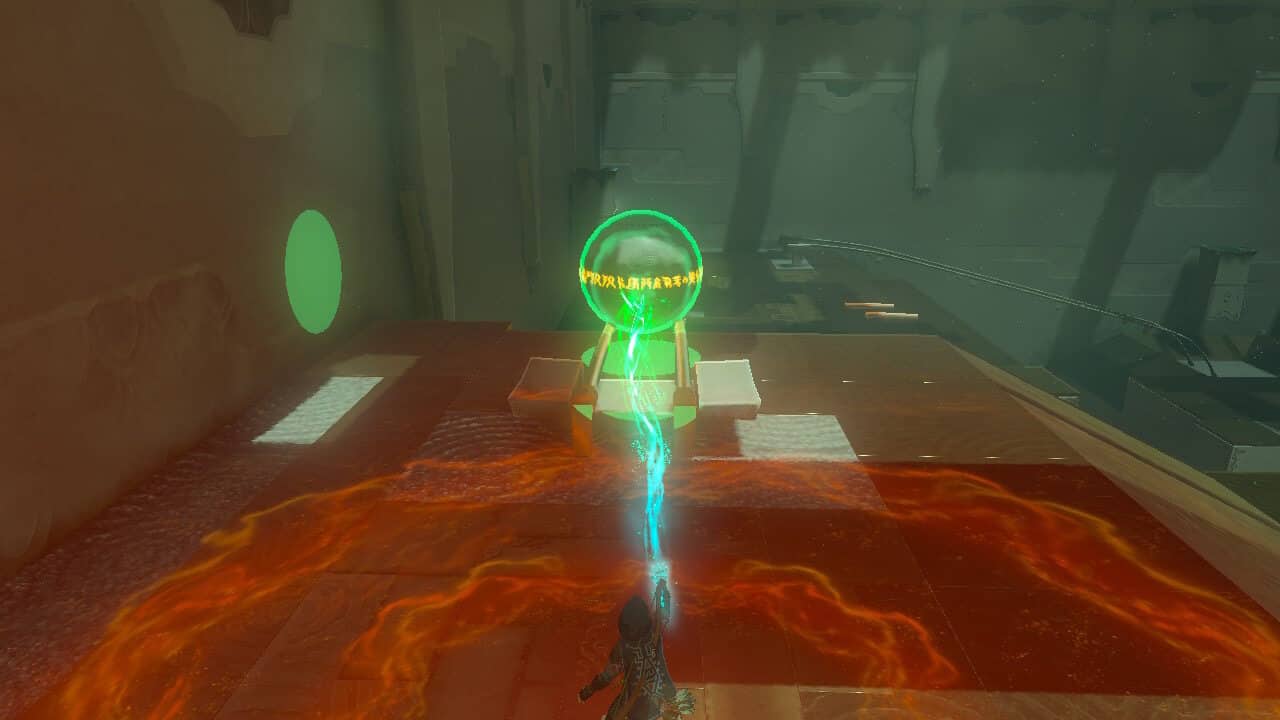
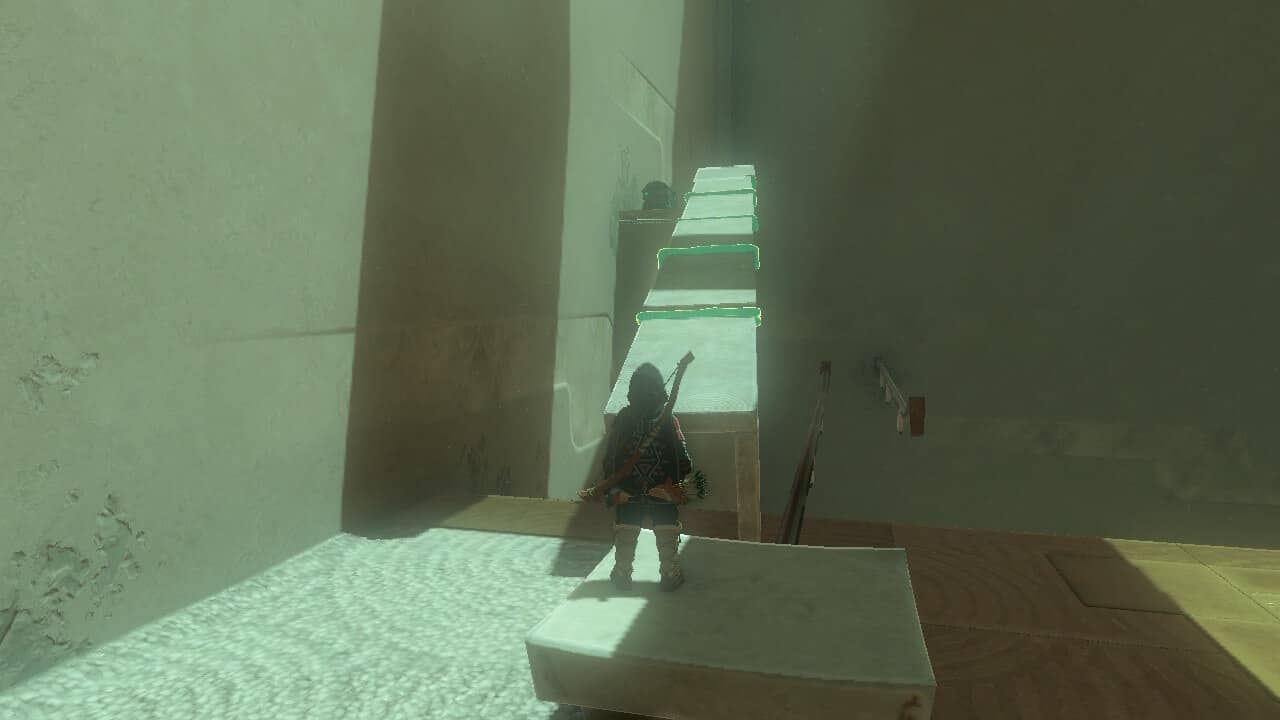
Follow the ball by gliding over to the next platform. Ahead of you is another small platform with a chest. To reach it use Ultrahand to combine the stone slabs scattered around into a long ramp. Place the ramp between the chest and the platform to create a bridge. Climb across to reach the chest and snag a Construct Bow.
From here, you have to get the ball down to the final platform, however, there’s only a single rail. There are many ways to do this, including building a makeshift bucket with an arm that sits on the track. But the easiest option is to attach two logs together at an angle to make a V-shape, then attach the ball to the end of one of the logs. Place it on the rail and it will slide down.

Glide down, then use Ultrahand to detach the ball from the contraption then carry it over the sunken bowl. Doing so opens the gate and allows you to complete the Tears of the Kingdom Runakit Shrine. That covers the Tears of the Kingdom Runakit Shrine solution. Check out our Tears of the Kingdom Sahirow Shrine and Tears of the Kingdom Riogok Shrine guides.
About the Author

The Legend of Zelda: Tears of the Kingdom
-
UnknownUnknown
- Platform(s): Nintendo Switch
- Genre(s): Action, Action Adventure, Adventure