You can trust VideoGamer. Our team of gaming experts spend hours testing and reviewing the latest games, to ensure you're reading the most comprehensive guide possible. Rest assured, all imagery and advice is unique and original. Check out how we test and review games here
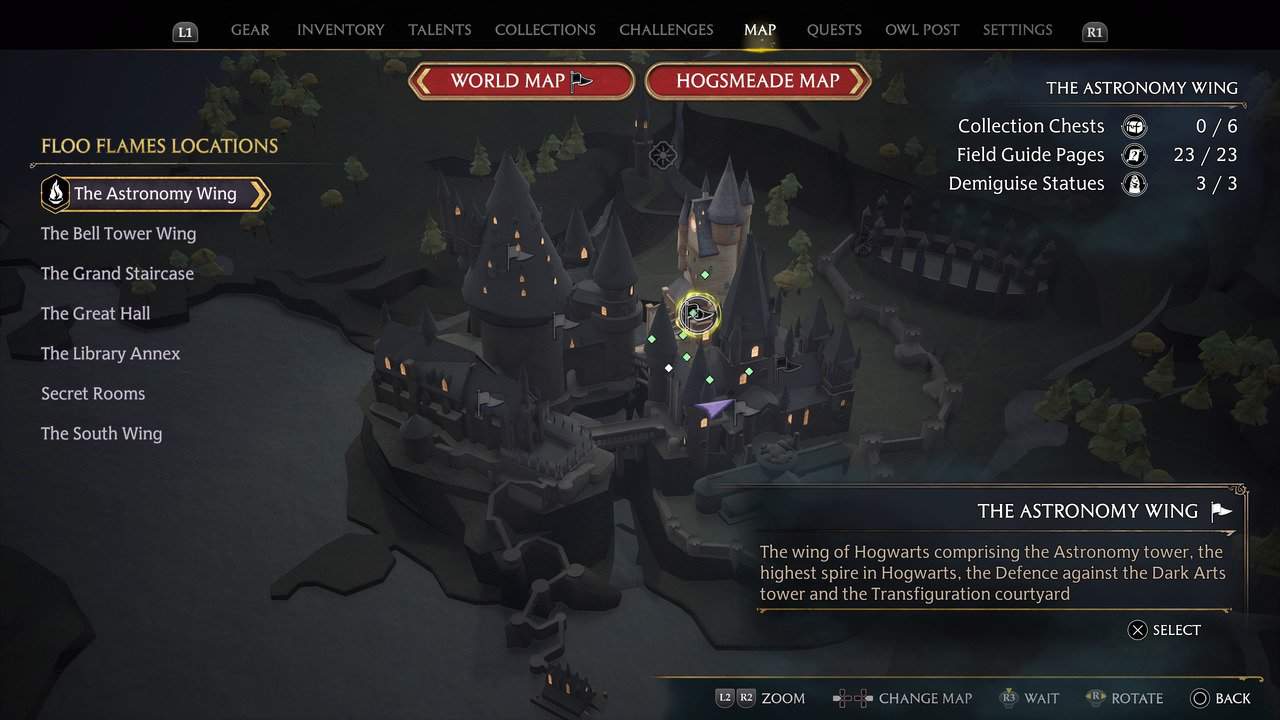
If your gunning for 100% completion, then you’ll spend quite a bit of time exploring Hogwarts for Field Guide Pages. The Astronomy Wing has 23 Field Guide Pages to find, hidden down dark corridors, in secret rooms, and even in the dungeons below. In this guide, we’ll share the location of all Field Guide Pages in The Astronomy Tower in Hogwarts Legacy.
You’ll need several spells to get all 23 Field Guide Pages in The Astronomy Wing – Revelio, Accio, Levioso, and Lumos. If you don’t have these yet, we recommend taking on more story missions before attempting to find all the pages. If you want more information on how to unlock each of these spells, our dedicated guide covers it.
To try and make finding the Field Guide Pages in The Astronomy Wing as easy as possible, we’ll note the closest Floo Flame to each and guide you from there.
READ MORE: Hogwarts Legacy – The Library Annex Field Guide Pages Locations
The Astronomy Wing Field Guide Pages Location in Hogwarts Legacy
Augurey Skeleton – 1/23

Fast travel to the Defence Against the Dark Arts Classroom. Take a right then a left, looking for a glass case with a skeleton of a bird inside. Cast Revelio in front of the case to reveal the Field Guide Page.
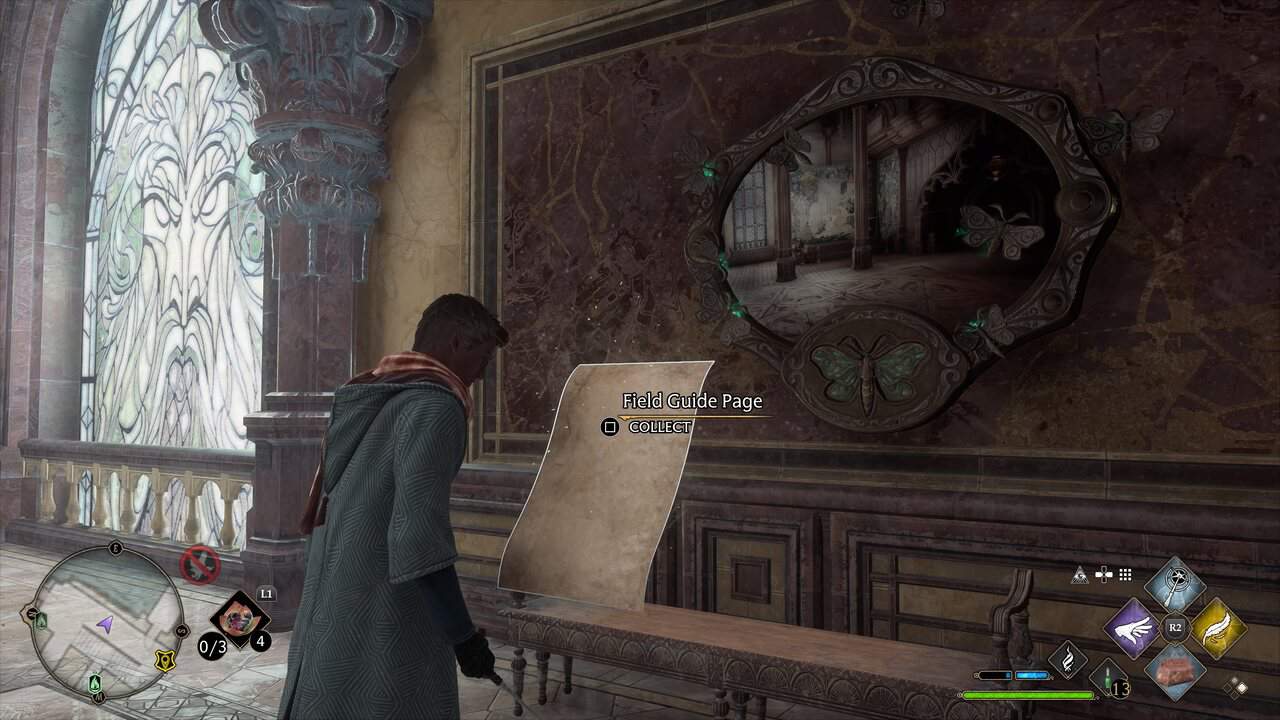
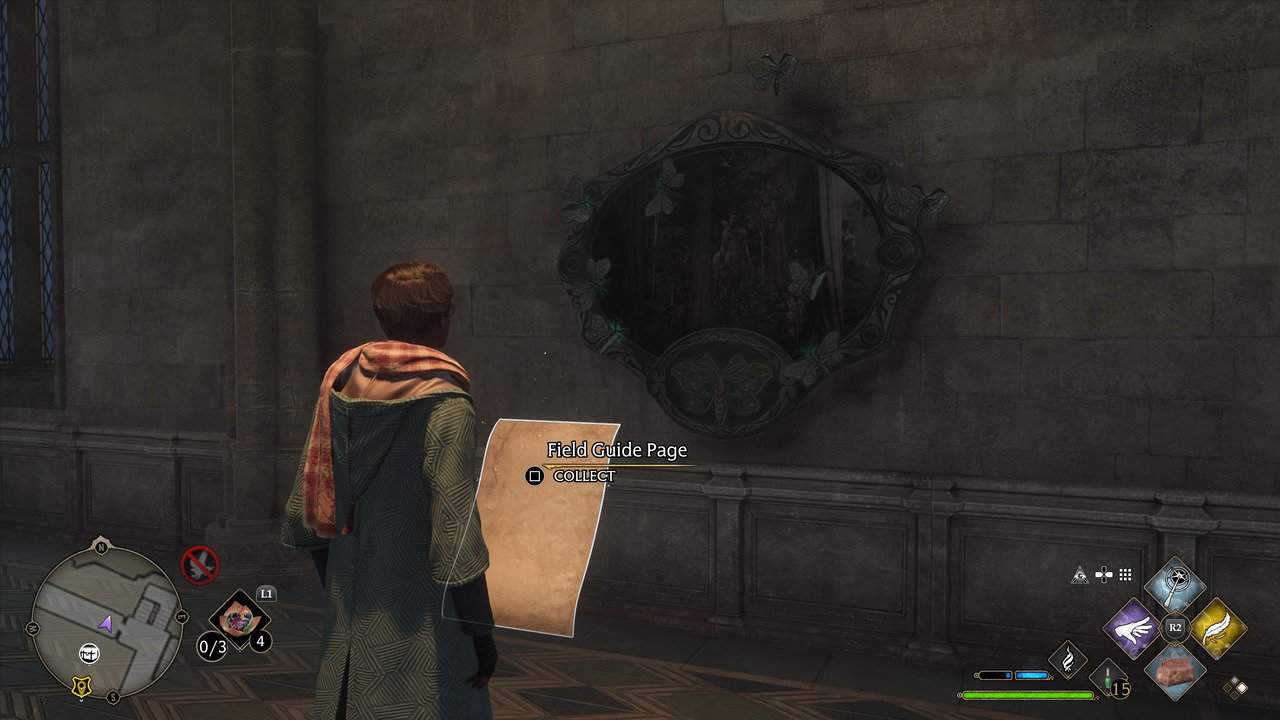
Moth Mirror Astronomy Tower 2/23
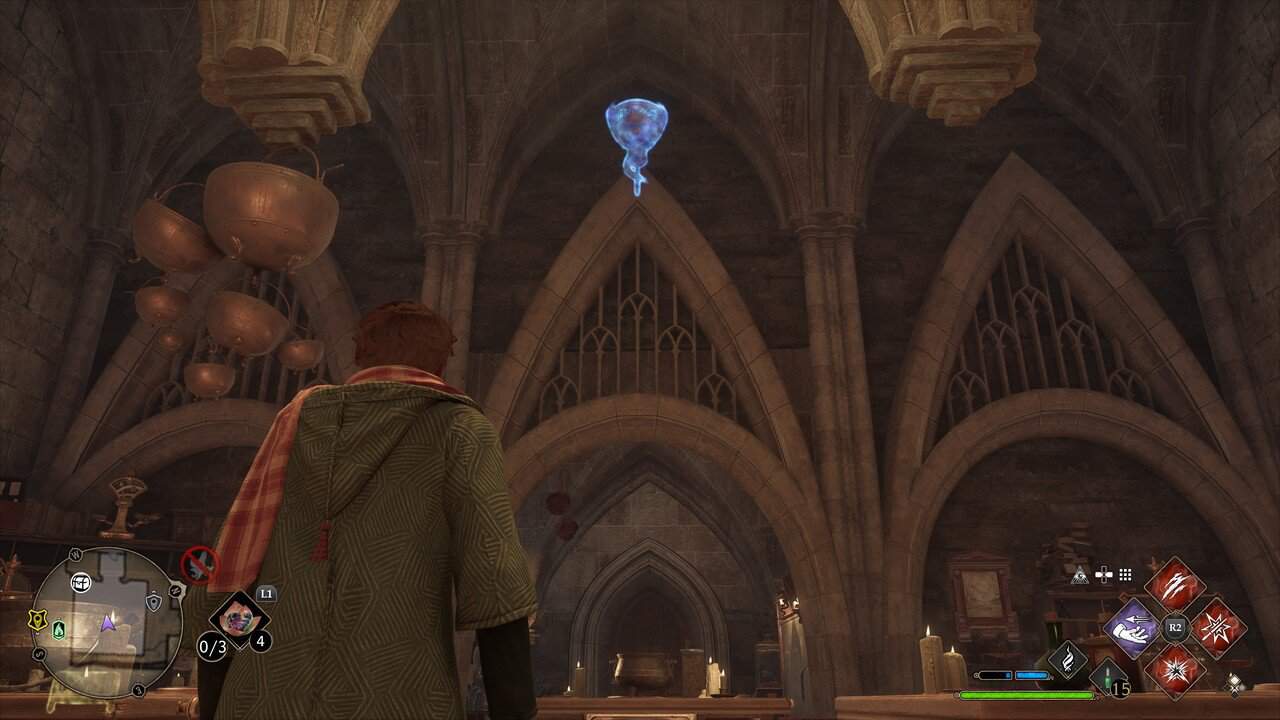
Fast travel to the Astronomy Tower Floo Flame. Take a right up the wooden stairs, then up another set of stairs. At the top, go through the doorway and turn left to find a moth mirror. The moth is at the top of the tower. Take the stairs just behind you and once at the top, head to the blackboard and cast Lumio to grab the moth sitting above. Return to the mirror and release the moth to get the Field Guide Page.
Unclassified Page 3/23
Fast travel to the Astronomy Tower Floo Flame. Turn right and take several flights of stairs to the top of the Tower. Once at the top, head down the short flight of stairs going down on the right. Here you’ll find a dragon bowl. Cast Confringo to reveal the Field Guide Page.
Astronomy Telescope 4/23
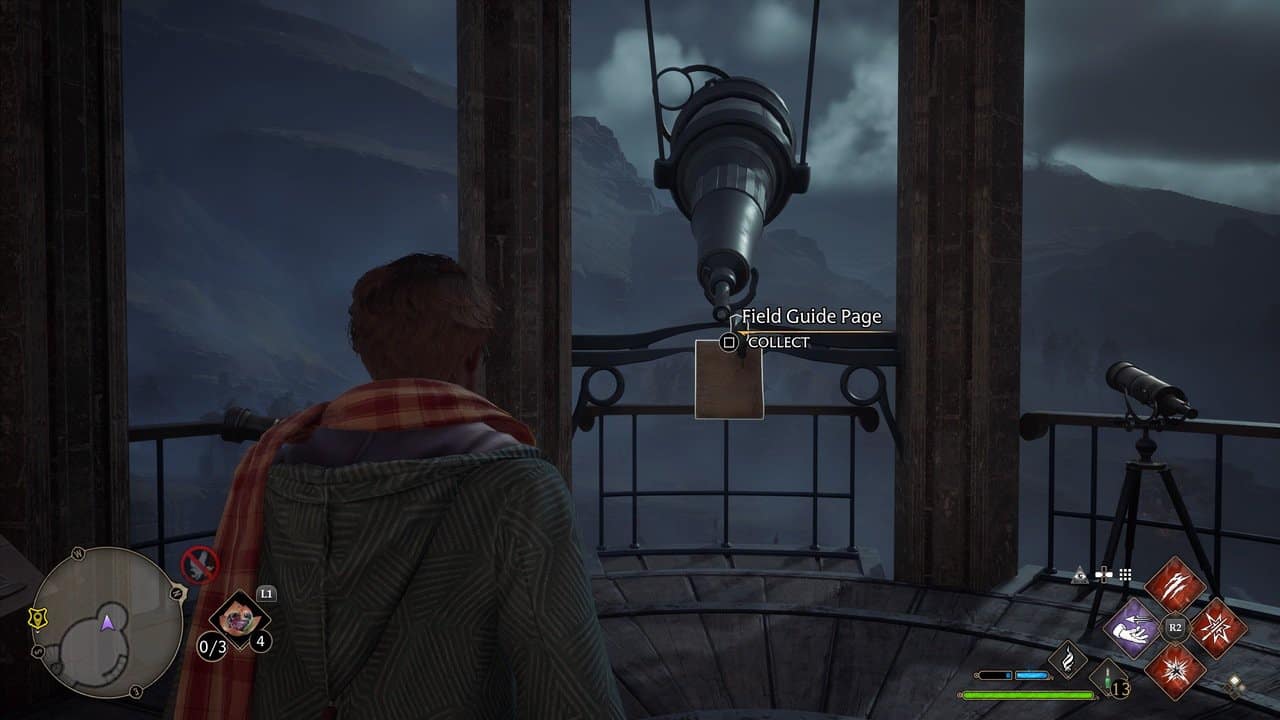
Fast travel to the Astronomy Tower Floo Flame. Turn right and take several flights of stairs to the top of the Tower. On the observation deck at the top, approach the telescope looking out over the Quidditch arena and cast Revelio to reveal the Field Guide Page.
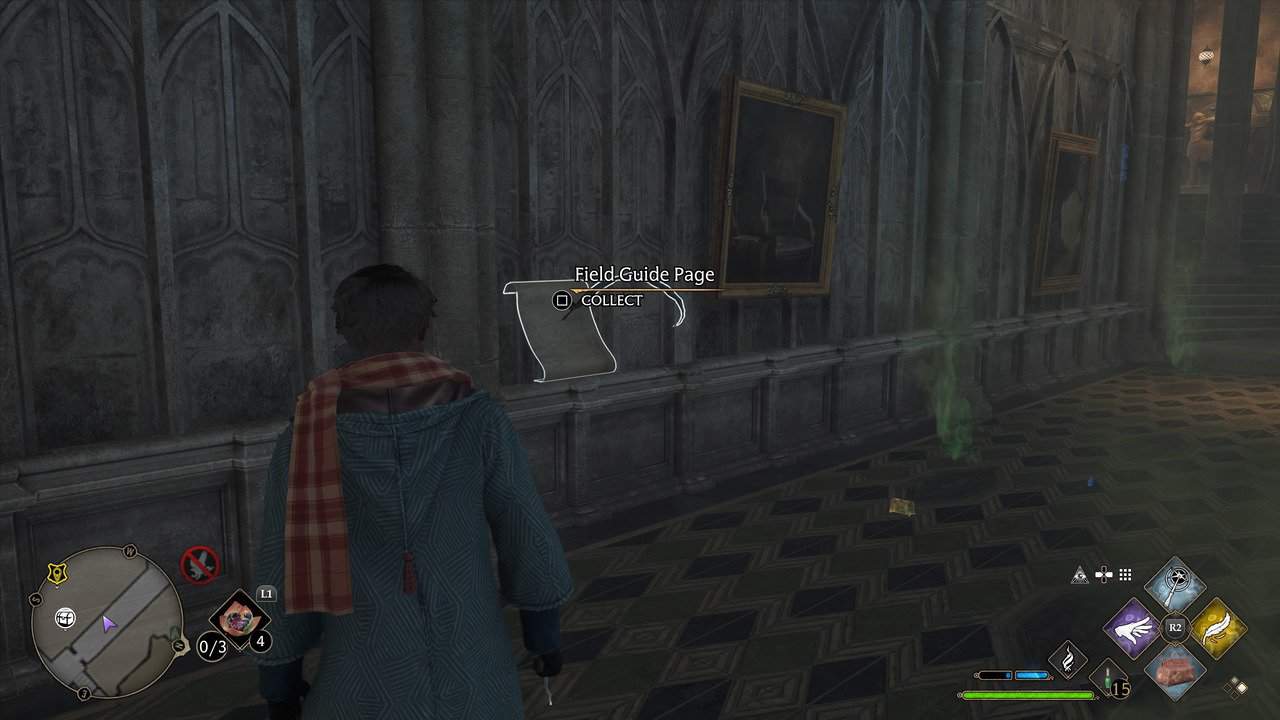
Tapestry of Barnabas the Barmy 5/23
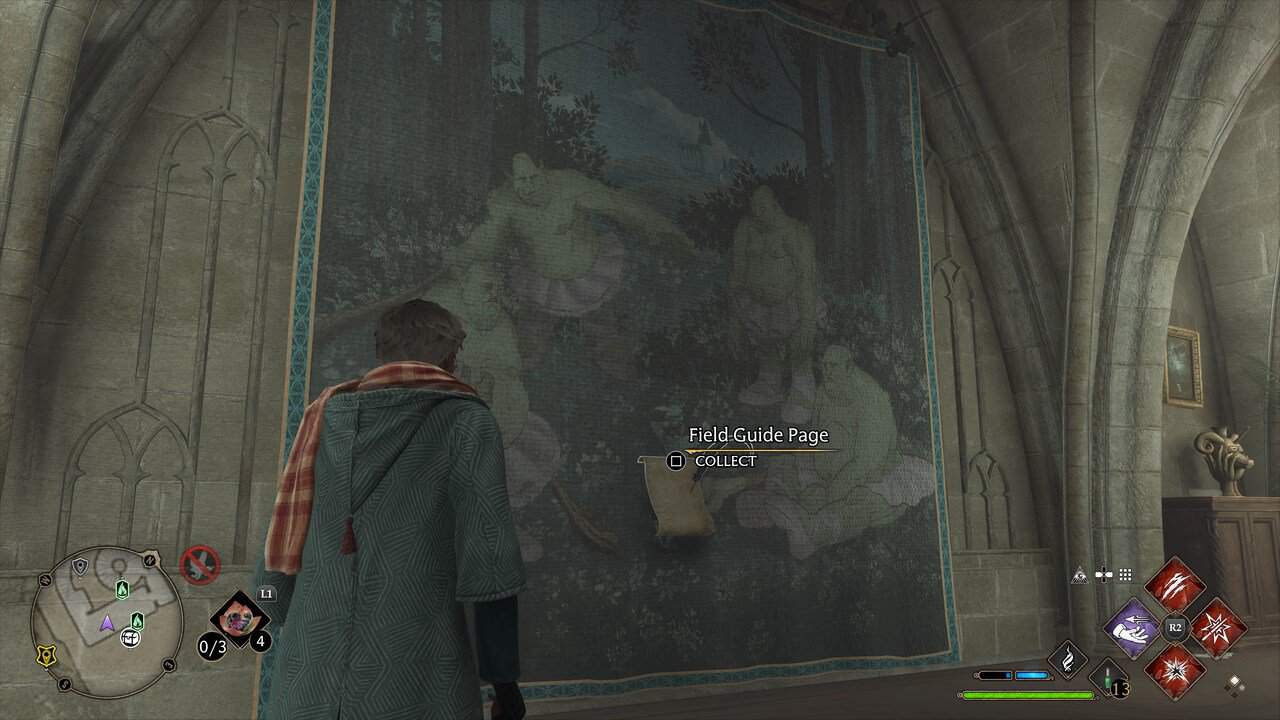
Fast travel to the Astronomy Tower Floo Flame. Take the on your left down. Turn left at the bottom. Cast Revelio on the tapestry of four ogres in ballet gear on your left, opposite the entrance to the Room of Requirement, to reveal the Field Guide Page.
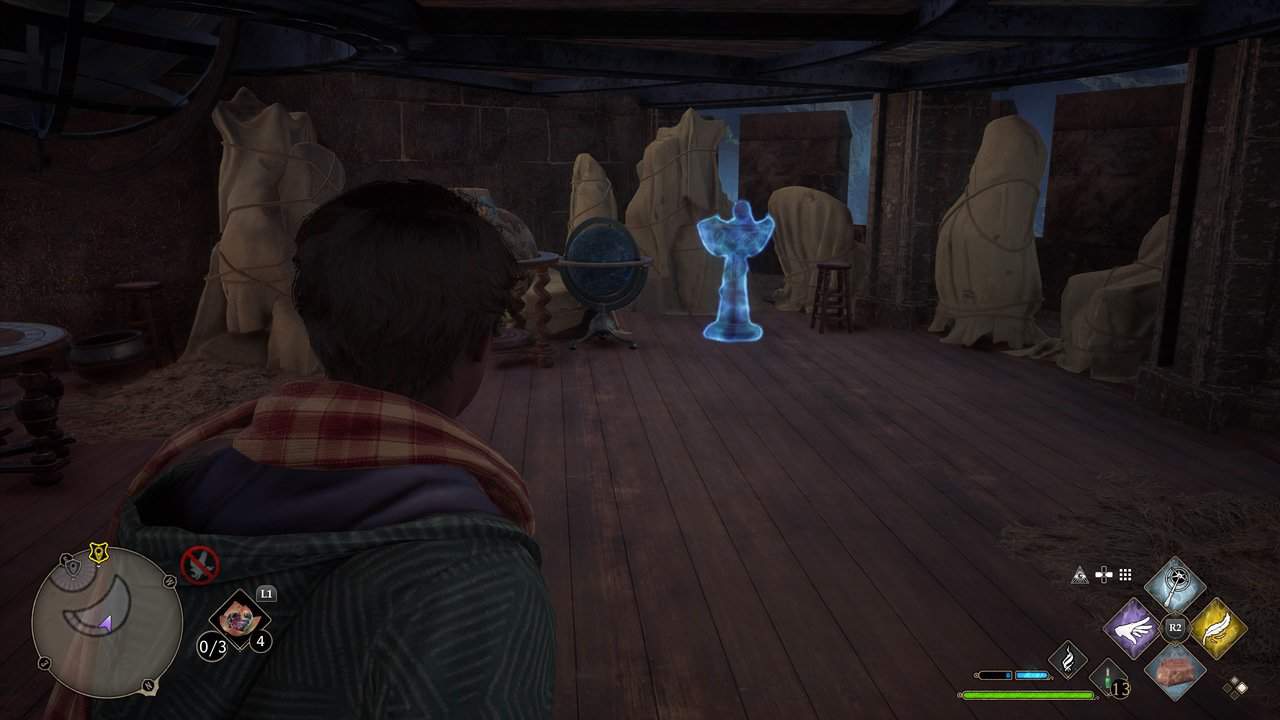
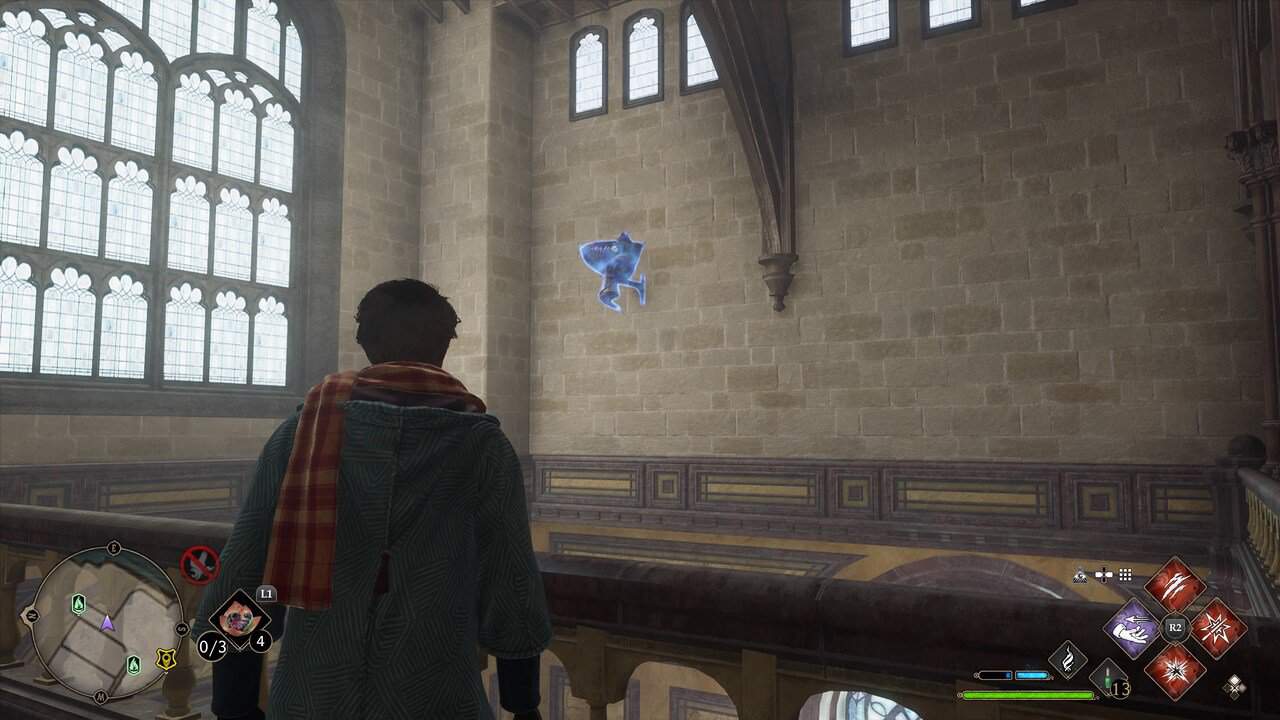
Unclassified Page 6/23

Fast Travel to the Charms Classroom Floo Flame. Turn around and look up. The Field Guide Page flies in a loop in front of the stairs. Cast Accio to grab it.
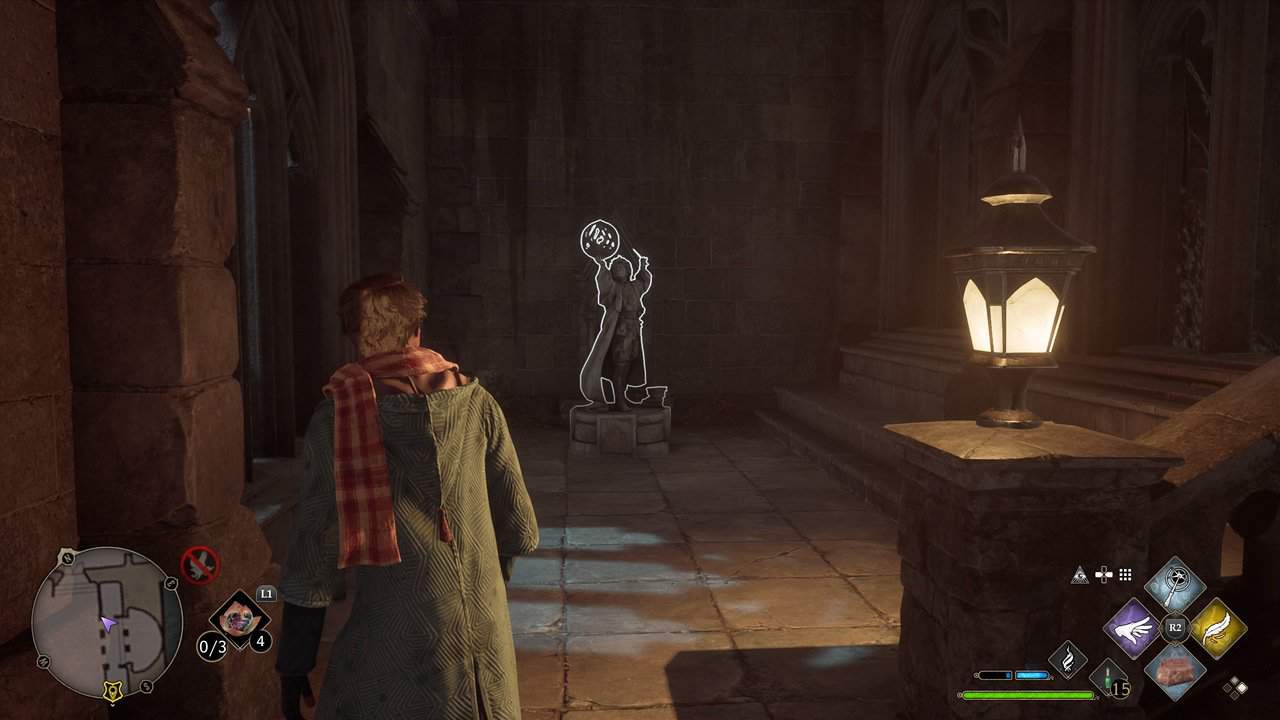
Unclassified Page 7/23
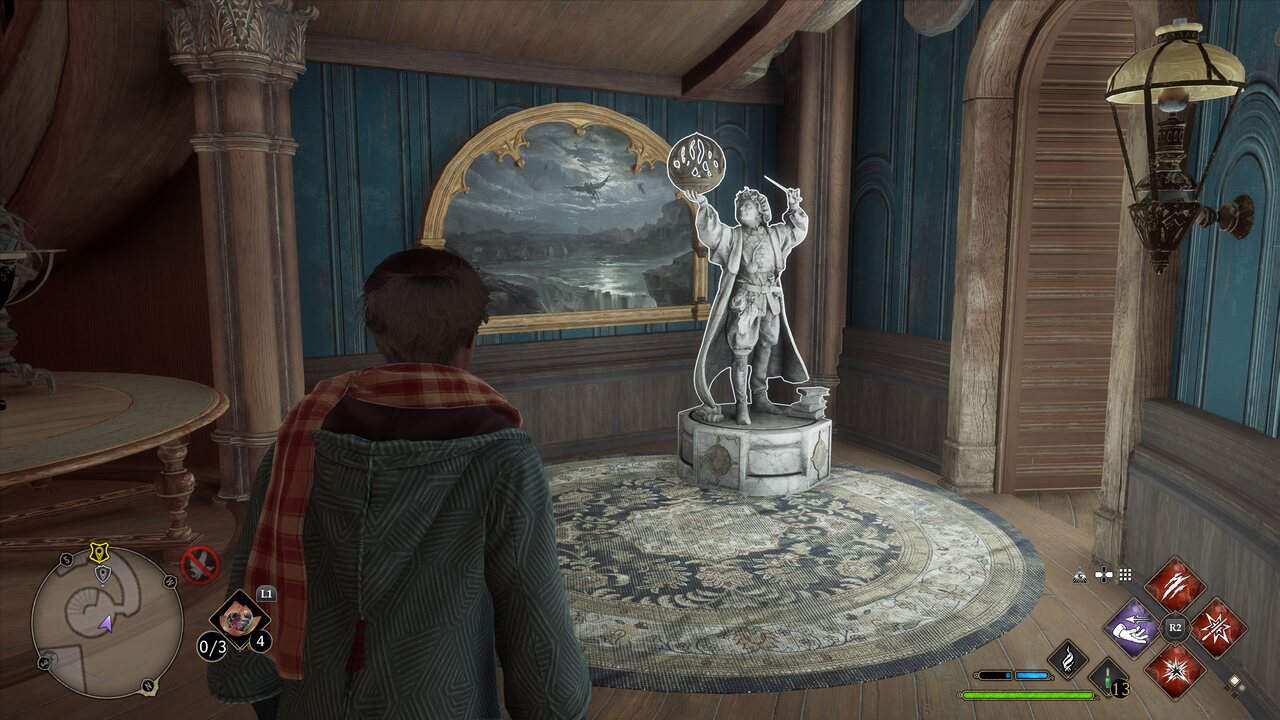
Fast Travel to the Charms Classroom Floo Flame. Turn around and go up the stairs on the right. On the first landing, go through the doorway and there’s a statue on the right. Cast Levioso to reveal the Field Guide Page.
Dark Tower Cell 8/23
Fast Travel to the Charms Classroom Floo Flame. Go down the stairs ahead and right into the Charms classroom. Take a left up the stairs to Professor Ronen’s study, then up the spiral staircase all the way to the roof. You’ll find a prison cell you can open using Alohomora. Cast Revelio inside to reveal the Field Guide Page.
Unclassified Page 9/23
Fast travel to the Professor Fig’s Classroom Floo Flame. Turn around and head towards the large window ahead. On your right is a dragon bowl. Cast Confringo at the bowl to reveal the Field Guide Page. Use Accio to pull the page to you.
Moth Mirror Defence Against the Dark Arts 10/23
Fast travel to the Defence Against the Dark Arts Tower Floo Flame. A moth mirror is straight ahead to the right of the large stained glass window.

The moth is up one floor on a pillar next to the Professor Fig’s Classroom Floo Flame. Use Lumos to capture it and return to the moth mirror. Uncast the spell to reveal the Field Guide Page.
Hebridean Black Skeleton 11/23
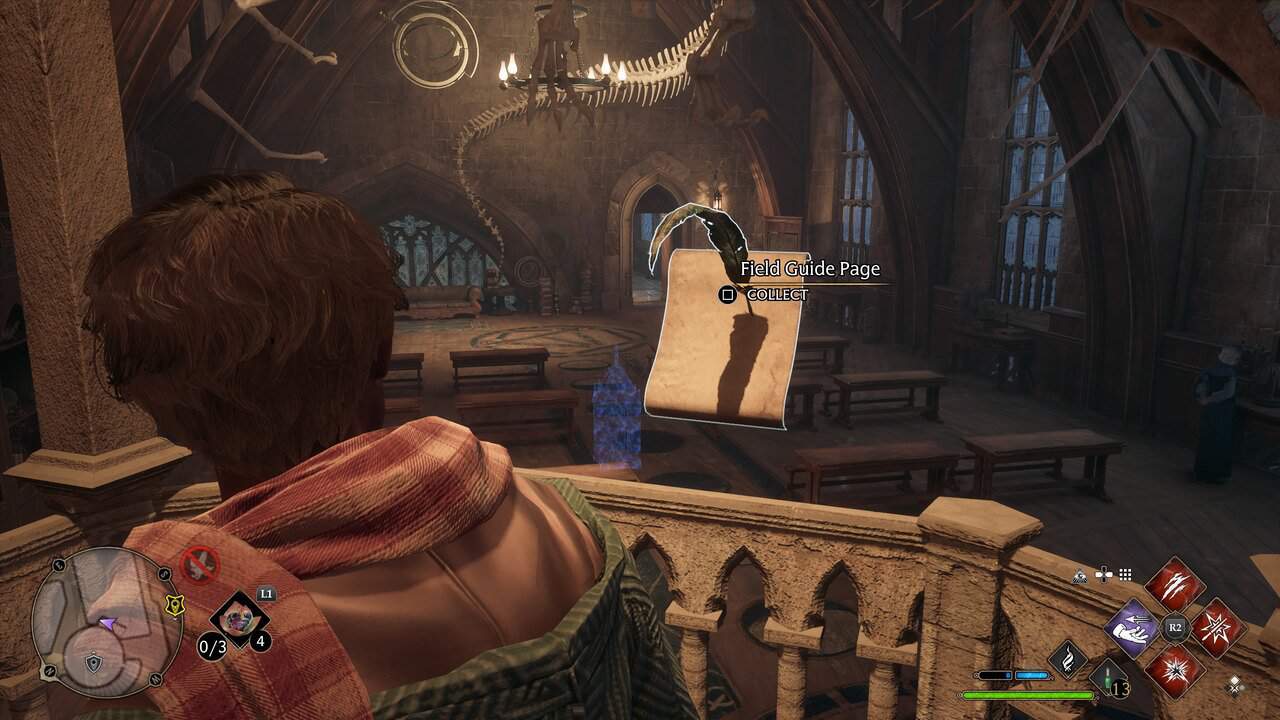
Fast travel to the Defence Against the Dark Arts Floo Flame. Enter the classroom just ahead. Climb up the short stairs at the back of the room and cast Revelio to see the Field Guide Page.
Serpentine Beast Window 12/23
Fast travel to the Defence Against the Dark Arts Floo Flame. Take the stairs on the right of the classroom door down. Walk to the skeleton on display and turn right to find a stained glass window of a snake wrapped around a tree. Cast Revelio to reveal the Field Guide Page.
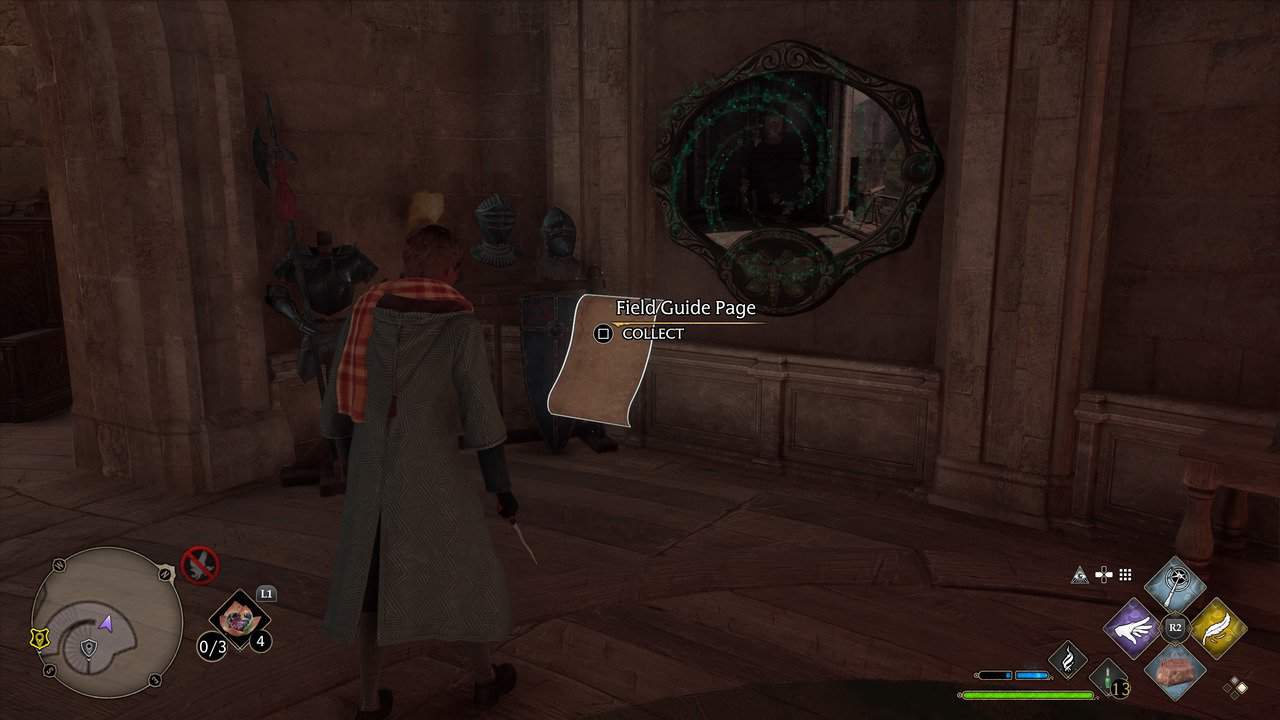
Painting of Illyius 13/23
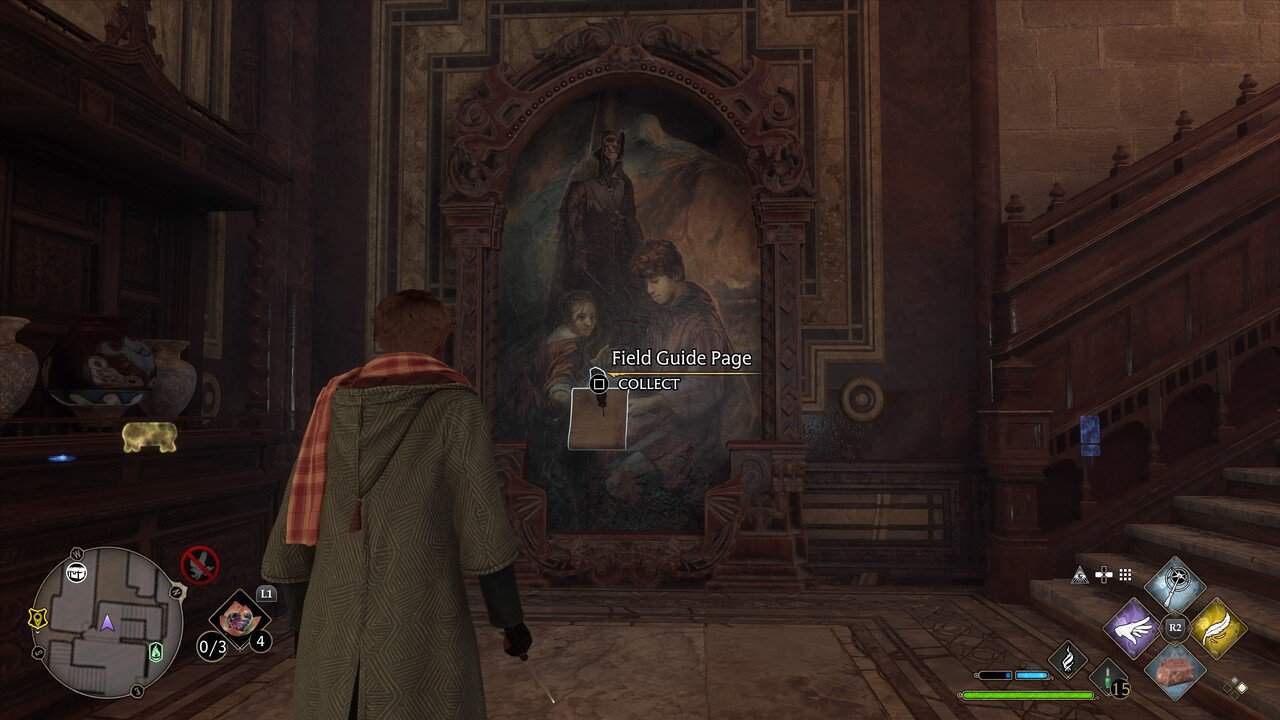
Fast travel to the Transfiguration Courtyard Floo Flame. Turn around and go through the double doors into the Astronomy Wing. Take a right and you’ll see a painting at the foot of the stairs. Cast Revelio to see the Field Guide Page.
Unclassified Page 14/23
Fast travel to the West Tower Floo Flame. As you spawn in, note the moth on the tapestry ahead of you. Turn left and enter the Pungent Passage. You’ll find a moth mirror on the left-hand side wall. Return to the moth, cast Lumos and lure it back to the mirror. Uncast to reveal the Field Guide Pages.
Pungent Passage 15/23
Fast travel to the West Tower Floo Flame. Turn left and head into the Pungent Passage. About half-way down the corridor, cast Revelio facing the right wall to reveal the Field Guide Page.
Unclassified Page 16/23
Fast travel to the Transfiguration Courtyard Floo Flame. Head right under the arched stone structure. At the end, you’ll find a statue. Cast Levioso to reveal the Field Guide Page.
Wyvern Fountain 17/23
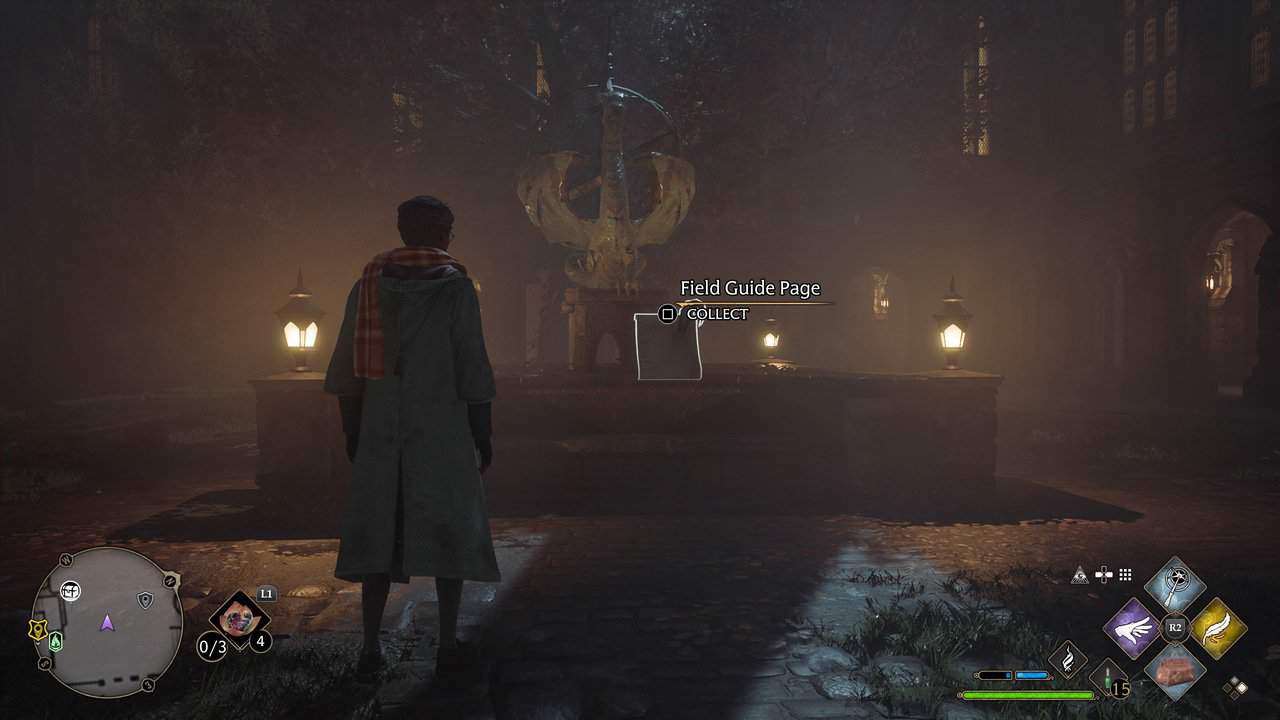
Fast travel to the Transfiguration Courtyard Floo Flame. Cast Revelio near the fountain at the center of the courtyard to reveal the Field Guide Page.
Partial Transfiguration 18/23
Fast travel to the Transfiguration Classroom Floo Flame. Go through the door straight ahead into the classroom. Cast Revelio on the desk on the left side of the room to see the Field Guide Page.
Boggart Closet 19/23
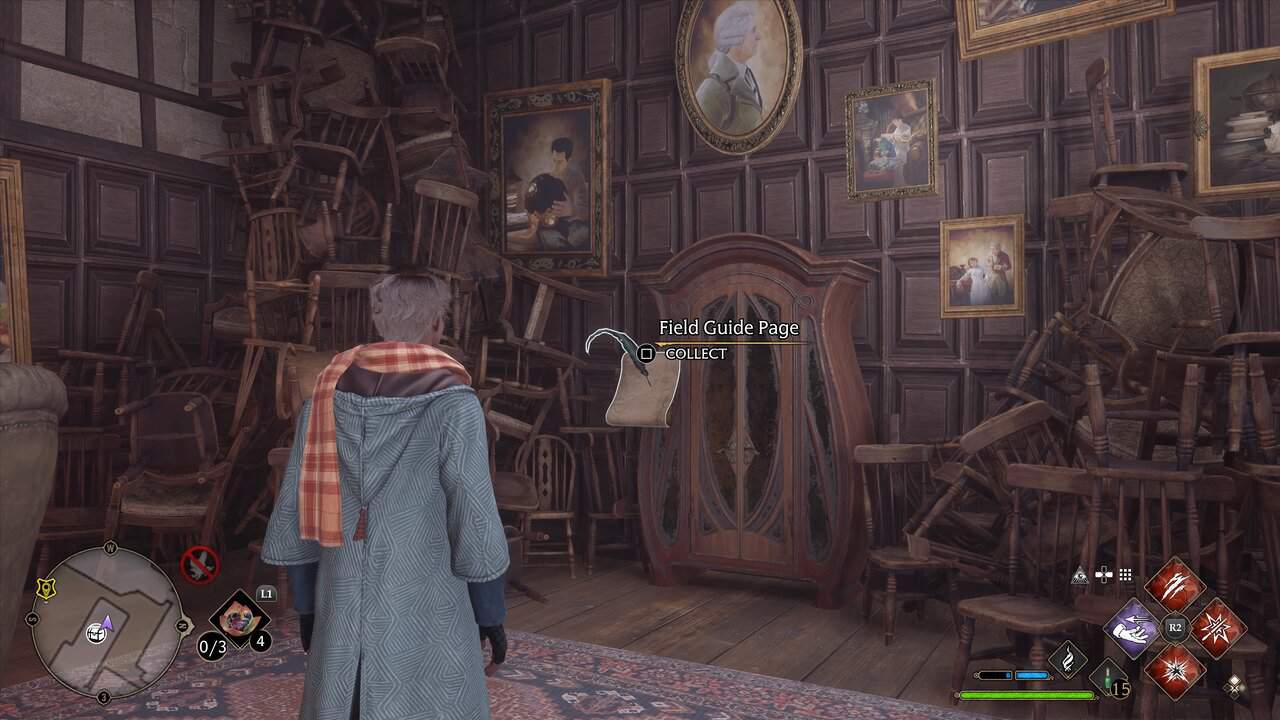
Fast travel to the Transfiguration Courtyard Floo Flame. Turn around and go through the double doors into the Astronomy Wing. To the right of the main staircase in front of you is a door. Use Alohomora to break the lock and head to the stacked chairs at the back of the room. Cast Revelio to see the Field Guide Page.
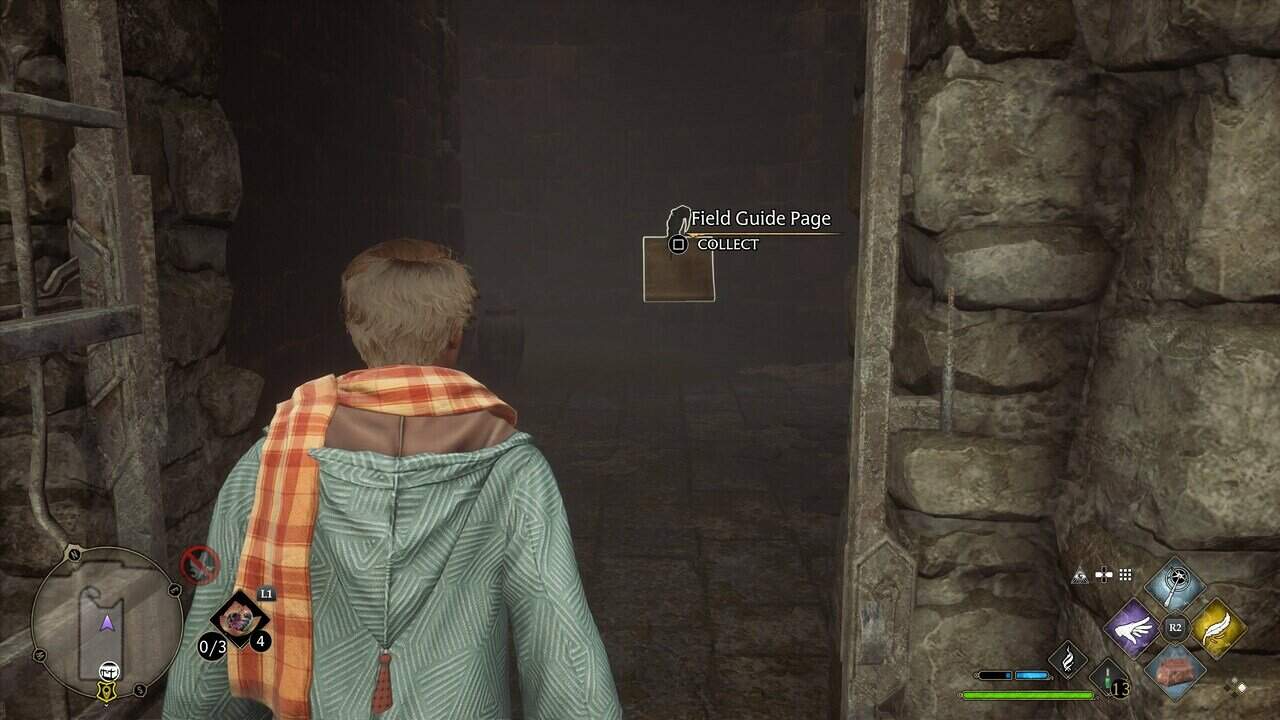
Unclassified Page 20/23
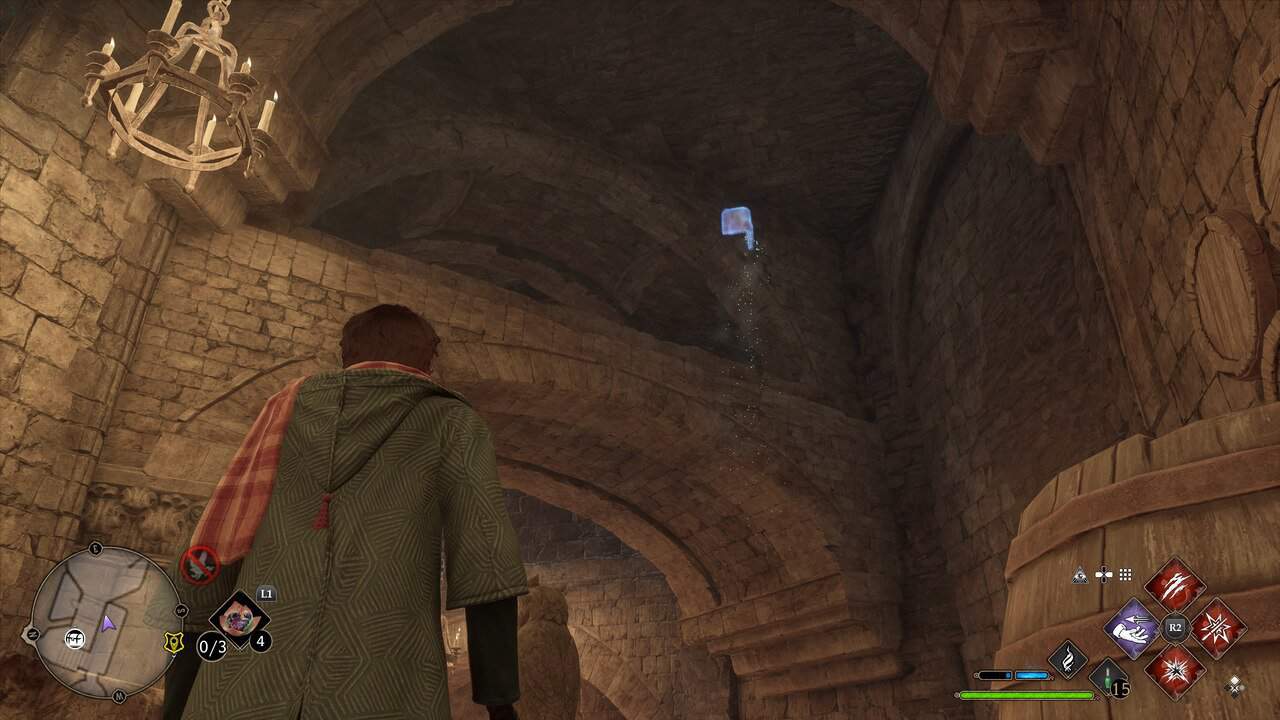
This one involves a trek to the Dungeons below Hogwarts.
First, fast travel to the Bell Tower Courtyard Floo Flame in The Bell Tower Wing of Hogwarts. From where you spawn in, take the left stairs (those going south), and head through the door in front of you. Take a sharp left down some more stairs. Follow the path down until you see a large dragon statue on the left. Go right down the corridor and follow it until you come where the passage opens up into a room full of barrels. Look up and you’ll see a Field Guide Page looping in the air near the ceiling. Use Accio to grab it. While you here we recommend grabbing the next three pages.
Unclassified Page 21/23
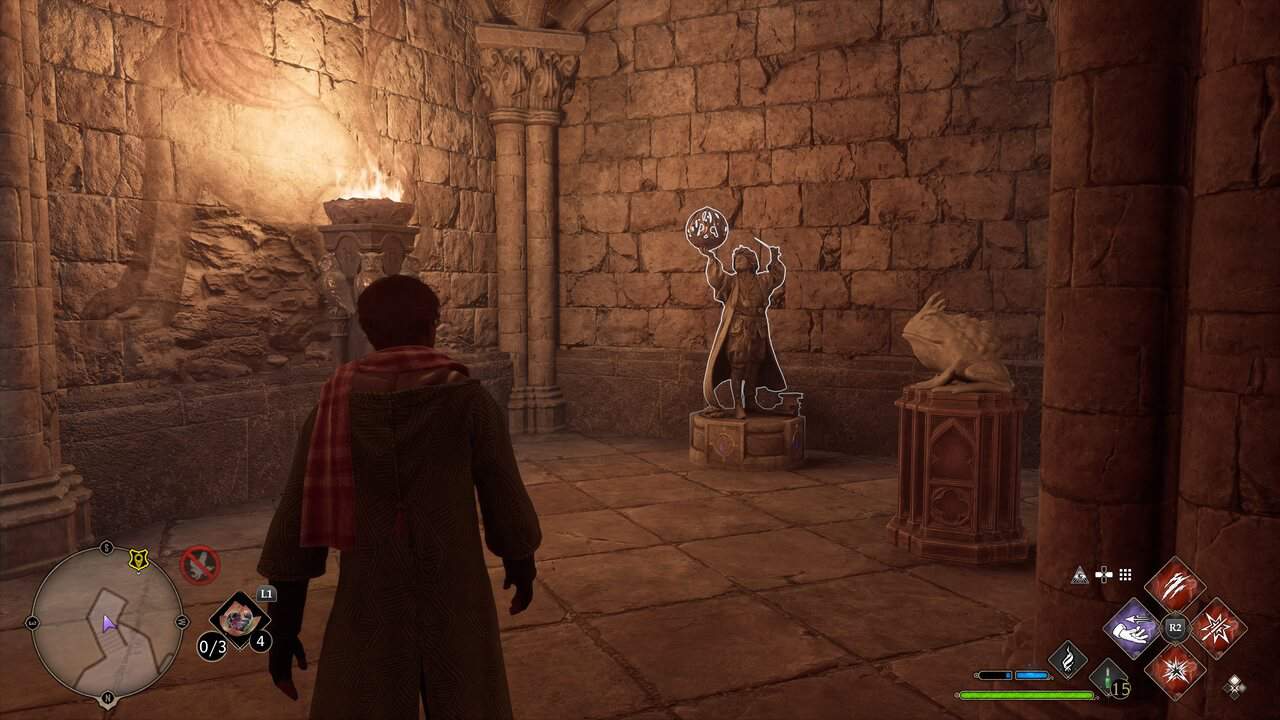
Follow the instructions above for Field Guide Page 20 and reach the Dungeons. Once you arrive at the room with the barrels. Use Alohomora on the jail cell on the left. Interact with the frog statue inside and teleport behind the locked cell on the other side of the area. Straight ahead is a statue. Cast Levioso on the globe to reveal the Field Guide Page.
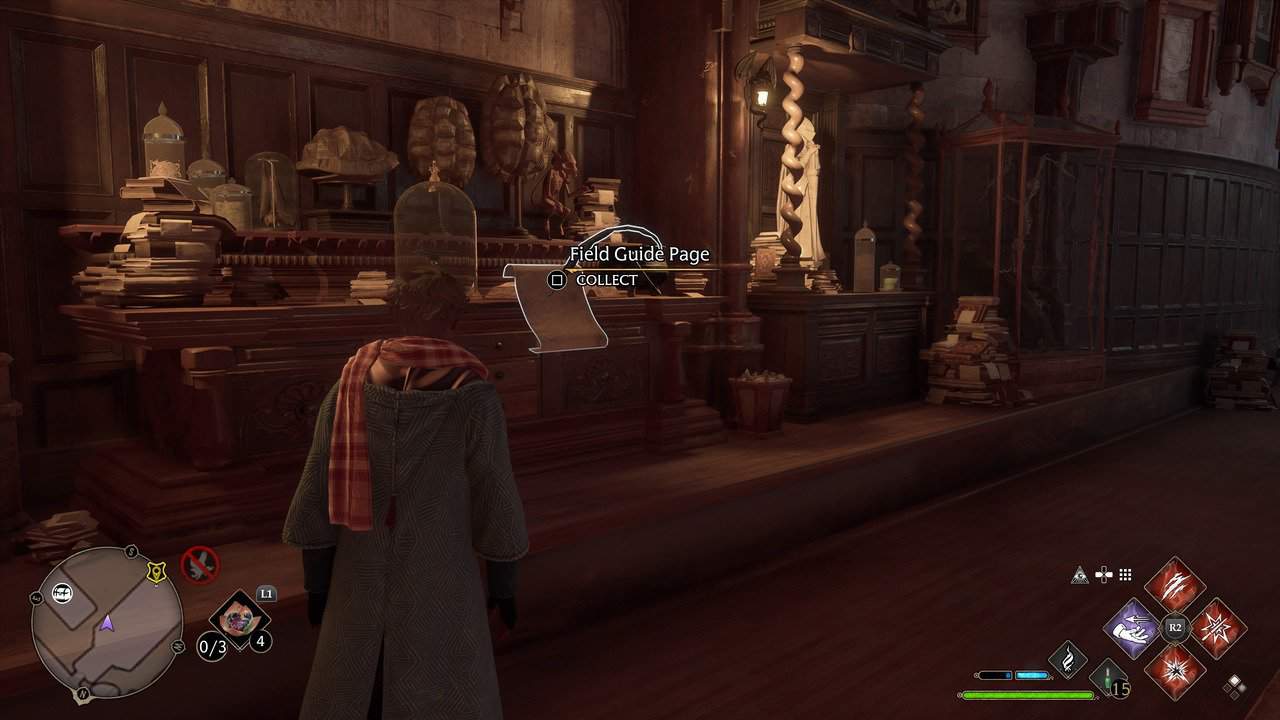
Alchemy Class 22/23
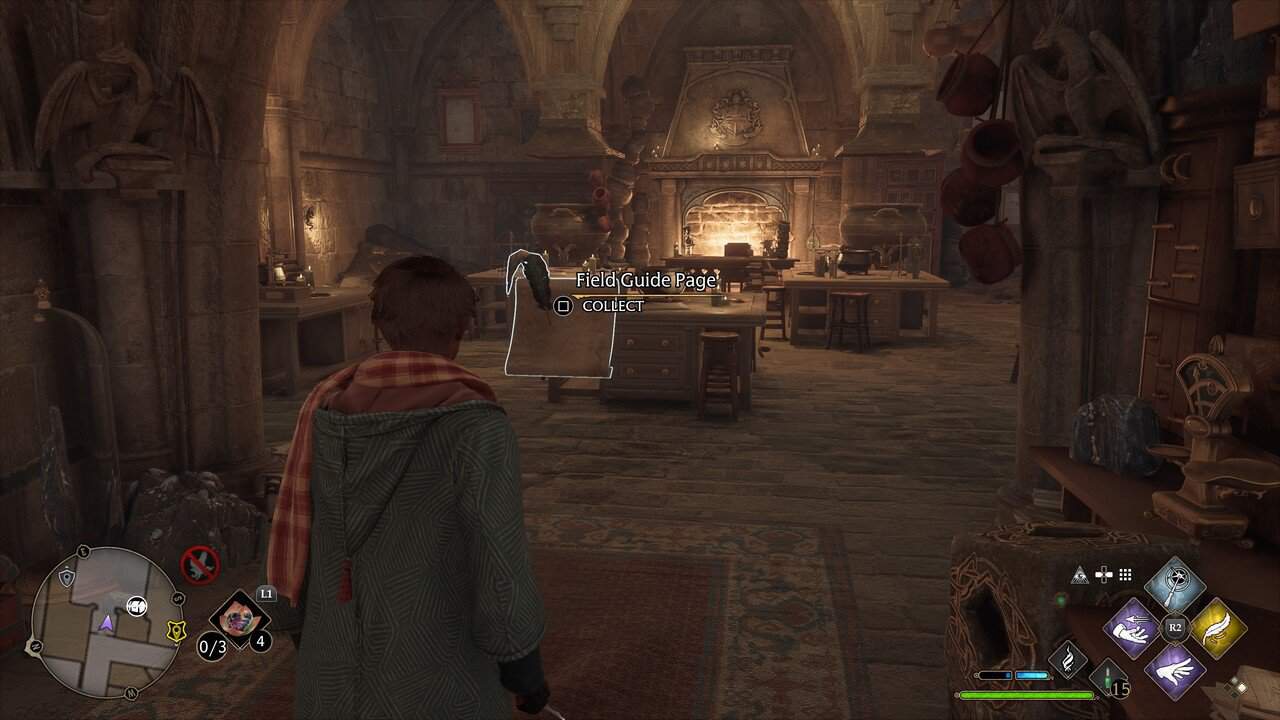
Follow the instructions for Field Guide Page 20 to reach the Dungeons. However, when you arrive at the large dragon statue, go right and enter the room straight ahead of you at the end of the corridor. Cast Revelio as you enter to reveal the Field Guide Page.
Unclassified Page 23/23
Follow the instructions for Field Guide Page 20 to reach the Dungeons. However, when you arrive at the large dragon statue, go right and enter the room straight ahead of you at the end of the corridor. Once inside the room, turn around, look up and you’ll see a dragon bowl close to the ceiling. Cast Confringo to reveal the Field Guide Page, then Accio to pull it to your character.
READ MORE: Hogwarts Legacy – The South Wing Field Guide Pages Locations
That covers the location of all Field Guide Pages in the Astronomy Wing in Hogwarts Legacy. Thinking of tackling Demiguise statues next? Check our our guide to their locations in Hogwarts, Hogsmeade, and The Highlands.
About the Author


