You can trust VideoGamer. Our team of gaming experts spend hours testing and reviewing the latest games, to ensure you're reading the most comprehensive guide possible. Rest assured, all imagery and advice is unique and original. Check out how we test and review games here
The Lost Bastille is the most challenging area you’ll have come across in the game thus far. This is thanks to some new enemy types that attack in large numbers and absorb hits without breaking their own. The area also culminates in an incredibly challenging boss fight against the Ruin Sentinel, which is in fact three fiendishly difficult enemies.
The Lost Bastille has three bonfires before the boss: one which can be found after entering the Lost Bastille via the Ghost Ship from No Man’s Wharf, the second is found by entering the area via the bird who you meet by entering its nest after beating The Pursuer, the final bonfire is hidden within the area itself.
For this guide, we’re going to briefly look at a route from the Ghost Ship bonfire to collect all the items, before taking the route to Ruin Sentinel from the Tower Apart bonfire (where the bird drops you off), as this is the best place to start when speed-running back to the boss should you die (and in the Lost Bastille, you’re probably going to be dying a lot).
From The Ghost Ship bonfire – Exile Holding Cells
From the Ghost Ship, head up the stairs and through the door on the left to ignite the bonfire. At the top of the stairs is another White Knight. This guy is much trickier than the previous Knight, thanks to his devastating combos. Your best chance is to circle with your shield up (for melee-based characters), and look to backstab following his three-hit combo. Defeating the Knight will give you his Heide Knight Spear.
There is an open area to the left with zombie dogs and scythe-wielding enemies. There are two ways down: take the ladder at the end of the walkway, or exploit the break in the bridge to get the jump on one of the scythe soldiers stood atop the wooden scaffolding. After three hits, the scaffolding collapses, causing a minor hit to your health bar, but it’s worth it if you can take out the guard before worrying about the dogs. Also grab the alluring skull from here. Behind the fallen scaffolding structure is a path blended into the pattern of the wall that leads to a chest containing an Estus Flask Shard and large Titanite shard.
After grabbing the shard, head back out to the open terrain and head left of the ladder to find a gate that you need to open to reveal a shortcut for the second bonfire, and eventually to McDuff and a third bonfire. Pull the lever to the right and kill the dogs.
Don’t worry about heading up the stairs for now, instead, backtrack and smash the wooden door on the opposite end of the garden. There’s a silver knight behind the screen, as well as some mummies inside the cell. The mummies’ belly drop attack stuns you as well as doing heavy damage, meaning you can’t respond and are vulnerable to follow-up attacks, so kill them ASAP. Grab the flame butterfly once the mummies are dealt with.
Now you’re ready to head to the Tower Apart bonfire and take on the rest of the Lost Bastille from here.
The Tower Apart
If you’ve been using the Fire Longsword up until now, unequip it. This area is full of exploding barrels that will do a ton of damage if you hit them with the sword.
Head left of the bridge from the bonfire, over the rubble and follow the edge of the building to pick up a Radiant Lifegem. Head inside one of the windows and kill the crossbowman and dogs downstairs. The scythe guard from the bridge may follow you, so be wary. Open the door and open the chest at the end of the room, beware that it’s booby trapped so you’ll need to roll escape to avoid whatever lay inside before grabbing the key and Serpent Ring.
Head back upstairs, kill the scythe guard if you haven’t already, and open the iron door. Lucatiel is inside, speak to her and she’ll give you a Human Effigy. Head through the second door and down the green path. This is where things get tricky.
At the top of the final set of stairs is an exploding barrel which needs to be rolled to the wall at the bottom and set off to reveal a secret path to McDuff and another bonfire. If you’re too slow, the scythe guard slices the barrel and detonates it, meaning you have to start over. Quickly kill all guards and dogs before they have a chance to interfere with it. Once the barrel is by the wall, use your Fire Longsword to set it off, you’ll take damage, but won’t die.
Ignite the bonfire inside so you begin from here should you die. Open the chests around this bonfire to get:
– Iron arrows
– Titanite shard
– Heavy bolts
– Large Titanite shard
Speak to McDuff, he’s sat on a chest and doesn’t move, moaning about a flame he yearns to see alight once again. The way you re-ignite his flame is by lighting one of your torches and lighting the one inside the room. Rest at the bonfire, then re-enter the room, he’ll be working away, leaving you free to loot the chest, which contains a Craftsman’s Hammer and Twinkling Titanite.
Head back upstairs, halfway up the path is a broken lump of concrete allowing you to head onto the path to the right. Inside the door ahead of you are a bunch of silver knights, who are a nightmare to deal with when tackling more than two. Your best bet is to open the door and creep in slowly, hoping to only alert a small group at a time. If all hell breaks loose, run straight ahead, down the flights of stairs, left and up the ladder. To the right is the mist leading to the Ruin Sentinel, the boss of the area. But if you can take out the Silver Knights, to the left of the top of the ladder is a lever granting you a shortcut back to the boss should you fail at your first attempt.
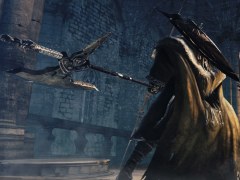
How to beat the Ruin Sentinel
The Ruin Sentinel is a very difficult boss, especially if you’re a melee-based character. Keep a look out for the gold writing on the floor en route to the mist, as these are summon signs left from other players. Having an extra player to help with the fight will be crucial to help turn the tide against the three sentinels. Unless you’re incredibly powerful and have high stamina, summoning another player may be the way to go.
Once you enter the mist, stay on the platform you drop to, going to the floor before killing the first sentinel will wake up the other two, making the fight virtually impossible. Focus on Sentinel Yahim, if it falls off, put your back against the wall and put your shield up. The way the sentinel gets back onto the ledge is with a jumping slash attack that will do heavy damage and knock you off your feet, so just wait patiently for its return.
Keep guarding and wait for its heavy attacks, which are often single or double hits. keep circling and try to stay behind Yahim. Only attack twice at every turn, eventually Yahim will fall.
Once Yahim is down, the other two sentinels will move towards you. Drop down early to give you more time to recover from the fall damage. There isn’t enough room on this ledge to deal with two sentinels, you’re going to need a lot of space to escape and use Estus Flasks. Keep both in front of you at all times to avoid cheap hits. They will do jumping slam attacks from time to time, just keep moving backwards to stay out of range of these, as blocking will zap your stamina and leave you open to a follow-up hit from the other one.
Don’t return fire until both sentinels have attacked. Trying to hit after one sentinel has swung leaves you open for the second, and these foes can kill you with a single move. Ideally, continue to guard until the sentinels decide to throw their shields at you. It doesn’t look as though a specific action leads to the Sentinels throwing the shields, but once they’ve thrown the shield they can no longer use it, giving you more opportunities to attack.
About the Author