

Video Gamer is reader-supported. When you buy through links on our site, we may earn an affiliate commission. Prices subject to change. Learn more
Now that Ubisoft’s own open world pirate game has launched into its open beta, here are the best graphics settings for Skull and Bones, configuring performance optimised high FPS gameplay or setting up the highest fidelity performance options. It’s definitely worth checking out Skull and Bones system requirements too!
Best graphics settings for Skull and Bones on PC
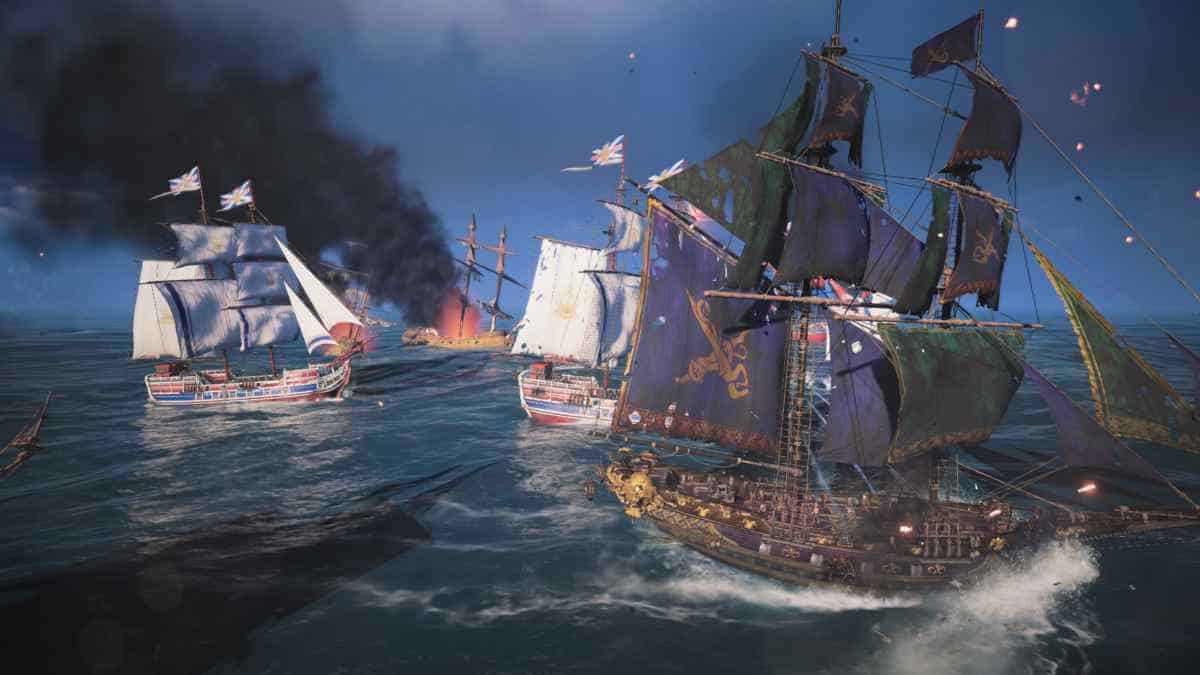
Ubisoft’s Skull and Bones crafts a new IP set where players can pillage and plunder in a historically accurate 17th century setting. Before you get hooked on sailing the seas, you’re probably going to want to configure your game settings to squeeze out performance in line with the game’s system requirements, alongside your PC hardware.
Best performance graphics settings for Skull and Bones
Visual Settings
- Window Mode: Borderless
- Aspect Ratio: 16:9
- Resolution: 1920 x 1080
- VSync: Off
- Field of View: 100%
- FPS Limit: On
- FPS Limit Value: 60
It’s a good idea to tone down the resolution on Skull and Bones if you’re struggling for performance. It’s a pretty intensive game graphically, and is built on the same engine that Assassin’s Creed Mirage uses. Textures are intense, and lighting is extreme, so controlling the resolution is a pretty obvious start.
After that, you’re going to want to limit FPS to 60, which I’d say is an optional step. The reason I’m suggesting this is because when you’re struggling for performance, you’ll be able to reach an sustainable compromise between frame rates and texture fidelity by capping both at a reasonable level.
If you’re struggling with performance in Skull and Bones, it might be worth upgrading your graphics card. Ubisoft recommends an RTX 2070 or RX 5700 XT at the very least, both of which feature 8GB VRAM. We’re going to discard their recommendations and suggest that you aim a little higher as the game is – honestly – not optimised that well. I used an RTX 3090 to test out these graphics settings, and I still saw frame rate drops at times.


Graphics Settings
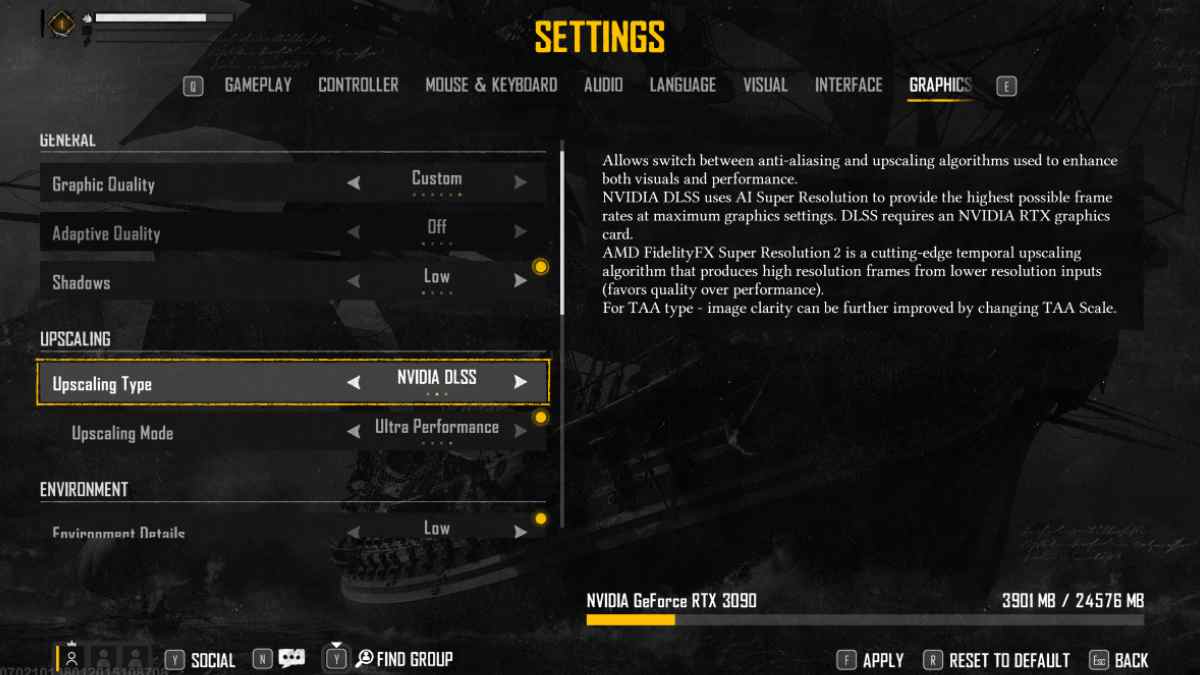
- Shadows: Low
- Upscaling Type: Nvidia DLSS or FSR (depending on GPU)
- Upscaling Mode: Ultra Performance
- Environment Details: Low
- Clutter: Medium
- Water: Low
- Screen Space Reflections: On
- Volumetric Clouds: Medium
- Ambient Occlusion: Off
- Depth of Field: On
- Motion Blur: Off
- Ray-Traced Global Illumination: Off
The difference between low and maxed out shadows isn’t going to make a huge hit to the fidelity of the game, but performance will see a nice uptick if you limit them. Ambient Occlusion is a big hitter on VRAM, so if you’re on a slightly weaker graphics card it’s a good idea to disable this. You can fiddle around with having it on and off, depending on the performance level of your gaming PC, but getting rid of ambient occlusion is a good start if you’re trying to increase your FPS.
If you have a DLSS or FSR enabled graphics card, definitely make use of Ultra Performance upscaling. This will increase your FPS with a nice bump, while also artificially upscaling resolution. If you’re on a much older graphics card, TAA is the only alternative you have. It won’t net as much frame rate gains, but it’s better than nothing.
Limiting environment details and clutter will also help reduce how much is rendered on-screen, though these are some of the graphical features that create a really immersive experience. I’d say it’s well worth fiddling around with increasing and decreasing these until you find something that yields you a compromise between performance and fidelity.
As you’re going to spend quite a lot of time sailing the high seas, limiting the water textures will help squeeze out a bit more FPS. I would recommend keeping Screen Space Reflections on though. While it might demand a little more from your graphics card, without it the texture of the sea is incredibly flat, boring, and immersion breaking.
Get rid of motion blur as this can be quite taxing on hardware, and you’re probably not going to be able to run ray-tracing without absolutely destroying whatever performance gains you’ve made while optimising the graphics.
Best fidelity graphics settings for Skull and Bones
Visual Settings
- Window Mode: Borderless
- Aspect Ratio: Same as display
- Resolution: Display Maximum
- VSync: On
- Field of View: 100%
- FPS Limit: Off
- FPS Limit Value: Off
Unlike with the performance settings, if you’re running a graphics card with a sufficient amount of VRAM, you can probably start to test out our high fidelity graphics settings. Max out the resolution and match it with whatever aspect ratio your monitor offers.
We’d recommend enabling VSync, while also removing a frame rate cap. This is going to reduce any screen-tearing you experience at higher frame rates and also lets you gorge in a lightning fast gaming experience.
Graphics Settings
- Shadows: Very High
- Upscaling Type: Nvidia DLSS or AMD FSR 2 (depending on GPU)
- Upscaling Mode: Quality
- Environment Details: Very High
- Clutter: High
- Water: High
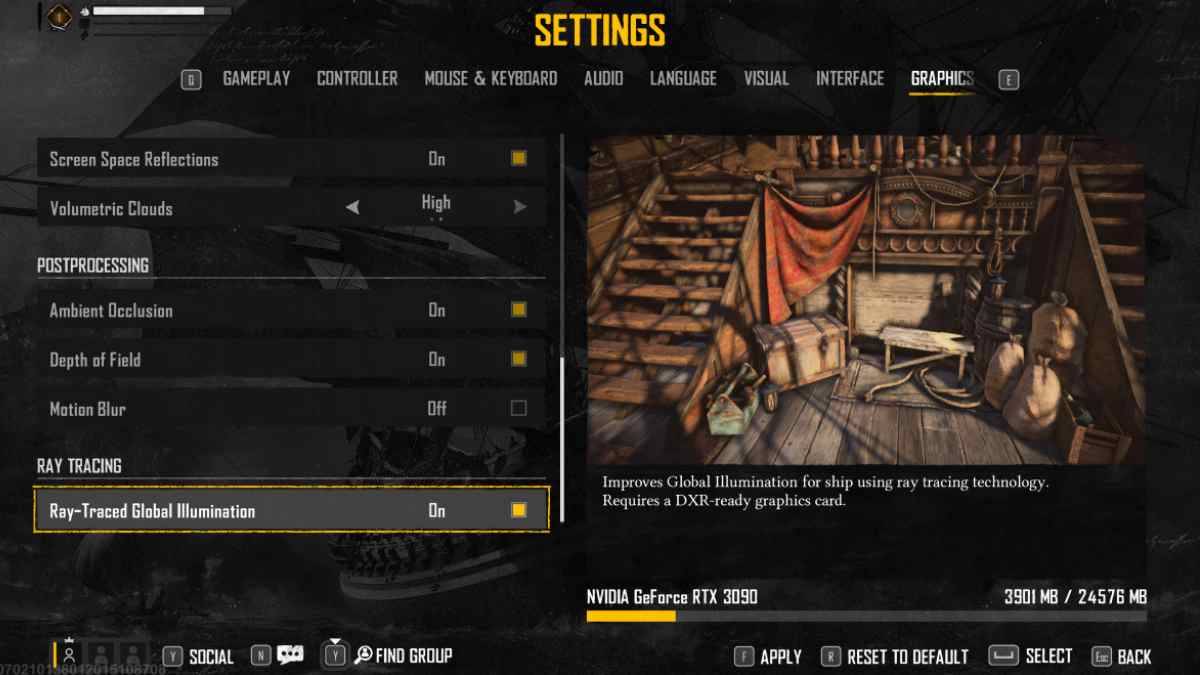
- Screen Space Reflections: On
- Volumetric Clouds: On
- Ambient Occlusion: On
- Depth of Field: On
- Motion Blur: Optional
- Ray-Traced Global Illumination: On
You’re going to have the ability to try out the game with most settings maxed out here. Max out the shadows quality, alongside enabling ambient occlusion. If you do experience any FPS drops, we’d recommend disabling it, though with it turned on shadows are going to be extremely well rendered, alongside 3D shapes looking as natural as possible.
Make sure you have Upscaling enabled through whichever standard is possible, too.
You can play around with environment details and clutter, and having this as high as possible will generate a really immersive and enjoyable experience here. When it comes to water and screen space reflections, maximise this so you have a really immersive experience sailing and plundering.
The difference between having volumetric clouds on or off is pretty minimal, so you can choose whether or not to enable this here. You can also turn on motion blur if it’s your kind of thing. Finally, if your graphics card can handle it, try out ray tracing for the final touches that will make your game stand out vibrantly.
Frequently Asked Questions
Should you use ray tracing with Skull and Bones?
While ray traced lighting is going to give you a huge boost in fidelity, it’s also going to eat away at any spare VRAM you have. If you’re planning to use RT in-game, make sure you have a graphics card with at least 16GB of VRAM.
Should you use DLSS / FSR with Skull and Bones?
On the converse, if you can enable any form of upscaling in Skull and Bones, make sure that you do. It’s going to drastically increase your frame rate and keep you at a high fidelity resolution, so if you have access to either DLSS or FSR – turn it on.