You can trust VideoGamer. Our team of gaming experts spend hours testing and reviewing the latest games, to ensure you're reading the most comprehensive guide possible. Rest assured, all imagery and advice is unique and original. Check out how we test and review games here
As we all know by now Nathan Drake is pretty keen on doodling things down in his little journal for posterity (these end up mostly being drawings of dead people and old buildings, so he probably hasn’t shown them to his therapist). He also likes collecting and reading people’s private correspondence, but since they’re letters from hundreds of years ago we’ll let him off. In Uncharted 4 there are 48 of these collectibles to find (though there are some others Drake will put in the journal for you automatically as part of the plot), and they’re hidden more carefully than you might think. Here’s a handy guide to help you find them all and collect those game trophies.
Journal entries and notes in Chapter 8 of Uncharted 4
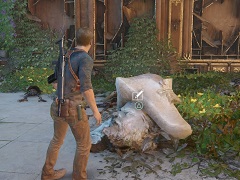
Cathedral graveyard – journal entry
There’s an open grave with two skeletons near where you first enter the graveyard that you can interact with and draw (Drake must have an unsettling number of drawings of skeletons at this point in his life).
/https://oimg.videogamer.com/images/5b86/1_cathedral_graveyard.jpg)
Skeleton under Avery’s grave – journal note
After you open the secret door at Avery’s grave, go down the steps and then into the right hand corner, where there’s a small, sad pile of bones with a note on it (odds on that Avery immediately killed the monks and took all his money back).
/https://oimg.videogamer.com/images/d278/2_skeleton_under_averys.jpg)
Puzzle under Avery’s grave – journal entry
Once you’ve solved the light puzzle in the secret crypt under the graveyard you’ll get a prompt to speak to Sam about the fact that the light forms a zodiac constellation. If you do then you collect the entry.
/https://oimg.videogamer.com/images/3c6d/3_puzzle_under_averys.jpg)
Journal entries and notes in Chapter 9 of Uncharted 4
Those who proved false – journal entry
The poor dudes strung up in gibbets at the very start of Chapter 9? The ones marked as being unworthy? Yeah, Drake’ll draw those guys too.
/https://oimg.videogamer.com/images/2926/4_those_who_proved_false.jpg)
Door mechanism – journal entry
This is the first big test that Avery has set up. After you’ve gotten the lights, crosses, and bucket of water lined up in the right places you can open the door, and after that interacting with the door lever will result in a journal entry.
/https://oimg.videogamer.com/images/ddbe/5_door_mechanism.jpg)
Skeleton in the seesaw test chamber – journal note
As you enter the test chamber drop down to the level below you on your left. There’s a skeleton propped up on a beam, with a note in his bag. He turns out to be a very unhappy, and now very dead, pirate captain.
/https://oimg.videogamer.com/images/91a4/6_skeleton_in_the_seesaw.jpg)
Journal entries and notes in Chapter 10 of Uncharted 4
The EIC officer behind the waterfall – journal note
As you come into the second area of the chapter head left, upstream, and go behind the large waterfall to the hidden pirate cave. Pull the box on the left down and use it to climb up to the platform. There’s a desk on the wall that has a note from an East India Company Lieutenant.
/https://oimg.videogamer.com/images/9fa8/7_the_eic_officer_behind.jpg)
Captain Condent’s tower – journal entry
Your jeep will eventually come to a mud slope that you can’t drive up, and have to use the winch on a tree at the top. To the left of this slope are some stairs and a tower. At the base of the tower is Condent’s sigil. He was the captain of the Fiery Dragon, so his sigil is pretty dragon-y.
/https://oimg.videogamer.com/images/54ce/8_captain_condents_tower.jpg)
Adam Baldridge’s tower – journal entry
This is the large, mostly intact tower where you have your first fight with Shoreline in this chapter. At the base of the tower you can find a door wired for dynamite. Either follow the wires to the plunger or straight up shoot the dynamite to get in and find Baldridge’s sigil on the floor, which appears to be two skeletons having a piss up.
/https://oimg.videogamer.com/images/63c2/9_adam_baldridges_tower1.jpg)
/https://oimg.videogamer.com/images/b49b/9_adam_baldridges_tower.jpg)
The skeleton in the well – journal note
In the well where you find the Pewter Letter Cylinder treasure there’s a skeleton sitting up against a beam, in the corner opposite the ledge with the treasure. He’s a little out of sight but still easy to find.
/https://oimg.videogamer.com/images/cd07/10_the_skeleton_in_the.jpg)
The signal tower – journal entry
After a stretch of driving perilously close to the edge of the cliff you’ll come to a smaller signal tower. The group will comment on the view, and you can collect a journal note from looking at the tower itself.
/https://oimg.videogamer.com/images/a0bb/11_the_signal_tower.jpg)
Anne Bonny’s tower – journal entry
When you come to the big drawbridge contraption the floor of the tower on the right has Anne Bonny’s sigil, which is a pretty boss unicorn. Examining it will give you another entry.
/https://oimg.videogamer.com/images/69d6/12_anne_bonnys_tower.jpg)
Journal entries and notes in Chapter 12 of Uncharted 4
The grave of the unknown sailor – journal entry
On the beach on the large island, in almost a straight line from where you enter the chapter, you can find a small sandy grave with a wooden cross in marking it, although there’s no name. Examine it to get another journal entry.
/https://oimg.videogamer.com/images/d3ed/13_the_grave_of_the.jpg)
The Jonathan Burnes expedition – journal note
Right from the grave we just described is a cave, with supplies from an earlier expedition and a note explaining who that expedition was lead by, and why. They seem to currently be in good spirits.
/https://oimg.videogamer.com/images/5dde/14_the_jonathan_burnes.jpg)
The wrecked ship’s mast – journal entry
If you head left around the large island you’ll come to a few rocks and sand spars around a wrecked ship, on your right. Get out and have a gander. Looking at the ship’s mast sticking out of the water gets you a journal entry.
/https://oimg.videogamer.com/images/32ca/15_the_wrecked_ships_mast.jpg)
Burnes’ note near the shipwreck – journal note
On the sand bar around from the wrecked ship you’ll find some boxes and barrels, and a tree. Just underneath the tree is a satchel with a grisly note in it. The previous expedition is taking a bad turn already.
/https://oimg.videogamer.com/images/5d36/16_burnes_note.jpg)
The punished crewman’s skeleton – journal entry
On the smaller island, with the tower, there are two beaches, and on the one that faces out to sea there’s a skeleton of a man who was tied to a ship mast and left to die. Cheerful. Nate will do his normal thing of drawing the dead person.
/https://oimg.videogamer.com/images/da96/17_the_punished_crewman.jpg)
The statues at the cistern – journal entry
At the bottom of the mudslide towards the cistern jump off to the right, onto a platform. On the other side is an alcove/platform area where you can get a better look at the statues sticking their spears out into it, and Nate is like “Well good, that’ll make a sweet drawing, bro!”
(He doesn’t really say that but he will draw them in his journal).
/https://oimg.videogamer.com/images/a470/18_the_statues_at_the.jpg)
/https://oimg.videogamer.com/images/1836/18_the_statues_at_the1.jpg)
The model village – journal entry
In the bottom of the cistern is a room with big slabs on the wall depicting Avery’s greatness, and a diorama model in the middle (which actually turns out to be a model of New Devon rather than Libertalia). Interacting with it gets you a journal entry. These rooms aren’t locked off by any doors, so if you go through the one you have to lift up with Sam then you’ve gone too far.
/https://oimg.videogamer.com/images/9f09/19_the_model_village.jpg)
The giant statue of Henry Avery – journal entry
After the giant statue of Henry Avery rises out of the ground, go around to the front of it to get another journal entry. Going up and interacting with the spyglass before you do this will trigger the cutscene into the next chapter, and you won’t get a chance to get the entry.
/https://oimg.videogamer.com/images/d43a/20_the_giant_statue_of.jpg)
Journal entries and notes in Chapter 13 of Uncharted 4
No Quarter for Thieves! – journal entry
When you’ve done the morse code signalling with Sam climb up and around, and go behind the waterfall. Once you’ve climbed up and across to the first platform you’ll run into a skewered skeleton with some threatening graffiti behind him and Drake, ever enthused by new skeletons to draw, will put an entry in the journal.
/https://oimg.videogamer.com/images/0412/21_no_quarter_for_thieves.jpg)
After you’ve climbed up out of the cave behind the waterfall you’ll have reached some jungle again, but are surrounded by rock walls on all sides. On your right is the skeleton of the navigator on Burnes’ expedition, who has another informative note on him.
/https://oimg.videogamer.com/images/4c03/22_the_navigators_last.jpg)
The unlucky climber – journal entry
When you’ve gotten the note described above, look up and you’ll see a skeleton hanging upside down from his feet. Walk around underneath him until the journal interaction triggers and Drake will do a drawing of him.
/https://oimg.videogamer.com/images/c3c5/23_the_unlucky_climber.jpg)
Burnes’ first mate – journal note
After you first meet the Shoreline goons in this chapter you’ll swing away and into a dense area of jungle. Towards the end of that you’ll come to a wide ledge on the left, with a skeleton in the corner. Guess what you can find on him? This, incidentally, was Burnes’ first mate. They’re dropping off fast.
/https://oimg.videogamer.com/images/d222/24_burnes_first_mate.jpg)
Journal entries and notes in Chapter 14 of Uncharted 4
Christopher’s letter – journal note
Climb up the side of the blacksmiths (which is on the right side of the main street through Libertalia’s commercial district) and onto the first floor. Go into the intact room here and there’s a letter on the desk to Christopher’s father, although what a letter from someone claiming to work the fields and livestock is doing in the blacksmith’s house is not clear.
/https://oimg.videogamer.com/images/4bfb/25_christophers_letter.jpg)
Unfortunate horses – journal entry
On the left side of the street through Libertalia is a stable, with some horse skeletons still tied up, almost as if their owners had left in a hurry. Nate will dutifully draw these as well, proving that he likes bones of all different persuasions, not just human ones.
/https://oimg.videogamer.com/images/0c30/26_unfortunate_horses.jpg)
Article Five – journal entry
Continuing in a straight line down the street you’ll come to the end of it, where there’s a big slab of stone with ‘Article Five’ written on it. We never find out how many articles the pirates lived by in Libertalia, but this one, at least, is still standing.
/https://oimg.videogamer.com/images/0862/27_article_five.jpg)
Graffiti on Avery’s statue – journal entry
Carry on through the district, going right from Article Five and around to a square with Avery’s statue. On the other side of it you can find that it’s been graffitied with the same symbol found on the ‘No Quarter for Thieves!’ skeleton. This prompts a journal entry.
/https://oimg.videogamer.com/images/dea4/28_graffiti_on_averys.jpg)
Sam in the stocks – entry
Next to the statue are some stocks. Sam will wander over and put his head in them. An optional conversation prompt will come up, and if you take it you’ll get a little caricature of Sam in your journal. The caricature is smoking, obviously.
/https://oimg.videogamer.com/images/586d/29_sam_in_the_stocks.jpg)
Matthew is concerned – journal note
After rappelling down out of the bottom of the church you’ll get into a fight with a bunch of Shoreline types. After you’ve taken them all out Sam will say he’s “Just a little winded.” After this you drop down into a room full of barrels, with a kind of low shelf in the middle. Matthew’s letter (expressing concern for his cousin) is on this shelf, but you have to turn around and look behind you after you’ve dropped in order to see it.
/https://oimg.videogamer.com/images/f13a/30_matthew_is_concerned.jpg)
Journal entries and notes in Chapter 15 of Uncharted 4
Avery’s head – journal entry
At the far end of the treasury is a giant statue of Avery, again. On the floor just in front of it is his head, it having been removed by some angry rioters. Interact with the head to get your entry.
/https://oimg.videogamer.com/images/91f8/31_averys_head.jpg)
Notes on the shelves
There are three notes left in the empty treasury: a ship manifest and two inventory notes for shelves in the treasury. The problem is that they’ll be placed randomly around the treasury every time you play the chapter. To find them all you need to open all the drawers, cupboards, and chests you can interact with, but once you’ve found three you’ve found them all.
/https://oimg.videogamer.com/images/c08a/32_to_34_notes_on_the.jpg)
Journal entries and notes in Chapter 17 of Uncharted 4
The waterwheel at the second lift – journal entry
This is the lift that Elena comments is large enough for the jeep to fit in. Get out and look up at the waterwheel driving it; you’ll get a prompt to draw it in the journal.
/https://oimg.videogamer.com/images/22d6/35_the_waterwell_at_the.jpg)
The lift keeper’s note – journal note
In the house on the right after the lift, where you find the Pewter Incense Burner treasure, there’s a note on the right hand side. It reveals more of the shady goings the Libertalia founders were getting up to. But then they were pirates, so we’re not sure what anyone was expecting of them.
/https://oimg.videogamer.com/images/0475/36_the_lift_keepers_note.jpg)
The collapsed bridge – journal entry
After the bridge collapses and you have yet another near death experience in a jeep, turn and look back at the broken bridge for a journal entry.
/https://oimg.videogamer.com/images/7cb4/37_the_collapsed_bridge.jpg)
The mutineer – journal note
From the bridge collapse climb round to a small waterfall. Looking at it, climb up the rocks to the right (or go through a little tunnel under them) and then climb up to the ledge the other side, where you’ll find the remains of one of the rebel inhabitants of Libertalia.
/https://oimg.videogamer.com/images/ee2e/38_the_mutineer.jpg)
Journal entries and notes in Chapter 18 of Uncharted 4
Christopher Condent’s brother – journal note
The first house on the left at New Devon is Founder Condent’s house! Go through but, before you leave it, make sure you’ve found the bedroom (it’s not hard; there isn’t much of the house left). On the four poster bed you can find Condent’s brother, and a note.
/https://oimg.videogamer.com/images/29b7/39_christopher_condents.jpg)
The lady in the garden – journal note
Once you’ve climbed round to a garden with a fast flowing river cutting through the middle, you should be able to spot the remains of a hanging woman on the right side. There’s a note on the table next to her.
/https://oimg.videogamer.com/images/8a45/40_the_lady_in_the_garden.jpg)
Mughal Vase – journal entry
In Baldridge’s mansion, which you swim into after falling/sliding through Richard Want’s mansion, you can find a mughal vase. Before you go into his study (with the fetching pink drapes) take a right and look for the vase on a table between two windows. Nate draws it to indicate that pirates also used vases.
/https://oimg.videogamer.com/images/3379/41_mughal_vase.jpg)
From Condent to Baldridge – journal note
Once you come to Baldridge’s study, with a fireplace on the left that you can duck through to the next room. Before you do, check the desk opposite the doors where you entered. You should find a note from one of the other founders there. It seems tensions were rising.
/https://oimg.videogamer.com/images/fe4d/42_from_condent_to.jpg)
Tew’s dinner invitation – journal note
Trust us, you’ll know when you’ve found Tew’s dining room. Elena finds the invite and reads it out, before putting it back down at the corner of the table. You can pick it up from here.
/https://oimg.videogamer.com/images/adef/43_tews_dinner_invitation.jpg)
Honour among thieves – journal entry
To pick up this one you need to look at the middle of the table. You get to draw a little still life of the horrible dinner party, and Nate titles it ‘honor among thieves’ because he’s really pithy.
/https://oimg.videogamer.com/images/14ec/44_honour_among_thieves.jpg)
Tew’s fireplace – journal note
Go out of the dining room into the next room. Immediately on the left is a fireplace, where a naughty pirate was trying to burn his personal correspondence to cover his tracks…
/https://oimg.videogamer.com/images/f6f7/45_tews_fireplace.jpg)
The freebie – journal note
Elena just gives you this one as you explore Avery’s estate. You don’t have to look anywhere or anything. Anyway, turns out Avery was pretty shady. Who’d have thought?
Journal entries and notes in Chapter 20 of Uncharted 4
The unsent letter in the house – journal note
After Sam does his disappearing act, follow Sully and Elena as they go up through town, but go into the house on the right. Near the bottom of the stairs is a sideboard with a letter on it, which is oddly sad to read now you know what became of Libertalia.
/https://oimg.videogamer.com/images/2929/47_the_unsent_letter_in.jpg)
Journal entries and notes in Chapter 21 of Uncharted 4
Here lies Jonathan Burnes – journal note
While you’re pursuing Sam through the jungle you’ll come up to a ledge that has the remains of a tent and campfire (which Nate will comment on to himself). To the right of that is a skeleton, camouflaged by the green moss that has grown over the half of it facing you. Collect the note to find out what finally became of Burnes.
/https://oimg.videogamer.com/images/9160/48_here_lies_jonathan.jpg)
This concludes Drake’s journal for this adventure. You can go back and flick through it whenever you like from the game’s main menu.
About the Author

Uncharted 4: A Thief’s End
- Platform(s): PlayStation 4
- Genre(s): Action, Adventure, Shooter, Third Person