You can trust VideoGamer. Our team of gaming experts spend hours testing and reviewing the latest games, to ensure you're reading the most comprehensive guide possible. Rest assured, all imagery and advice is unique and original. Check out how we test and review games here
The Destiny 2 Starcrossed exotic mission is here, and with it a brand new exotic for Guardians in Bungie’s space-faring FPS to get their hands on. But how does the quest work, what are its mechanics, and where is the secret chest hidden?
Here, we’re going to take you through the Destiny 2 Starcrossed exotic mission, explaining the mechanics and secrets you’ll need to know in order to come out on top. Much like the Wicked Implement mission before it, there’s a lot of fun to be had, and a great reward at the end, this time the Wish-Keeper exotic. If you’re after a breakdown of the bow and its catalysts in particular though, check out our dedicated guide on that for everything you need to know.
The Starcrossed exotic mission in Destiny 2 explained
Here are the steps you’ll need to follow in order to obtain and complete the Destiny 2 Starcrossed exotic mission.
- Obtain the quest by completing the opening mission of Week 4 of the Season of the Wish.
- Enter the mission and navigate your way through the Black Garden and enemy squads.
- Complete the first sequence and symbols puzzle with the Sire’s Obligation buff.
- Complete the second puzzle with the Dam’s Gift buff by killing the Wyverns and eliminating the Vex boss.
- Complete the third puzzle with the combined Crowned by Dragon’s buff, using both the mechanics you learnt from the last two encounters in unison.
- Defeat the final boss using all the mechanics you’ve learnt. Then claim your rewards.
These are the general steps of course, so if you just wanted a quick overview and intend to learn the specifics yourself, we hope this helps. If you’re looking for a more detailed breakdown of each encounter however, keep on reading.
Step 1: Obtaining the exotic mission: Starcrossed
Before you can begin, you’ll need to actually unlock the mission. This is fairly straightforward to do, as you just need to play through the Season 23 story missions including Final Wish, Polysemy, Apophasis, Tautology, and Enthymeme. This does mean that the quest is unfortunately not available to you if you haven’t picked up the season pass.
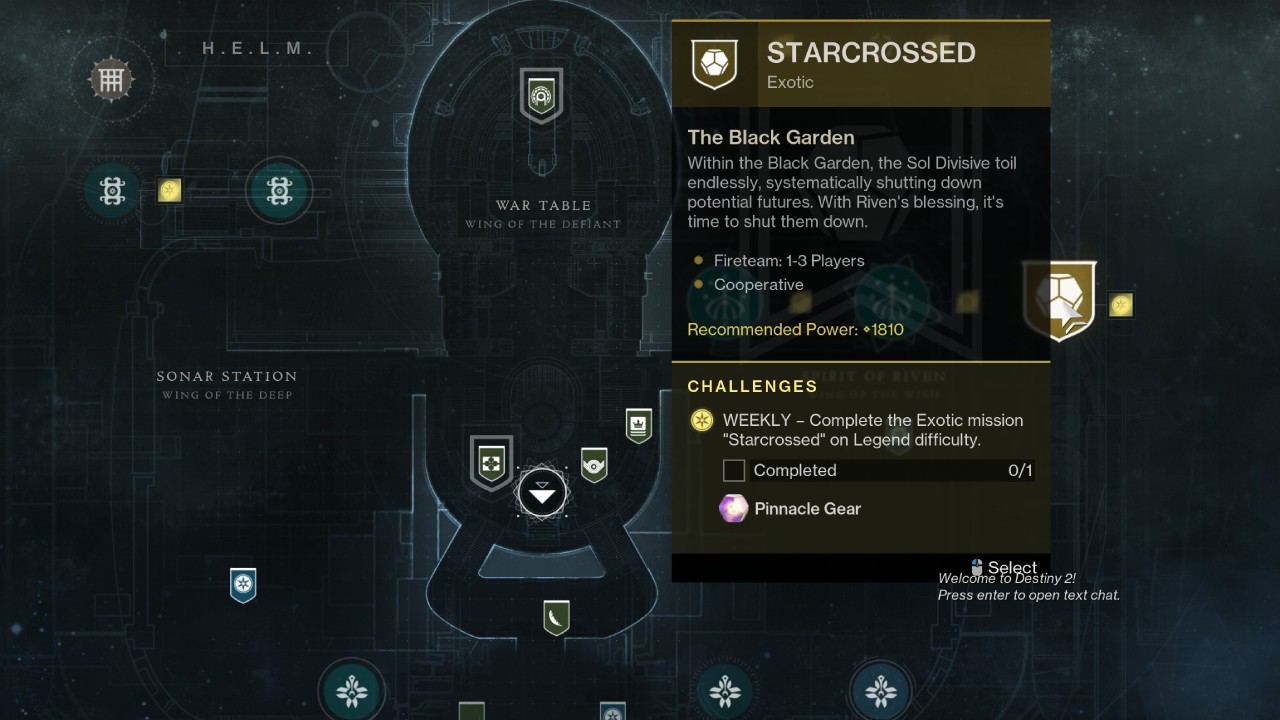
Once you’ve finished the opening mission of week 4, speak to Crow. He’ll follow up on the events of that mission, telling you that they’ve tracked the stolen egg from Riven’s clutch to the Black Garden, and that Riven knows a secret way inside.
After this conversation is finished, the mission will appear on your map in the HELM. You’ll find it off to the bottom right, next to the Riven’s Lair and Coil seasonal activities. Click on it, and when you’re ready, launch into it.
Step 2: Navigating to the first encounter
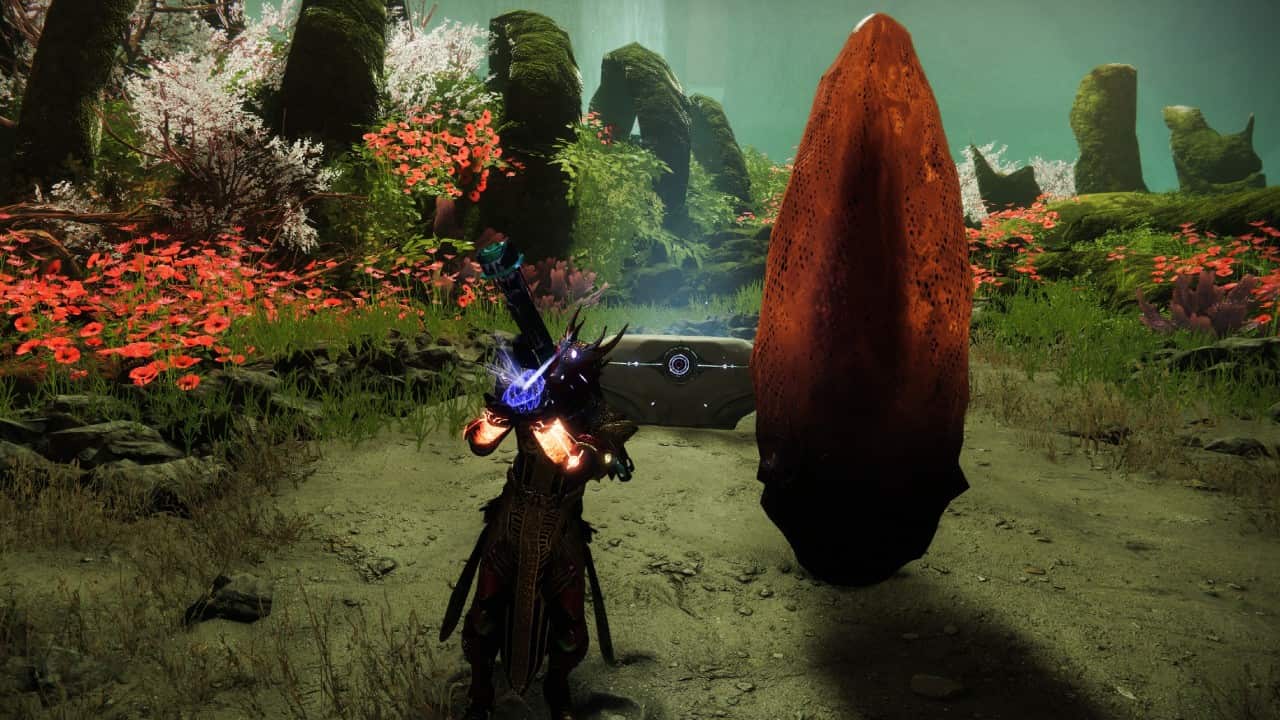
Once you load into the mission, your first job will be some parkour and navigation. You’ll start underground, and need to jump from grassy outcropping to grassy outcropping. This isn’t a Darkness Zone, so falling off during the jumping puzzles isn’t a massive issue.
Did you know?
You’ll encounter some interactable fauna while navigating this area. Shooting the bulbous plants hanging from tree branches will cause them to unfurl, creating a flat, temporary platform you can use to progress. This mechanic is also present in the Garden of Salvation raid.
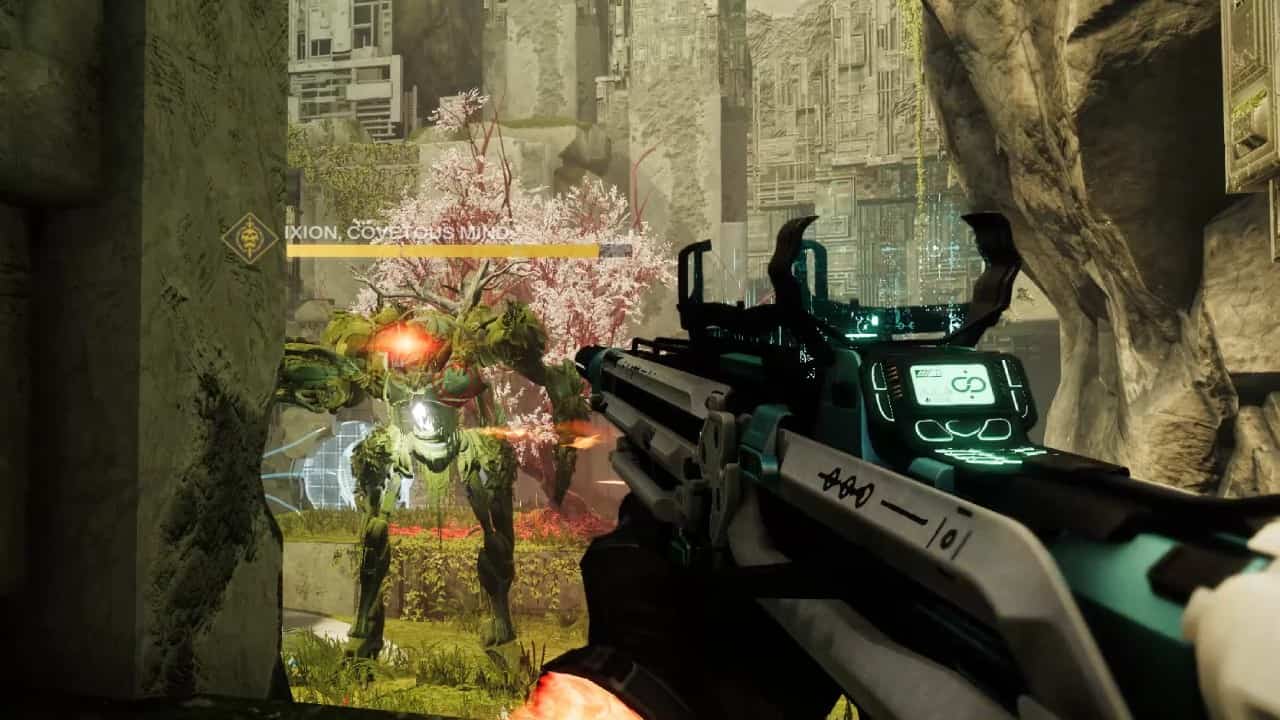
After you’ve navigated out, you’ll need to fight through a few enemies. First you’ll encounter some Vex, and then some Taken. Neither are particularly challenging, but you may want to take some care on solo runs or Legendary difficulty.

Step 3: The first encounter and puzzle
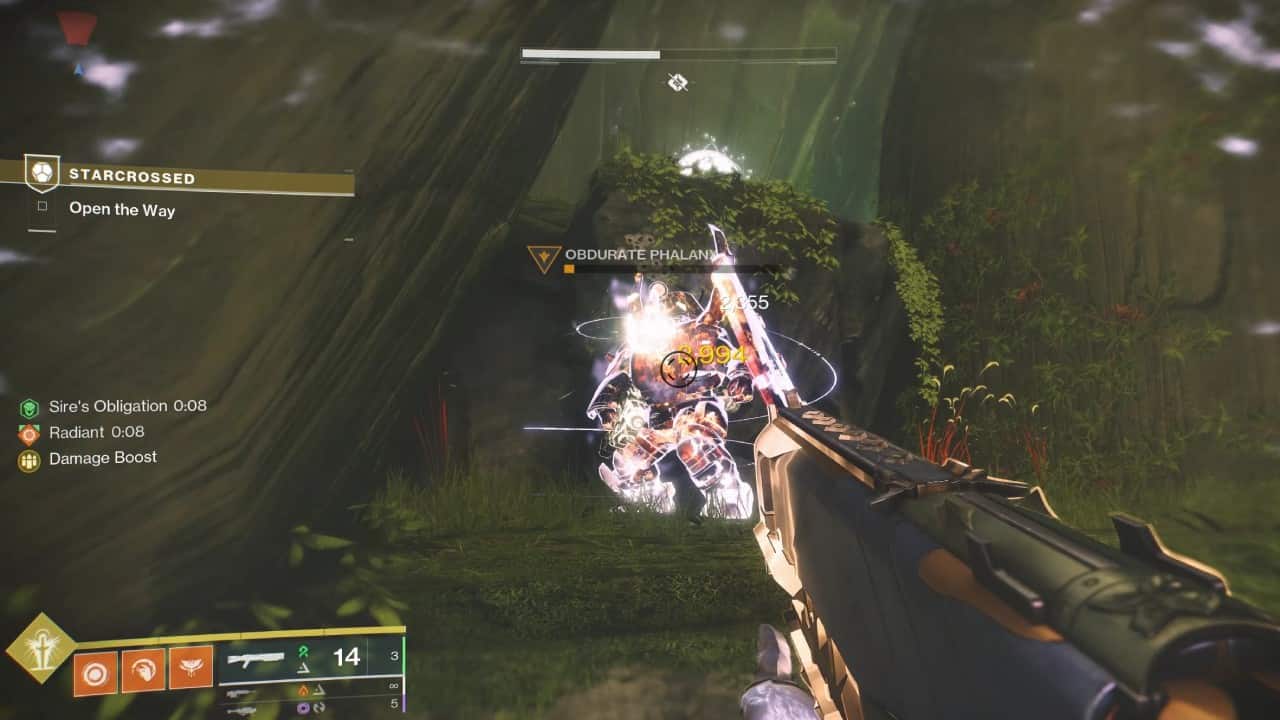
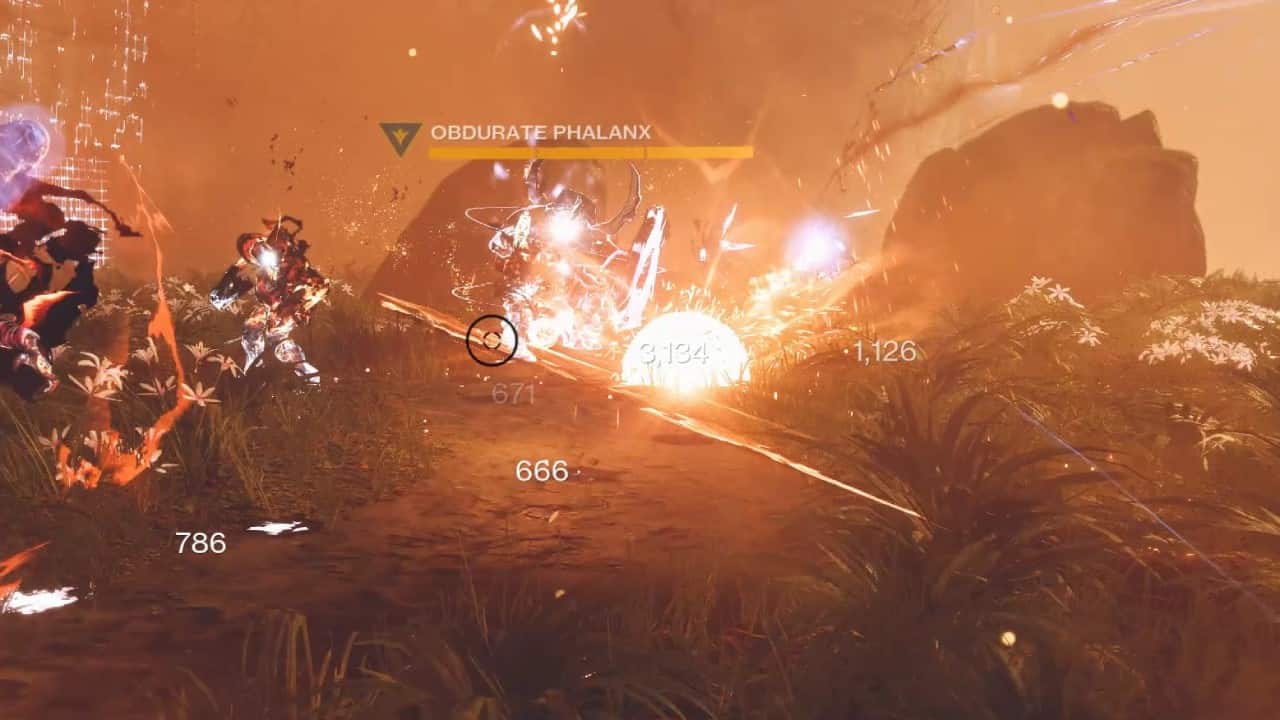
Starcrossed is fairly mechanically involved for an exotic mission, something we greatly enjoyed while running it. The first encounter is pretty simple. Before entering the area, you’ll run into an arrangement of rocks and flowers with glowing pools of light inside. Step into it and you’ll pick up a buff called Sire’s Obligation, which lasts about 50 seconds once you exit the pool. This buff allows you to damage the Taken Phalanx blocking the path, called an Obdurate Phalanx. Be aware that these enemies are tanky, you may want to use grenades or heavy ammunition to dispatch them. Once down, the barriers blocking the way will drop.
Head through and you’ll step into a larger arena with much the same mechanic. Three groups of Taken enemies will spawn around the area in set locations, each with an Obdurate Phalanx among them. The key here is that you need to defeat them in sequence. Three Last Wish symbols will appear above the blocked exit when you have the Sire’s Obligation buff. These will each match to one of the symbols that appear near the spawn locations of the Phalanxes. You need to go top-to-bottom, finishing off each one in the sequence the symbols are displayed in.
You’ll find a pool nearby to each Phalanx, though each will deactivate once you’ve beaten the Phalanx in that area. In between each defeated Phalanx you’ll also get a wave of Vex to contend with, including some Colossi. The arena is large with plenty of cover, so if you’re struggling, try picking off enemies from a distance first.
Step 4: The second encounter and puzzle
The next encounter adds something new to the table, introducing a new buff called Dam’s Gift. This buff has a different purpose, allowing you to traverse Darkness-infested zones of the mission safely. These zones will appear as shrouded in orange mist, and visibility within is slightly obscured. They also have the same length of buff timer. Without Dam’s Gift, you’ll be hit with the Unwelcome debuff, which will kill you.
Dam’s gift appears in pools of orange light surrounded by flowers, and like Sire’s Obligation, you’ll encounter an initial instance to show you the mechanic before the encounter.
Once you reach the next encounter area, you’ll need to use it to navigate to separated areas of the map. Your aim is very straightforward – you’re just looking to defeat the Gatekeeper Wyverns at each location, which will unlock shielded interactable nodes you can then “Imbue with Paracausal Power”. There are three nodes in total, and activating them will bring the teleporter system online. Once the third is active though, you’ll first need to defeat a final wave of Vex that spawn in.
They’ll spawn in the starting area of the encounter, and include a number of Hobgoblin snipers, another Wyvern, and a boss. None on their own are particularly grim threats, though taken together they can unleash a lot of firepower in quick succession. Try to make good use of cover and healing – solar buffs like Restoration work wonders here. Once these vex fall, the teleporter will open, and you can continue.
Step 5: The third encounter and combining the mechanics
After another spate of more challenging parkour, you’ll arrive at the third and penultimate encounter of the Starcrossed exotic mission. This one asks you to use both the mechanics of the previous puzzles together.
You’ll need to pick up the Sire’s Obligation buff, make note of the symbols and their sequence, then traverse into the orange mist areas in order to dispatch Obruadte Phalanxes in order. This means picking up the Dam’s Gift buff too. When you have both buffs at the same time, they’ll combine to grant the Crowned by Dragons buff. Crowned by Dragons can be refreshed by running through either pool, and will allow you to survive in orange mist while also damaging otherwise immune enemies.
Once you’ve defeated all three Phalanxes in order again, you’ll complete the encounter and be able to enter the final boss fight.
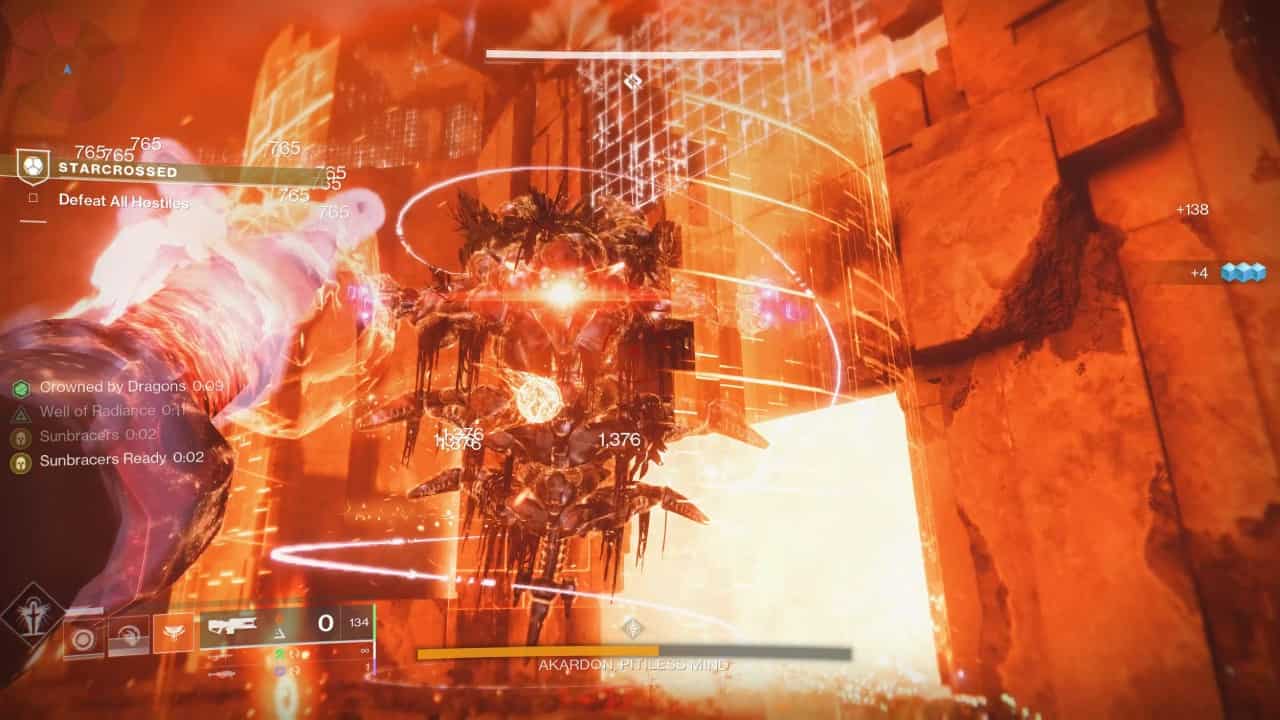
Step 6: Defeating the final boss
After the third encounter, it’s time to face down against the Vex Mind responsible for tracking and trapping Riven’s Ahamkara egg: Akardon: Pitiless Mind. To damage Akardon you’ll need the Crowned by Dragons buff. You can refresh it at any time by the pools on either side of the arena or the pools at the entrance, though the arena sides are guarded by Phalanxes.
Akardon doesn’t have any specific mechanics, but he will spawn in waves of Vex Harpies and Taken Goblins. Due to the Goblins immunity projection abilities, we’d recommend taking the time to safely dispatch them in between damaging the Vex Hydra.
He doesn’t have a huge health pool, so concentrated fire with meta DPS loadouts like the Whisper of The Worm or bipod rocket launchers should make quick work of him. Between decent cover, high enemy density, and an arena small enough to make refreshing the buff pretty straightforward, he’s not an insurmountable challenge.
Once he’s defeated, head through the exit. Here you’ll find an Ahamkara skeleton, retrieve Riven’s eggs, learn more about Riven’s backstory, and be able to open a chest which will drop the Wish-Keeper Strand exotic bow. It’s a pretty good weapon, able to deploy Snareweaver traps after charging up on precision hits and final blows, and dealing extra damage to Suspended targets. If you’re on the fence about whether it’s worth it, we’d argue that it is.
Destiny 2 Starcrossed: The secret portal, the final Star Cat, and the Ishtar Collective in the Black Garden
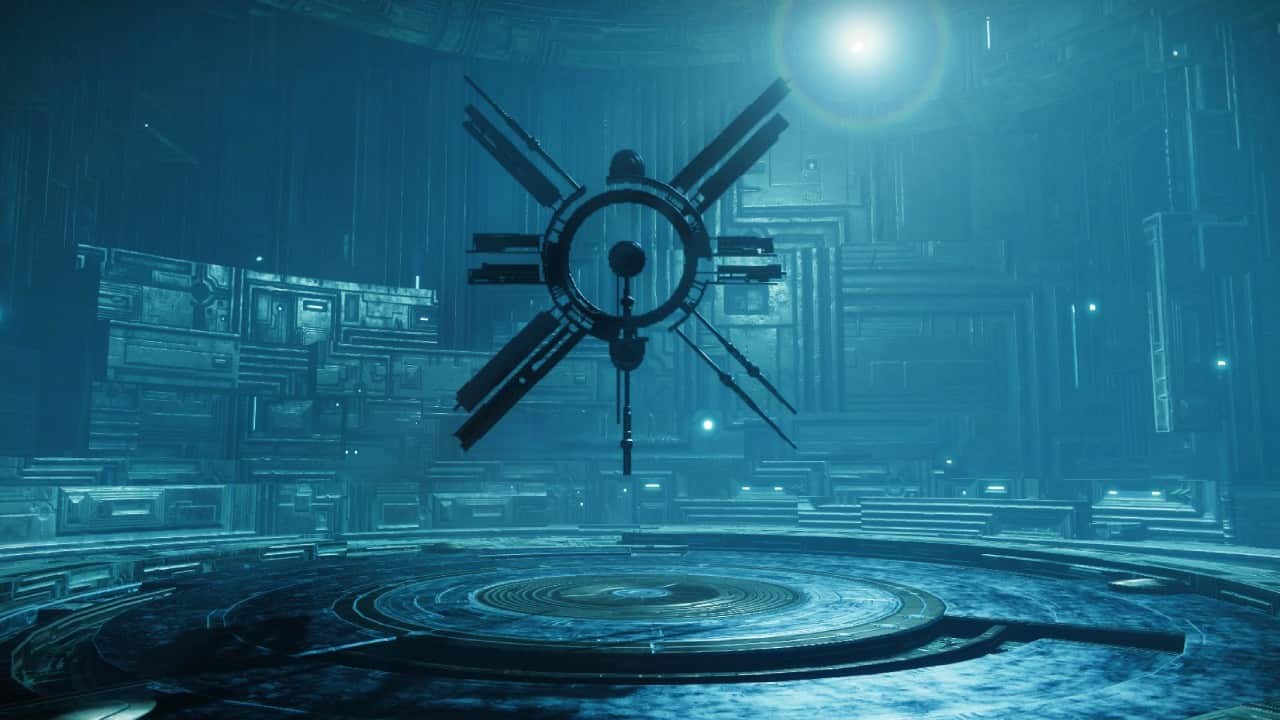
If you’ve been running Starcrossed weekly, you may have noticed something strange going on at the end of the mission after you pick up your loot. A path has slowly been forming, made out of broken sections of dreaming city walkway that spiral upward. That path is now complete, and it leads to an active portal.
Step through, and you’ll find a short Vex hallway on the other side with two interesting items of note at the end. First is the final Star Cat. If you’re an achievement hunter, this is where to grab them. How did it get here? Well it’s a cat – that’s a good enough explanation for us.
The second item of interest is a metal effigy of the Ishtar Collective’s symbol, a research group from the Golden Age based on Venus. The Collective were heavily involved with the Vex, especially lead researchers Maya Sundaresh and Chioma Esi, who have seen their story expanded in the Veil quest. Digital copies of the Ishtar researchers even went out into the Vex network to explore. Given that the Vex seemingly had less influence within Taranis’ lair in the Black Garden, perhaps his nest served as a safe spot for Collective agents? We can only speculate what their appearance here could mean, but could it be an indicator on what to expect in the first Vex-centred Episode coming to us after the Final Shape release date?
There’s one more secret worth picking up in this exotic quest – four hidden chests. Each one will give you some Undying weapons, originally from Season of the Undying and now returned in force. They’re worth picking up and crafting. Let’s go over the location for each one, and how you can reach them. Keep in mind some chests may not appear or become available until you’ve already run the mission and progressed with the Wish-Keeper catalysts.
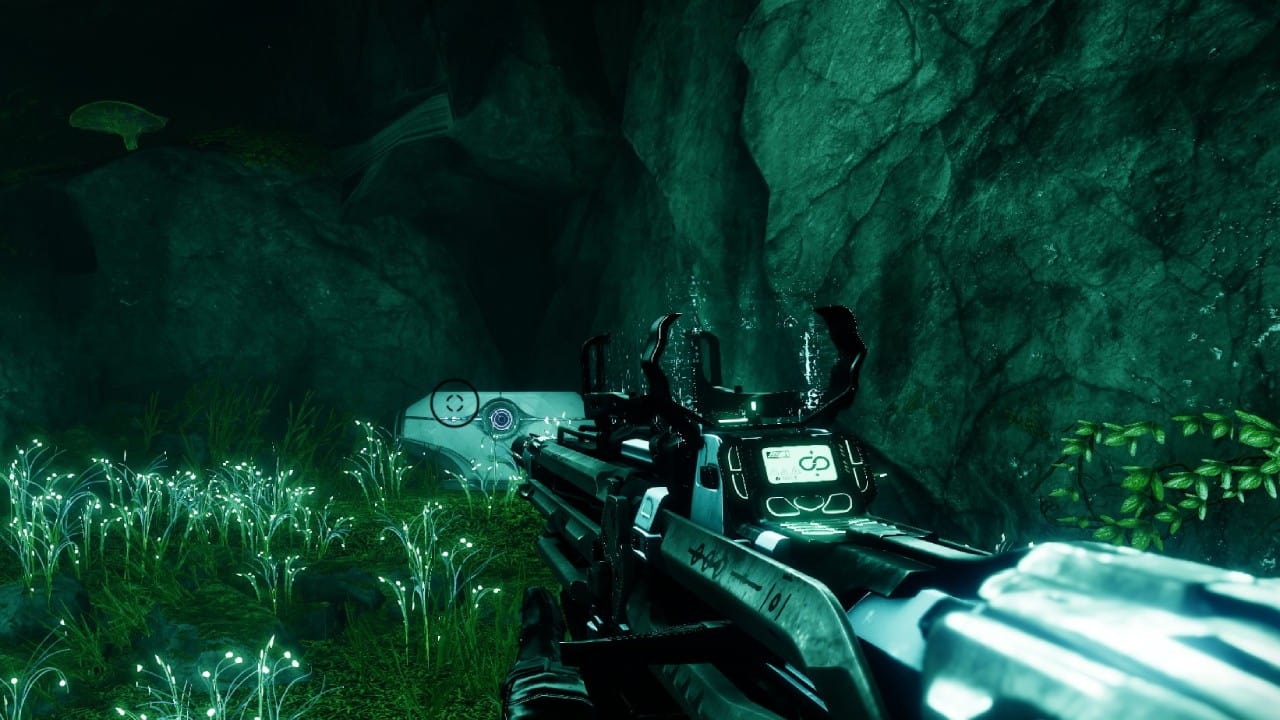
The first secret chest – Mission start
You don’t have to go far for this one. Make your way through the underground parkour area of the mission’s opening section. Just before you reach the first few Vex enemies, you’ll need to cross over a wide tree branch. If you spin around and look down, you’ll see a number of fauna ledges which might at first look to be decorative. Hop down and follow the trail though and you’ll quickly discover this to be a path leading into a small cave. At the back of this cave is your first secret chest. It’ll give you the Taranis’ Bounty triumph when you open it.
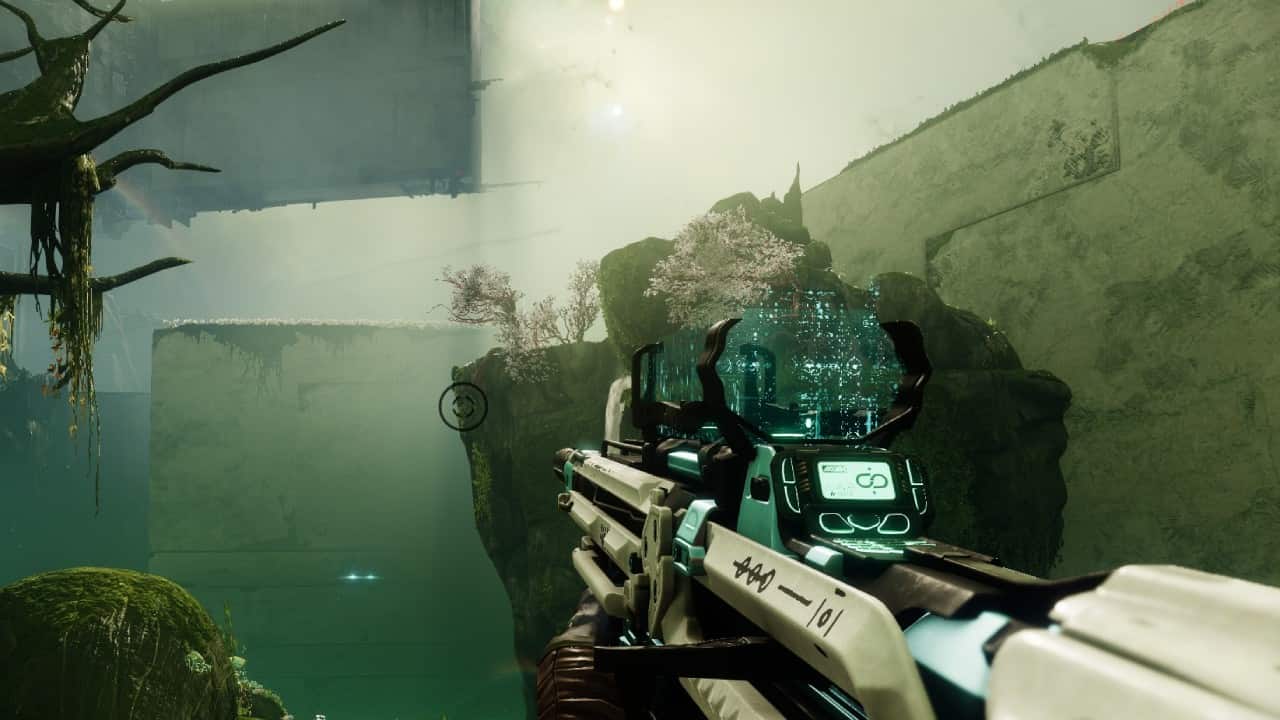
The second secret chest – The Overland (not the Minecraft one)
Your next chest is also really close by. Once you’re up in to the surprisingly gorgeous garden vista of Overland – the area right after the caves – head towards the back. Here, you’ll find a glowing red pool with Dam’s Gift in. Pick up the buff and go behind the Waterfall – the chest is at the back of this orange mist area, and easily accessible if the buff is active. You’ll get the Taranis’ Treasure triumph once opened.
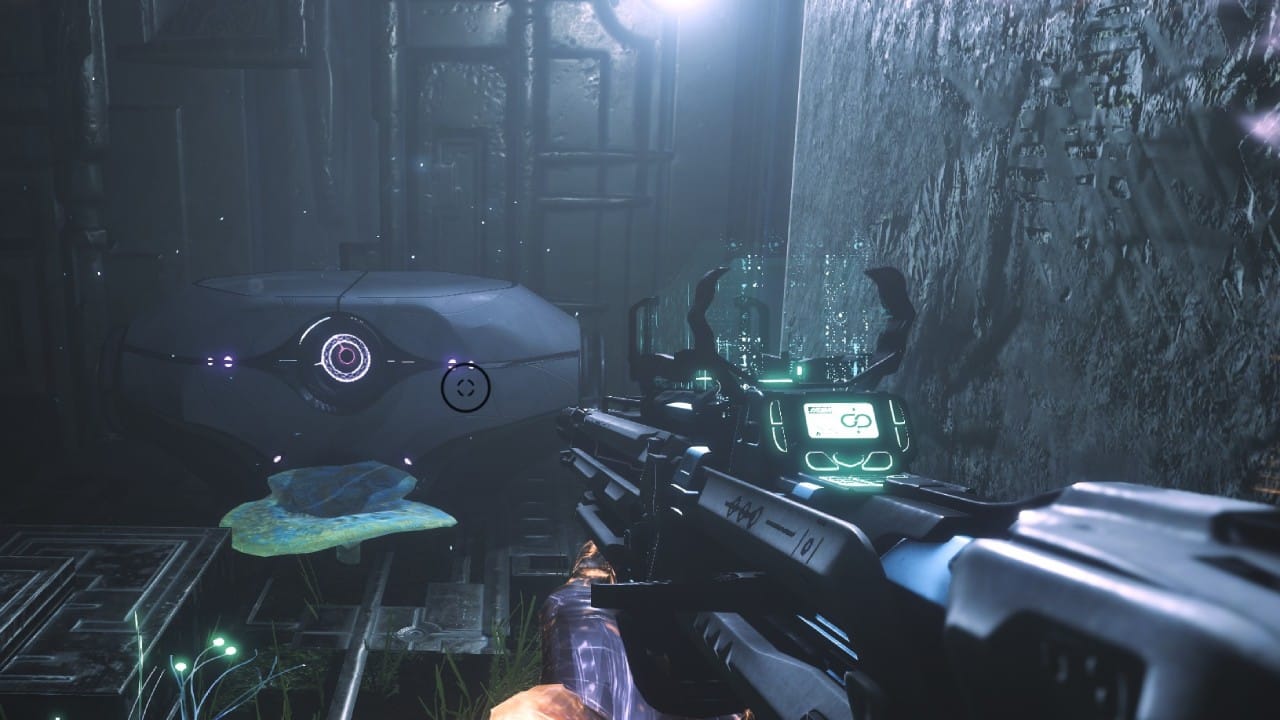
The third secret chest – Hidden in the mists
This one is a little further on, and you’ll need to get to the ‘first’ instance of Dam’s gift in-between the first and second encounters to find it. Here, you’ll find the orange pool meant to teach you how the buff works. Ahead, you’ll have three distinct openings leading into the orange mist. Take the smallest opening on the left and follow the path into the mist rather than through it – you’ll eventually find a Taken Phalanx hanging out at the back. Kill him and climb into the little stretch of hallway he was guarding to find the third chest of the encounter.
The fourth secret chest – They really didn’t want you to find this one huh
Chest number four is perhaps the best hidden so far. You’ll encounter it during traversal between the second and third encounters, after the parkour section. You’ll pass through two sizable clearings of Garden architecture, the second of which has a Dam’s Gift pool in it. Grab the buff, u-turn, and head back the way you came to the section you just passed. Of too the back left tucked far away is a wide, completely unremarkable alcove. This area will be sprayed across the floor and up the walls with scarlet red flowers. Go closer, and you’ll find that the left wall has a tiny, almost invisible narrow gap at the back, guarded by red mist. Squeeze through and you’ll find the chest right inside.

And that’s everything you should need to know about the Destiny 2 Starcrossed exotic mission. Don’t forget though, if you want to complete a build you’ll need some powerful armour to go along with your armaments. Check out our picks for the best Warlock exotics, best Titan exotics, and best Hunter exotics if you want to learn more. If you’re after something new, how about checking out our feature on 10 ways Destiny 2 can fix its biggest problems, instead?
Destiny 2 Starcrossed mission FAQ
Can you solo the Starcrossed exotic mission in Destiny 2?
Yes, matchmaking is not enabled for exotic missions, and Starcrossed is relatively easy to solo where these missions are concerned.
Is the Wish-Keeper exotic worth it?
The Wish-Keeper exotic is an excellent crowd control weapon, and versatile enough to be a lot of fun to use. Add in the relatively easy Starcrossed mission and we’d argue that it’s definitely worth the effort.
How many hidden chests are there in the Starcrossed exotic mission?
There are three hidden chests we currently know of, all located prior to the second encounter of the mission.
About the Author

Destiny 2
-
UnknownUnknown
- Platform(s): Google Stadia, PC, PlayStation 4, PlayStation 5, Web, Xbox One, Xbox Series S/X
- Genre(s): Action, Adventure, First Person, Massively Multiplayer, Shooter


