You can trust VideoGamer. Our team of gaming experts spend hours testing and reviewing the latest games, to ensure you're reading the most comprehensive guide possible. Rest assured, all imagery and advice is unique and original. Check out how we test and review games here
Manor Lords hides its moving parts well, the internal cogs, numbers, and rules that govern how villages transport goods, crops are harvested, and storehouses stay stocked with goods. It’s all to its benefit keeping that magic concealed but when playing Manor Lords it makes figuring out the best layout for your settlement challenging.
Add to that the fact that it’s a game that promotes efficiency over aesthetics, you can’t simply put down a village that looks the part; you need one that works well. Though this is a bit of an inexact science, we’ll walk you through the best settlement layout we’ve come across in our over 50 hours with the game for review. It’s by no means the end all and be all, but one that’s worked for us so far.
The most optimal layout we’ve found so far
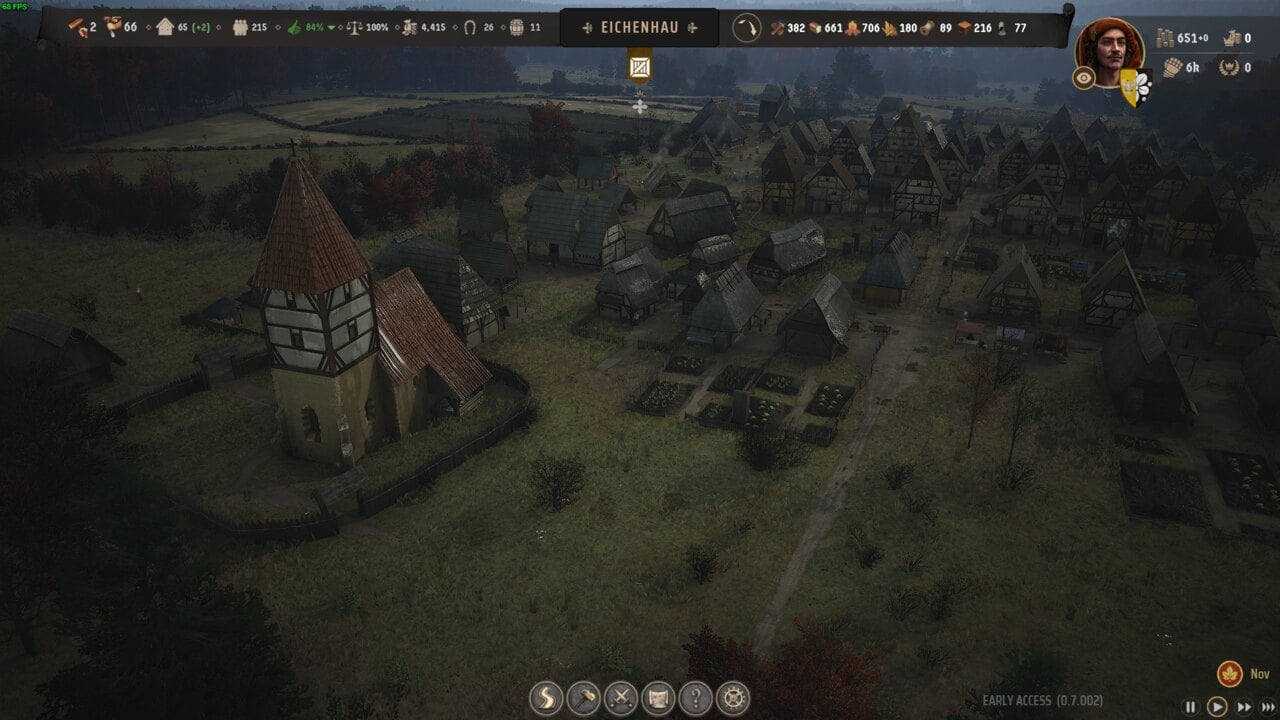
Nothing beats an image for this, so take a look at the image below for a visual idea of the best layout we’ve worked out so far.
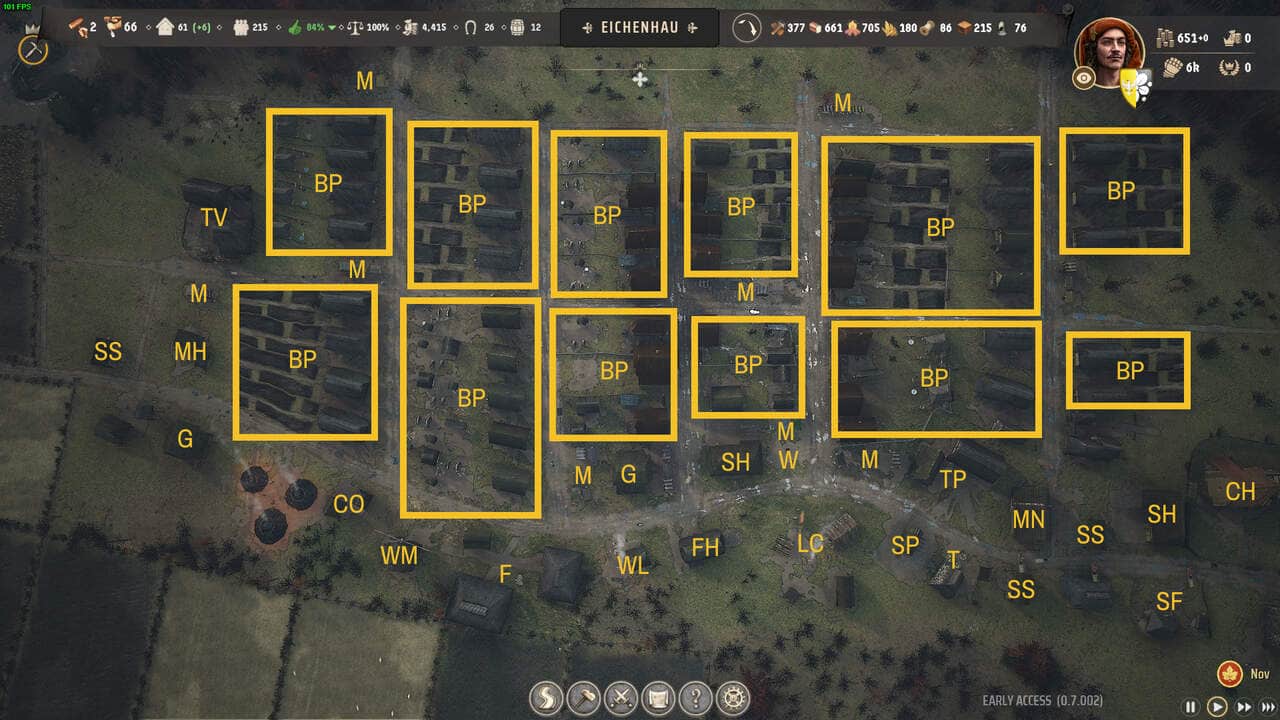
The golden rule is to build a condensed settlement where workers don’t need to travel far when transporting goods between production buildings, storehouses, granaries, market stalls, and burgage plots. We opted for a grid layout as it allowed us to keep buildings within a fairly contained area while still allowing for burgage plots with extensions. Production buildings are all placed south of the burgage plots on a single long road and close to both a Granary and Storehouse. You can also set them up on a smaller grid arrangement if that works for your specific map’s resource positions.
We tried to place related buildings close to another, for example the Logging Camp and Sawpit are together to speed up the movement of Timber to the Sawpit to produce Planks. Similarly, our Farmhouse is close to a Granary, Windmill, and Communal Oven to speed up Bread production after each harvest.
Best layout tips
Here are several general tips to think about when planning the best settlement layout in Manor Lords:
Bunch storehouses and production buildings together
Villagers move across your settlement in real-time and it takes time for resources to be transported around. For example, a villager collecting Berries from a Forager Hut will need to walk to the hut then take the Berries to a Granary then on to a food market stall. To cut down on this travel time, always bunch storehouses, granaries, and production buildings as close together as possible, and not too far from your burgage plots. By doing this, you’ll ensure a fluid and steady flow of resources, goods, and commodities through not just the production chain but also when they’re being distributed to burgage plots.
Smaller, spread out marketplaces are better
When planning out marketplace plots, always aim for small plots spread out evenly between your burgage plots, but never too far away from the nearest Granary and Storehouse. It’s tempting to build a massive marketplace at the centre of your village, but logistically this creates an issue funnelling goods to distant burgage plots, eventually leading to a negative effect on Approval rating.
Ideally, you’ll want to build each marketplace with three available stall spots – one for food, another for fuel, and the last one for clothing. Due to the fact that stalls are built automatically by workers, this can’t always be guaranteed, but remember that you can demolish individual stalls. So, if you want to shift a clothing stall, make sure your target marketplace has a free plot, then delete the clothing stall, and often it will be relocated.
Resource proximity
Resource spawn points are assigned randomly at the start of a new game, but you want to build gathering/harvesting buildings as close as possible to the deposits, especially Berries and Wild Animals to ensure a robust food source in the early game. If you’re unhappy with the deposits, you can always exit then start a new game repeatedly until they spawn somewhere more optimal for your planned settlement.
Things get a little more tricky when it comes to Stone, Iron Ore, and Clay deposits, which tend to always spawn quite far from your starting Settler’s Camp. These don’t matter so much as they are what we consider mid to late game resources. By then you should have several storehouses and enough villages so that the longer travel distance won’t matter so much.
Tavern, Church, Manor, and Well placement
The placement of the Tavern, Church, Manor, and Well (subject to underground water availability) in your settlement doesn’t really matter at all when it comes to finding the best layout in Manor Lords. As long as the settlement has one of these buildings (and have Ale in the Tavern’s case, they’ll serve the entire settlement. To save space, don’t hesitate to construct them away from your central grouping of burgage plots and production buildings. They’ll have exactly the same effect.
About the Author

Manor Lords
-
UnknownUnknown
- Platform(s): PC, Xbox One, Xbox Series S/X
- Genre(s): City Builder, Strategy


