Video Gamer is reader-supported. When you buy through links on our site, we may earn an affiliate commission. Prices subject to change. Learn more
The only bonfire before the Covetous Demon is the Mines in the early part of Harvest Valley. From here, turn right and head towards the poison gas pit. Kill the hammer guy on the wooden ledge, and enter the room on the far left, killing the two hammer guys here. This is technically Earthen Peak, but as the boss at the end of this area must be killed to reach the first bonfire, we’ll consider this the end of Harvest Valley.
The first thing to do is exit the door on the opposite side of the room, drop into the poison swamp and take the door to the right, sprint all the way to the end and grab the Estus Flask Shard. Backtrack and take the door to the left, kill all the blue mushroom-like bugs in this room, they spew poison gas, but aren’t much trouble. Using a Pharros’ Lockstone in this room reveals an illusory wall in the opposite side of where you place the Lockstone that contains a chest with a Poisonbite Ring and Soul of a Proud Knight. The Poisonbite Ring is a great help for these areas and beyond as it raises poison resistance, so it’s definitely worth grabbing.
Head back out the swamp and back into the main room. Take the ladder up where the third hammer guy is amongst the poison pots. Ignore him and head back to the swamp area. Follow the ledge around and up the wooden bridge. Kill the mushroom bug on the small platform. Don’t run toward the hammer guy just ahead, there’s an ambush of three of them in this open area. Coax each of them to this platform one at a time and backstab or, if you’re a mage, get as many attacks in from here before they get close.
After the three guys are down, you can get into the cell behind you from this platform. It’s pretty tricky to make, as rolling off the small platform when you land will mean falling into the poison below and dying. You need to run towards the cell so you combat roll into the room. Don’t jump, as you’ll overshoot it. Inside the cell are three headless thieves, a trapped floor tile that, when pressed, leads to arrows being shot from behind you, a Titanite Shard, a large Soul of a Nameless Soldier and a chest containing a Heavy Crossbow + 3 and heavy bolts.
Head back outside, roll down to the stairs you took to get the Estus Flask Shard, head back up the ladder and back around to where you killed the three hammer guys. There’s some stairs to the right that leads to a bunch of mushroom enemies, kill these before approaching the chest. The chest is booby trapped, so roll away as soon as you open it, then grab the item inside. Head back down the stairs and towards the small gap in the landing (where the wooden planks are), you can drop slash the blue bug in here, and grab the item it’s guarding.
After this, head back up and proceed through the mist to face the Covetous Demon.
How to beat the Covetous Demon
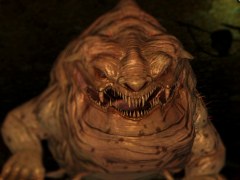
The Covetous Demon looks like Jabba the Hutt’s stunt double, and packs a hell of a punch. Don’t lock onto him, as his tail is his weak point and the lock-on focuses on the middle of his body.
His body rolls and jump attacks knock you over, doing heavy damage in the process. If ever you’re low on health, run to the broken staircase and heal. You’re faster than the Demon, so finding the space to heal up shouldn’t be a problem.
Attack his tale with fire weapons if you have them (the Fire Longsword is once again a big help).
Once he’s dead, head up the stairs, speak to Lucatiel and she’ll give you the Ring of Steel Protection + 1, then light the bonfire.
