You can trust VideoGamer. Our team of gaming experts spend hours testing and reviewing the latest games, to ensure you're reading the most comprehensive guide possible. Rest assured, all imagery and advice is unique and original. Check out how we test and review games here
Ever since coming out in Early Access, inZOI has offered a unique way to customize your virtual space by crafting objects with the 3D Printer feature. Whether you’re bringing your favourite real-life items into the game or designing custom accessories, the 3D Printer lets you add a personal touch to your Zois and their in-game apartment. However, using the 3D Printer effectively can sometimes be a bit tricky, especially when it comes to using it to generate clean and precise items. That’s why our guide will walk you through everything you need to know to get the best results out of 3D Printing in inZOI.
How to use the 3D printer in inZOI
Using the 3D Printer in inZOI is a simple yet creative process. However, just like real-world 3D Printing, getting the most out of it requires some work. First things first – start by entering Build Mode and selecting the Craft tab. From there, you’ll see an option to choose the 3D Printer. Once you’ve selected it, you will be prompted to upload an image of the object you want to print. After uploading, the 3D Printer will take a few seconds to process and generate the object based on the image you’ve provided.
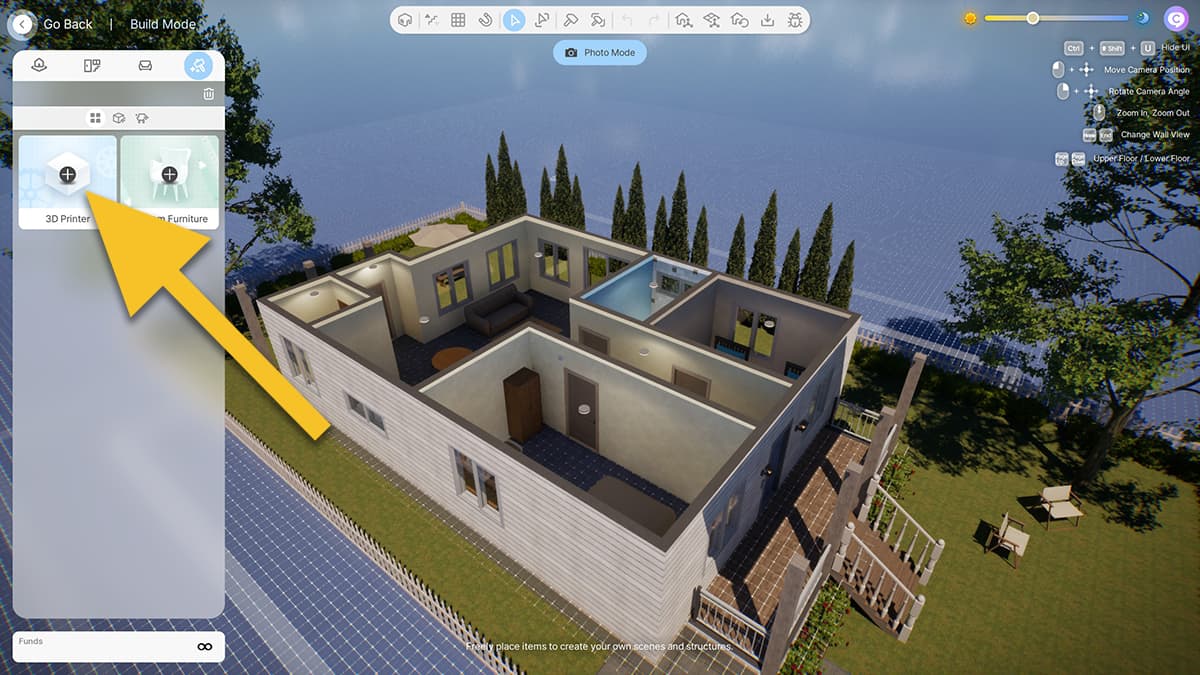
While in Build Mode, click on Craft, then 3D Printer. Captured by VIdeoGamer
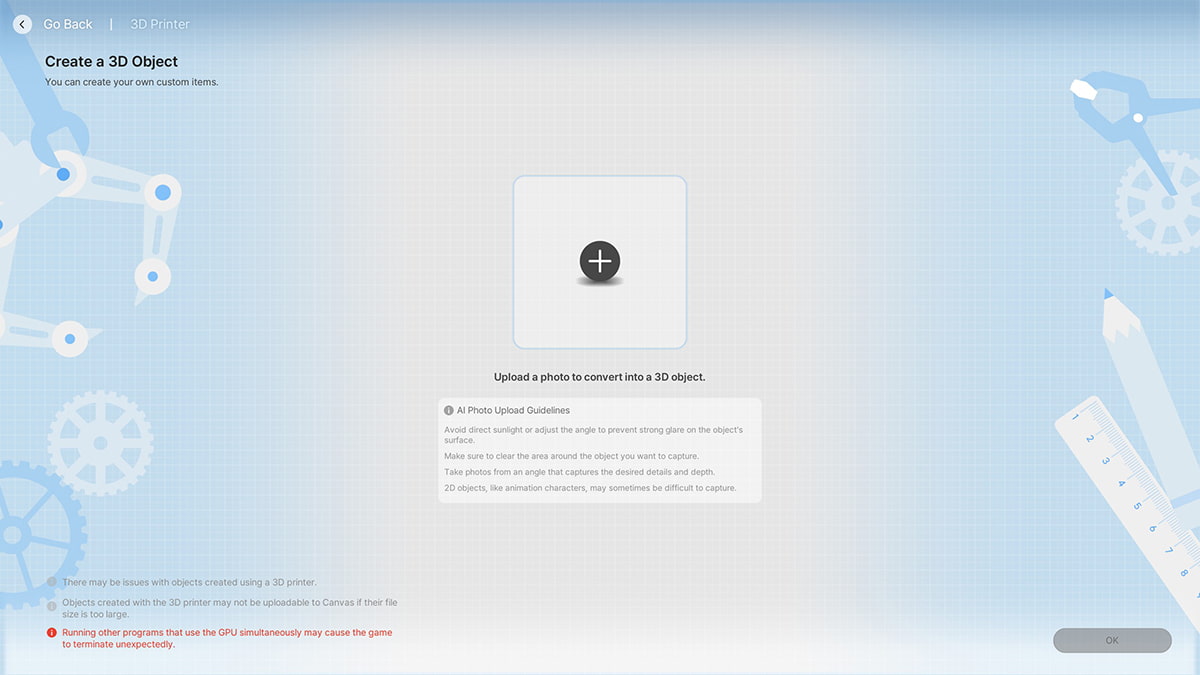
Upload the image of the object you want to have 3D printed. Captured by VideoGamer
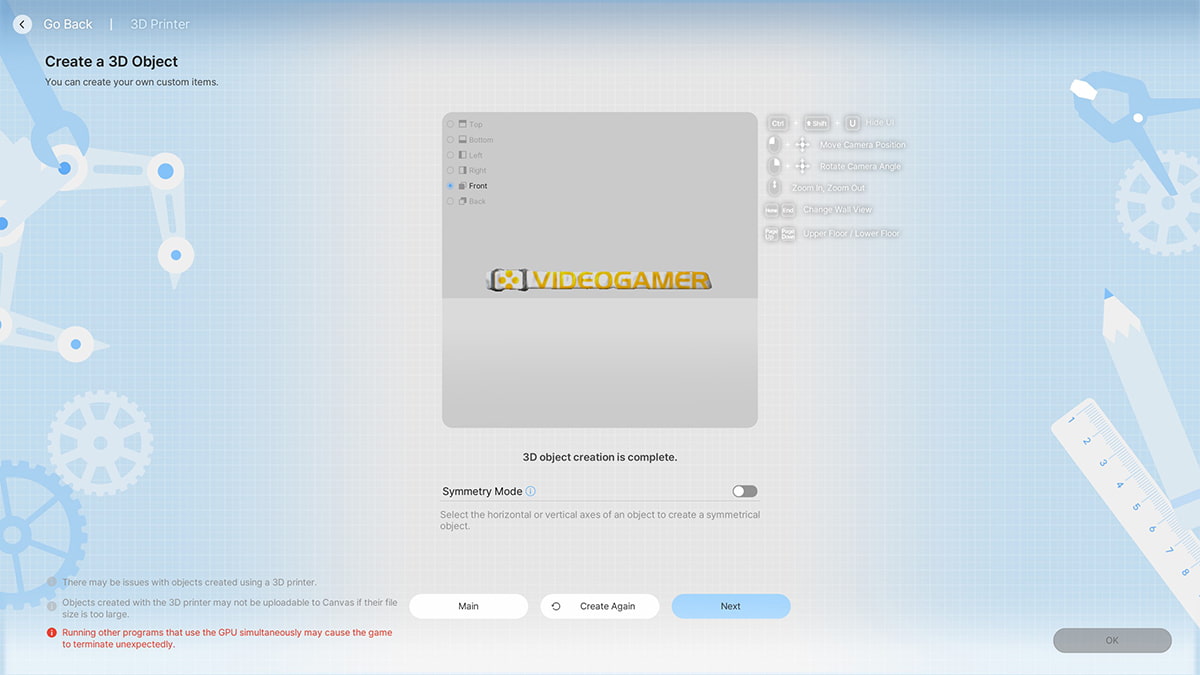
Once the initial design has been created, you can click Next to tinker further. Captured by VideoGamer
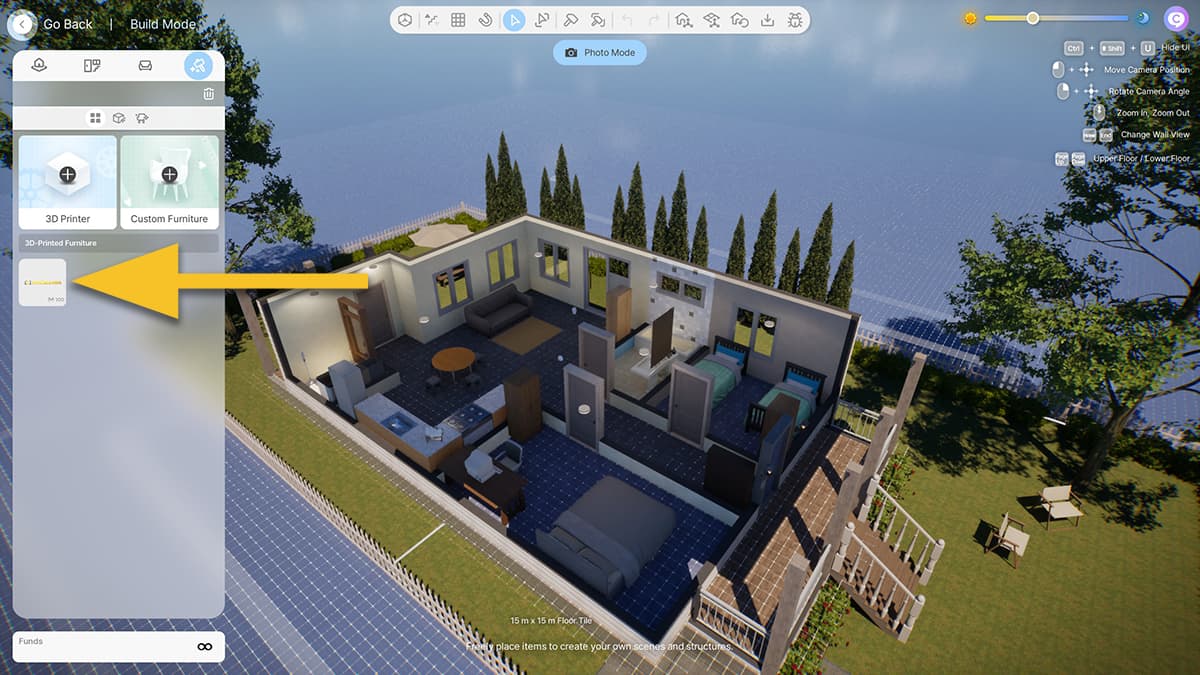
If you prefer to have a 3D Printer in your in-game house for easier access, you can purchase one for 628 Meows. After placing the printer anywhere in your home, you can use it to generate objects at any time. Each object you create costs 100 Meows to purchase after it’s saved, so keep an eye on your money and funds if you’re planning to print multiple items. In that case, make sure that your Zoi has a stable source of income.
If you notice that your print didn’t come out as well as you hoped, you can re-generate it again with the Create Again button to get a different, and hopefully, better result. On the other hand, sometimes the 3D Printer system doesn’t work when you try to use it. The simplest fix is to just quit the game, restart, and try again.
How to edit your 3D printed object
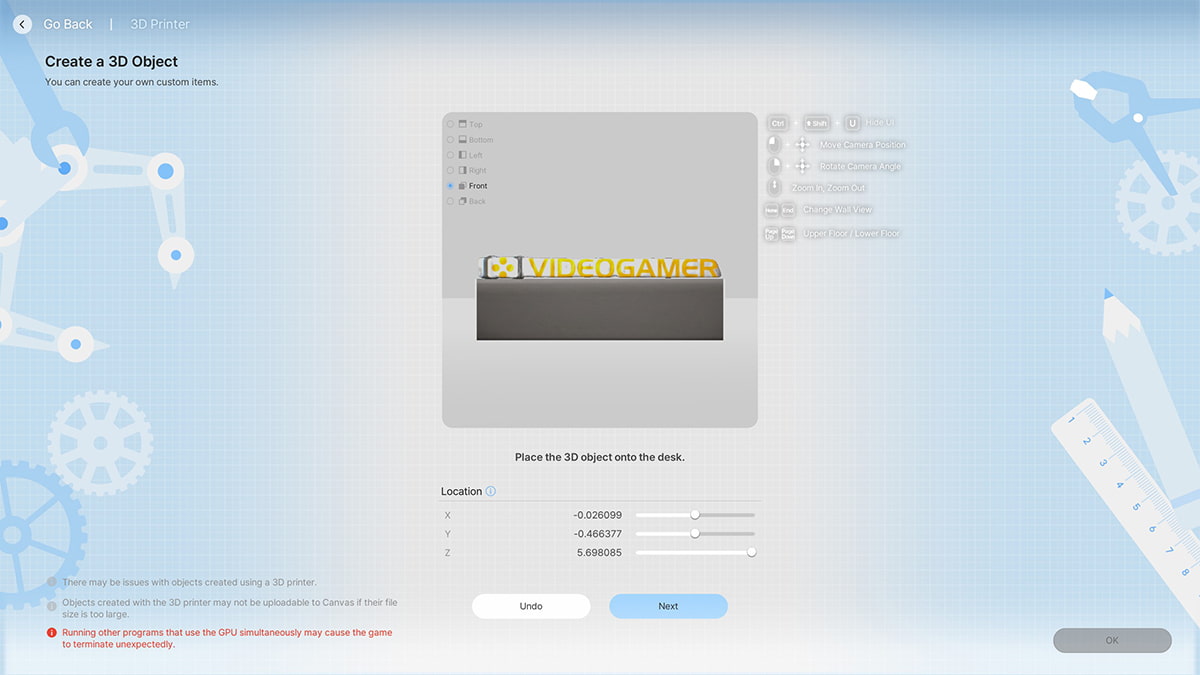
Contextual menus will help you define your object’s placement in the world once it’s completed. Captured by VideoGamer

Once done, all that’s left is to name your item and finalize it. Captured by VideoGamer
Once the object is generated, you have the option to adjust its position and appearance within your virtual space. The X, Y, and Z-axis bars allow you to rotate and orient the object to your liking. For example, the X-axis bar lets you move the object horizontally, adjusting its position from left to right. The Y-axis bar controls the vertical movement, allowing you to place the object higher or lower in your space. The Z-axis bar is used to resize the object, so you can make sure that it fits perfectly in its designated space.
If symmetry is important to your design, you can turn on the Symmetry Mode. After making any adjustments, you can click Next to finalize the placement of your object. This process allows you to customize your in-game space with a high level of precision, making it easy to incorporate your 3D-printed creations into your inZOI home, where your loved ones can marvel at them.
How to craft 3D printed accessories
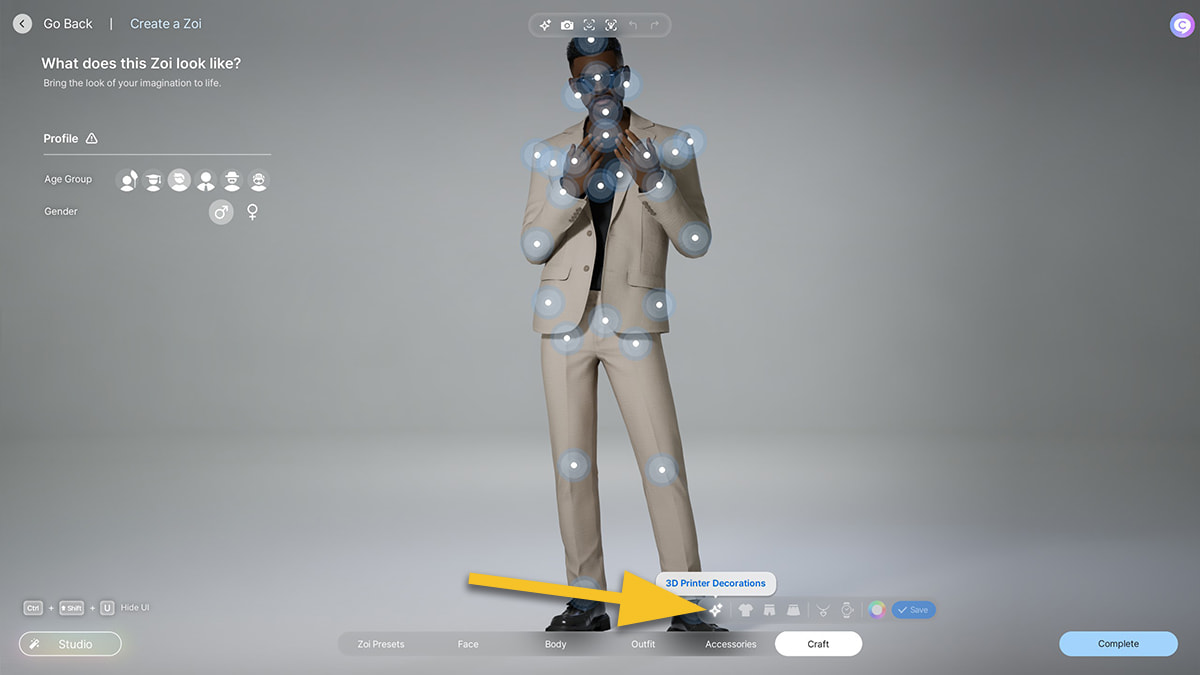
Click on Craft, then 3D Printer Decorations. Captured by VideoGamer
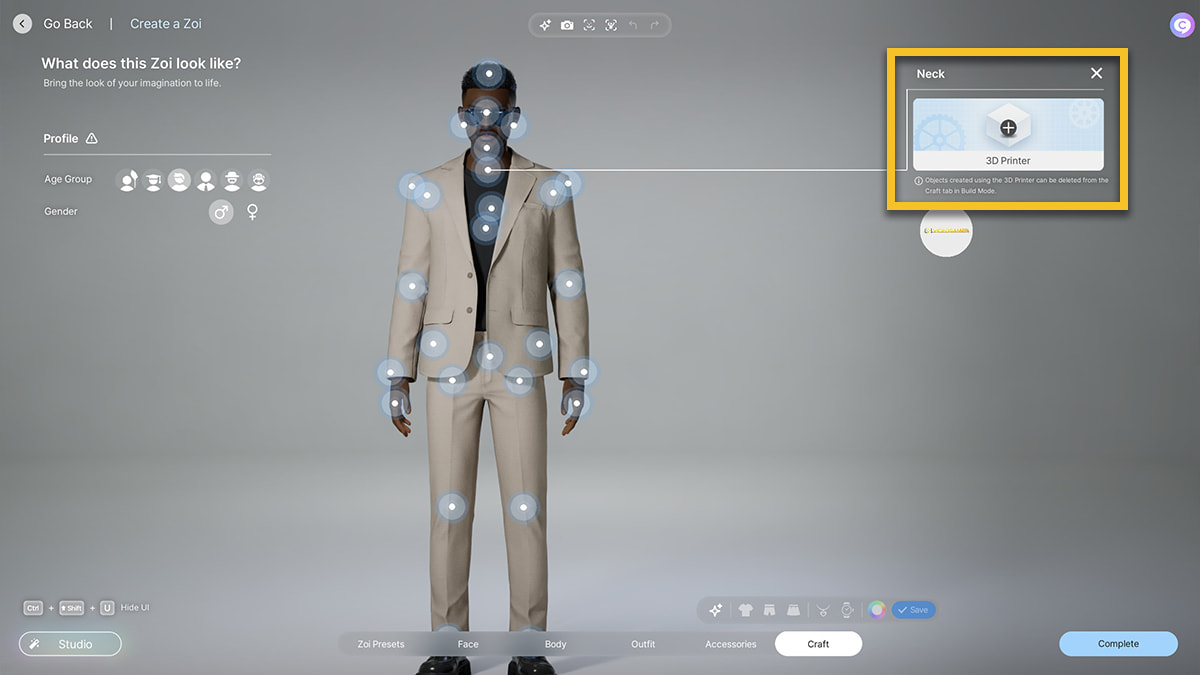
Select the 3D Printer option to craft your own accessories. Captured by VideoGamer
While the 3D Printer itself doesn’t have an option for crafting accessories directly, you can create custom accessories for your character through the Craft Clothes menu. To do so, open the Craft tab and select 3D Printer Decorations. This section will show several spots on your character where accessories can be added. You can then choose from the objects you’ve created using the 3D Printer and apply them to your character as custom accessories.
One thing to note is that crafting accessories can be finicky, especially if you want them to have a specific shape or curve. For example, when creating an eye patch, it may curve inward instead of outward. To solve this, you can reverse the image before uploading it, then spin it 180 degrees to ensure the design is oriented the right way without appearing backwards. Experimenting with these adjustments can help you get the perfect accessory for your Zoi.
inZOI 3D Printing tips
Creating high-quality 3D objects can be challenging, but there are several ways to improve your results. The most important factor is to ensure that the image you upload contains only one object, which makes it easier for the 3D Printer to recognize and generate accurately. Avoid taking photos of your object in bright lighting or sunlight, as this can cause glare or shine that interferes with the printing process. Instead, opt for a neutral, well-lit setting.
The background of your image is also important for generating clean objects. For the best results, use a contrasting background, such as a green screen or a transparent backdrop to help the 3D Printer distinguish the object clearly. Images with cluttered or complex backgrounds (such as ones taken in your yard, for example) can make it difficult for the printer to properly capture the object’s details, so simpler or monotone backgrounds are always better.
Another tip is that the 3D Printer performs better with simpler objects. Intricate designs or objects with a lot of fine details may not translate well into 3D prints. Stick to simpler shapes and objects for more accurate results. If you notice that some edges are missing or the object isn’t coming out as expected, try rotating the image or adjusting the placement of the object to see if that improves the print quality.
While it’s still early days, we’re certain that industrious players will over time release mods that support the 3D printing feature in inZOI. For example, we could see one that provides even more control over the item, letting you customize more details once the system captures the image.
About the Author