You can trust VideoGamer. Our team of gaming experts spend hours testing and reviewing the latest games, to ensure you're reading the most comprehensive guide possible. Rest assured, all imagery and advice is unique and original. Check out how we test and review games here
If you’ve ever played a Telltale game before then you know the drill here. As Bruce Wayne/Batman you’re going to get a lot of choices that will impact the later episodes, and if you’re here then you’re the sort of person who wants to know what those impacts will be. Since this is the first episode we don’t know what many of them are yet, but what we do know we’ve put down here, chapter by chapter, as well as marking out the key choices you need to worry about.
Batman the Telltale Series Episode One Chapter One: Welcome to Gotham Walkthrough
Your first introduction to Bruce Man – no, I mean Bat Wayne – is in the middle of foiling a heist on or about the 52nd story of the City Hall.This is intercut with Alfred fussing over Bruce back at the manor later, and there is some incidental conversation with him. You don’t score any ‘Alfred will remember that’ points for it, it’s more a flavour of the approach you can take to being Batman.
The first one of the more significant kind of conversations is with Catwoman, up on the roof of said City Hall, when she asks you why you dress up like a bat and beat the heck out of people. She will remember your response, though she asks you almost exactly the same thing later in the episode, too:
The city needs protecting
No one else can do the job
I do it for the thrill
Batman the Telltale Series Episode One Chapter Two: The One that Got Away Walkthrough
As Bruce Wayne you now have to deal with a fundraiser for Harvey Dent’s mayoral campaign. Your conversation with Harvey won’t have any huge impact for later in the chapter, but you do get to help choose a slogan for him if you want, your options being:
“A new face for Gotham” (do you see what they did there, reader?)
“Our hope is in Harvey”
“Put a Dent in Crime”
Harvey will then take you over to speak to Regina and Bob Zellerbach, influential donors that Harvey wants on board with the campaign. Bob makes some old money noise about how he doesn’t know Harvey, but he trusts Bruce because he’s a Wayne. Your responses are:
My name doesn’t matter.
Tonight is about Harvey.
We can all make a difference.
Harvey takes note of the first two options and the the Zellerbachs the last. Bob then goes off on one about how one man can’t fix everything and etc., which gives you another conversation choice:
Depends on the man
Harvey Dent can
Hope can light the darkness
Once again, you’ll get a prompt that the Zellerbachs remember your response, but you won’t get a reaction from Harvey no matter which one you pick. The Zellerbachs will then begin describing how horrible the Waynes death was, apparently aware that it happened in front of Bruce but ploughing ahead anyway. You can respond politely or curtly, but they won’t be especially bothered by it.
After your delightful chat with the Zellerbachs has finished, Vicki Vale will approach you. Harvey asks her to leave, and you can agree with him or you can let her stay – either on or off the record. If you let her stay on the record then keep that in mind when you talk to her, because she’s a goddamn journalist after all. Anyway, Bruce does his bored playboy flirting thing, and she’ll ask if he’s actually enjoying the party:
Politics bore me
Better, now that you’re here
Everyone loves the host
The second option is obviously the most flirtatious, whilst the third option is the least so, but whatever you say Vicki is going to Remember That. She’ll then notice that you have blood on your shirt, but you can cover it up successfully with any of the dialogue options; it’s really just so Alfred can have a go at you about it later on.
At this point Falcone, noted mob boss, will crash the party. Harvey will tell you that it’s for the greater good to speak to him and you can respond to him, but even if you say you don’t want Falcone in your house you’ll still have to deal with him. The significant choice comes when Falcone offers his hand. In either case your choice will be on the front page of the next morning’s paper, which you can see on the steps to Cobblepot Park. It will also be mentioned at the press conference in chapter three.
Key Choice: As you enter a private audience with Falcone you can choose to insist Harvey is party to it, or that he stays outside; according to the end slate about a two thirds of players allow Harvey to stay. Harvey will remember your choice; he’ll also remember some of the conversation beats you have with Falcone, like the following, where Falcone says he’d rather Harvey actually do something than just talk about it:
I say you can do both
I understand completely
Harvey will make Gotham better
Falcone will then ask you to chalk his pool cue. You can leave the chalk on the table, toss the chalk back at him, or do as he asks. Leaving the chalk is the most neutral action, but it’ll still annoy Falcone, and he’ll remember what you do in any case. He’ll follow up with a tortuous business analogy based around playing pool, and that he wants to be your friend. Your responses are ranged:
You and I aren’t friends
I get along with everyone
I’m just doing this for Harvey
Surprisingly, there’s no answer you can give here that won’t result in Falcone getting up in your grill. Even if you say you get along with everyone he has a go at you. However, he does remember whichever choice you make, so it’s possible that if Bruce Wayne meets Falcone again in the future he’ll remember how aggressive you were. In any case, the big deciding choice in the conversation is the last one, wherein Falcone says that Wayne Snr. knew “which hands to shake”. There are, as always, three options:
Whatever you say
You should go
Don’t talk about my father
The only one which results in Falcone leaving happy is the first one (he gives you a pat on the cheek and calls you a ‘good kid’). The other two result in him leaving and calling you a prick, although he will, again, remember the choice you specifically made – if you tell him to back off your dad he laughs, so you may have exposed a potential weak spot that’ll come up in future chapters.
Batman the Telltale Series Episode One Chapter Three: Meet the Press Walkthrough
At the start of this chapter you’ll be down in the Batcave decoding what you stole from Catwoman, and Alfred will come up to you. If you were friendly with Falcone he’ll say he would have been tempted to be less polite, and if not he’ll say it almost got “cut throat”, but it’s not a key conversation point. However, Alfred will begin suggesting Bruce and/or Batman be more careful and lay low. The first conversation choice has no ‘Alfred will remembers’ attached to it, but the second, after he mentions that Vicki Vale noticed your injuries, does. You can respond as follows:
This city needs me
I’ve got it covered
You’re right, Alfred
It seems Alfred is basically keeping track of how much of a reckless douche you are. After this you don’t have to worry about your choices until you transition to the next area, which is Cobblepot Park. Make your way into the park, look at the incidental bits and pieces, do what you want to do. The next section doesn’t trigger until you look at the statue, so do that and deal with the resultant mugging (which will happen regardless of what you say) and then turn to Oz. Your first response to him doesn’t matter, but the second, where he expresses sadness at what has happened to his parents’ park, does:
This is a shame
The place is a wreck
You’re right
Oz will remember your response, and if you choose option two he won’t be best pleased about it. He’ll talk about the death of his parents and you can choose how sympathetic you are in response:
I lost my parents too
That’s how things are
I’m sorry, Oswald
Obviously the second choice there is the uncaring one which will annoy Oz. When Oz asks why Falcone was at your party you also have a choice of responses:
That’s just politics
He wasn’t invited
It’s not what you think
In this instance the second option will actually placate him, but he won’t remember your answer for later. Now comes the heel turn, where Oz begins proclaiming himself the leader of a coming revolution and making vague threats about breaking windows and crossing off names.
I’m not your enemy
Is that a threat
You won’t win that battle
These are ordered from most to least threatening as responses. Oz will then slouch his way out of the park, while you get to drive a ferrari to a press conference. You can ignore or respond to Alfred’s text when you arrive, it makes no difference. Neither do your initial responses in the press conference (although you can inject as much drama into it as you like), until the press start asking you questions directly. These have no observable impact in this episode, but they will be remembered by the press.
In response to what the fate of Arkham Asylum should be:
Leave it standing
Its day has passed
Tear it down
In response to Falcone showing up at Wayne Manor:
Falcone’s no friend
He was Harvey’s guest
It’s a free country
At this point it all gets a bit tasty. Alfred will try and get in touch again (to tell you the police are at the manor), but whether you ignore him or not you’ll start getting questions about the Wayne family having links to the mob going back years. Your responses here, once again, have no impact, but you can cut the interview short, if you’d like to, by selecting ‘No comment’, and moving to the next chapter.
Batman the Telltale Series Episode One Chapter Four: World’s Greatest Detective Walkthrough
When you arrive at Wayne Manor the police are already turning it over, and Jim Gordon will serve you with a warrant (your response to him doesn’t really matter). You have two more conversation points with Gordon, and none of them have a ‘remember this’, although you might want to avoid being too antagonistic towards him.
Key Choice: Vicki Vale will appear once he’s gone, and again you don’t have to be too precious about your response to her until you get the option to go on record about the allegations against your family:
That story is pure fiction
Justice will be served
My family is innocent
If you give her one then it’ll play on the radio at the end of the episode and, one assumes, will probably turn up later in the game. You can also not give her a quote at all. Vicki will remember what you say either way. An overwhelming number of players choose to give Vicki a quote.
Cut to the Triste Cafe, where you’ve come to have a go at District Attorney Harvey Dent for not warning you about the search warrant. Responding Harvey will only take note if you respond ‘Someone’s after me’. You can then accuse him of knowing more than he’s letting on, and then discuss who could be behind the evidence, but neither of those have a substantial effect. There’s one final conversation choice with Harvey that he definitely takes notice of, no matter which you pick. He says he won’t be able to make the case disappear in case it damages the campaign, and you have to respond:
I’ll do this myself
We stick together
Just keep your distance
Harvey will remember what you choose to say.
It’s at this point that Selina Kyle shows up. So yeah, it turns out Catwoman is dating Harvey Dent. Who knew? There’s no way to conduct this conversation incorrectly, since it’s facilitating a plot point. Just enjoy the extremely pointed, flirtatious ride. This continues past Harvey going to answer his phone. The only conversation choice that will cause Selina to take note is when she asks you, for the second time, why you bother doing the Batman thing:
I’m the good guy
I have my reasons
No excuses
Selina will remember your response, but she doesn’t come up in the episode again, and neither do the conversations with her and Harvey.
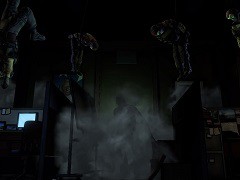
The rest of this chapter is taken up with an investigation down at the docks, where a warehouse has been the scene of a foul and bloody murder. Or murders, to be exact: a bunch of policemen and mercenaries have had a shoot out and you need to piece everything together by examining the scene and linking clues together. You’ll be prompted to look at the exploded body and the area of explosion, and link them together, by the game. The bits you need to examine with your special crime fighting techo-cowl yourself are, from left to right: the dead policeman behind you and to the left; the wooden pallets in the open container, the next shipping container and the shrapnel inside it; the dead mercenary on the floor; the unscorched area of floor in front of the explosion; the dead policeman with a white rise; the sniper on the right (examine both his face and his utility belt – he has a matchbook in his belt); and the dead policeman to the right of the aforementioned merc (examine his hands and then his head – you can pull a bullet out of his head).
You then need to link together the dead policeman’s hands to the mercenary with the destroyed face, the incendiary round to the shrapnel in the shipping container, and the blast epicentre with the unscorched area. You’ll then have to look for the sniper nest – it’s on the balcony on the left side, rather than in the shelving or at the top of the stairs.
Once you’ve found the sniper you can get him to talk. You’ll have a number of different options to get there, of varying degrees of physicality, but they all work.
Key Choice:Once all his beans have been spilt you can break the guy’s arm, but the police arrive soon afterwards, and Gordon will note whether you were violent or nonviolent. The players’ choice for this is pretty close. You monsters.
You can choose to stay and talk to Gordon or to disappear into the night. If you talk to Gordon.
Going after Falcone
I’m doing your job
Good to see you too
Gordon will remember your choice. Well done, greatest detective of all time! You’re now on to the last chapter!
Batman the Telltale Series Episode One Chapter Five: Room With a View Walkthrough
Alright, this one is pretty simple. This chapter opens with Alfred once again having a go at Bruce for being Batman too hard, because that sniper is now in hospital. Alfred will make note of your response, then ramble about your parents legacy for a bit, and eventually offer the bloodied ticket stubs from the night the Waynes were murdered. You can either keep them or tear them up, before noticing that Catwoman’s file has fully decrypted, and was hiding a whole lot of evidence tying Mayor Hill to Falcone’s illegal operations.
Key Choice: Your choice now is to give the evidence to either Vicki Vale or Jim Gordon in order to help take Falcone down (either in the press or with the police, on the streets). You’ll then meet with whichever you decided to go with, and have a conversation where they ask what your motivations are. You can reply saying you trust them, you’ll need a favour, or you just want Falcone taken out, and your choice here will be remembered. It’s reasonable to assume this is going to come up later in the game. The majority of players give the evidence to Gordon.
You’ll then suit up to take down Falcone directly at his club. Almost this entire section, in which you brutally take out some mobsters with furniture and batarangs and so on, you can play without worrying about your choices, though you will have to be on point with your quick time events (and we can’t really help you with that).
Key Choice: The only bit you need to look out for is the very end, where you can either arrest Falcone (relatively) peaceably, or you can, quote unquote, ‘brutalise’ him, in full view of a news helicopter and some police officers. So. That’s fun. Most people choose to arrest Falcone, so you’ll break a guy’s arm when you have him tied upside down, but you’ll arrest people when a camera is on you. Nice.
Congrats, you have now completed the first episode of a new Batman game. Please enjoy watching how many other people picked the same things as you, and waiting some months for the next episode to appear.
About the Author

Batman: The Telltale Series – Episode 1: Realm of Shadows
- Platform(s): iOS, Nintendo Switch, PC, PlayStation 3, PlayStation 4, Xbox 360, Xbox One
- Genre(s): Adventure