You can trust VideoGamer. Our team of gaming experts spend hours testing and reviewing the latest games, to ensure you're reading the most comprehensive guide possible. Rest assured, all imagery and advice is unique and original. Check out how we test and review games here
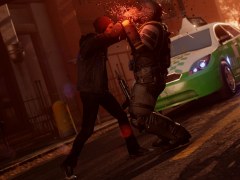
Having rescued your brother on the collapsed bridge, a cutscene will force Delsin through a checkpoint where you’ll need to use a fingerprint scanner. After the alarms are raised the guards turn hostile. This section can be dangerous as the fight starts with very little distance between you and your enemies, so a good strategy is to use your cinder blast (the shotgun-like power that you used earlier to clear the road for the bus) to quickly eliminate those closest to Delsin.
You should’ve created some space now, granting time to turn and destroy the scanners you just went through (you’ll need to use your cinder blast again) for some shards. You’ll also notice two blue icons ahead of you on your mini-map; these are ‘suspects’ held in cages. You can choose to either free or execute them for good or evil karma, so take advantage of these on your travels…
Don’t follow the road as you’ll run straight into another group of soldiers positioned in a guard tower at the end of this stretch covering more troops on the road leading up to the gate.
You want to bring this down as soon as possible, as doing so will kill most of the enemies. Proceed cautiously along the raised walkway to the left of the road. This will provide some cover against the troops on the ground, but you’ll still need to be careful of the troops on the gate. As soon as you’re close enough, smoke dash in and cinder blast the bridge between the guard towers.
Once the gate is destroyed, you’ll have far fewer guards to deal with, and any enemies not crushed by the debris should now be easy to dispatch. There should also be a few injured civilians around this area, so make sure to heal or execute them for a karma boost.
If you run low on smoke at any point during this section, there are wrecked cars on the road billowing smoke for you to drain. Just be aware that they are in the guard tower’s line of sight. Try to conserve your ammo until you have destroyed the gate and thinned out the enemies. Alternatively, heading left off the raised walkway will lead you to a building with a smoke vent on the eastern wall and a chimney on the roof.
Heading left round the corner, you’ll notice another destructible guard gateway. There are fewer soldiers on this gate, so you should have an easier time taking this one down.
Head round the next corner to see D.U.P soldiers firing tear gas down into a throng of civilians. Don’t immediately wade into combat this time. Instead, head to the left of the gate and circle around the outer wall of the compound. Once you’re out of sight of the guards on the gate, scale the wall, taking out the security camera on the side of the building (if you can’t find it, check the mini-map) and whichever soldiers happen to notice you, and head to the roof through the smoke vent.
Take out as many troops as you can from here before the whole compound targets you. As soon as you start getting pinned down, break line of sight with your enemies and make the leap to the building on the north side of the compound. If you ever take too much damage, back off from the edge of the roof and replenish your smoke using chimneys. The soldiers will not follow you onto the roof, but they will occasionally throw bombs up if they know you’re there.
Switching between the two roofs is easy with smoke dash and glide powers. Do so whenever you need to, remembering to use the smoke vents to get back up if you fall off, rather than trying to climb.
Once you’ve eliminated all the soldiers, take down the truck by shooting off the side-panels before jumping on top and punching the power core. Be careful when dealing with the truck, as shooting the side-panels can sometimes cause more soldiers to jump out the back of it.
When the minigun-wielding soldier turns up, don’t stick around trying to get a few hits in while he approaches. Sprint back up to the rooftops and resume your hit-and-run tactics. This fight should be much the same, but beware that one round of minigun fire can lead to a quick demise, so avoid dropping to ground level.
Another D.U.P compound has now been marked on your map to the south in Seattle Centre. Don’t try to assault this yet. The power-ups you get from taking down the core relays are very helpful in this fight, the cinder missile in particular.
About the Author