You can trust VideoGamer. Our team of gaming experts spend hours testing and reviewing the latest games, to ensure you're reading the most comprehensive guide possible. Rest assured, all imagery and advice is unique and original. Check out how we test and review games here
The Smouldering Lake is a completely optional area of the game that you access via cutting the rope bridge near the end of the Catacombs of Carthus. You’ll be facing a lot of enemies with fire themed attacks, so keep that in mind as you head in, but there are some good items to pick up here, including two pyromancy tomes, so it’s a recommended area for Pyromancers. This guide will help you through the area by highlighting key points, but leaves plenty for you to explore on your own.
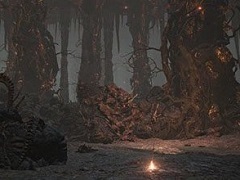
Bonfires at the Smouldering Lake in Dark Souls 3
Abandoned Tomb bonfire in Dark Souls 3
This bonfire is technically at the bottom of the Catacombs of Carthus, but it’s close enough to the Smouldering Lake that, for our purposes, it counts as the first bonfire there. To reach it start from the High Lord Wolnir bonfire and head back to the rickety wooden bridge. Attack the bridge supports and wait for it to collapse. Once it’s settled you can use the remains of the bridge as a ladder, so shimmy on down and follow the path into a room with a fire demon smashing about. If you don’t feel like fighting him run down past him and to the second level, where there are some skeletons waiting to assemble themselves, and a doorway in the opposite wall. Go through it and down the stairs to find the abandoned tomb bonfire.
Demon Ruins bonfire in Dark Souls 3
The Smouldering Lake itself is down from the Abandoned Tomb bonfire. You’ll know when you get to it because it’s a lake and it’s half on fire. As you step forwards a giant ballista will begin firing at you (it fires three arrows in succession, before pausing to reload) so, you know, watch out for that – we’ll get to turning off the ballista later, don’t worry.
Run to the left along the wall, towards the stone doorway in the distance. As you get nearer a giant worm monster will spawn from beneath the lake, but it’s fairly easy to get past it because it periodically disappears back under, at which point you can run through. Fighting the worm whilst the ballista is still firing is difficult, but you can cheese it by standing behind a rock behind the worm so the ballista fires at you but hits it instead. Either way, face the stone doorway (which is the boss room for the Old Demon King, and already has a lovely fog wall to warn you of this) and swing right, up a rock ramp and into the ruins. The bonfire is in here.
Old King’s Antechamber bonfire in Dark Souls 3
From the Demon Ruins bonfire go down the stairs and into the proper ruins. Run left, then around right (staying on the top level of the ruins) and into a square room with an opening on the opposite wall. Go through here and you’ll be in a narrow corridor, with an item orb on your left and a hole in the floor in front of it. If you can jump the hole then do so, and follow the corridor right, then right again to hit an illusory wall, behind which is the room with the new bonfire.
If you can’t jump the hole then drop down through it and run up the stairs in the room you’re in now, which should be on your right. The stairs will take you straight up to the Old King’s Antechamber bonfire.
Key Items at the Smouldering Lake in Dark Souls 3
Undead Bone Shard
When you first enter the ruins from the Demon Ruins bonfire you’ll come out onto a walkway, with the lower level below you full of floating fireballs (which cast more fireballs). Run along the top level, where there are two staircases leading down. Take one and then run left, into the furthest left corner. The Undead Bone Shard is here, and you can use it to boost your estus flask at Firelink Shrine.
Estus Shard
From the Old King’s Antechamber bonfire turn to face the stairs down and then hit the wall in the right corner. This illusory wall opens up a drop down shortcut to the lower level, and if you follow the passage to the left you’ll find the shard.
Izalith Pyromancy Tome
From the Old King’s Antechamber bonfire head forwards and out of the room (towards the pyromancer beast) and keep going straight. You’ll end up in a large, square room facing a few enemies, but the tome is beneath the statue of a beast, opposite the door. Give this to Cornyx back at Firelink Shrine for some more pyromancies.
Quelana Pyromancy Tome
From the Demon Ruins bonfire go down the stairs to the lower floor and go right until you hit the wall, avoiding all the fireballs as best you can. In this corner you’ll find a corridor leading off, with a solitary rat halfway along it. Just before the rat you can go left down another corridor, into a room which has three rats. An embarrassment of rats. Anyway, the wall opposite where you came in is illusory. Go through it and turn left, at the end of the corridor is the pyromancy tome. This must be given to Karla at Firelink Shrine; the spells in it can only be taught by a female master so Cornyx can’t help with it.
How to stop the ballista at the Smouldering Lake in Dark Souls 3
This can be a tough run through, so make sure you have you best fighting shoes on. From the Demon Ruins bonfire go down the steps to the lower level, and along the passage from the right corner. Go right into the room with three rats, then left, and right again down some stairs. You’ll be in a corridor with a giant rat on your right. Go through the doorway in the opposite wall and down the stairs to another lower chamber. Run right and then left until you see the stairs, and go up them, but watch out for the basilisks in this area because you’ll build up curse quickly from the gas they spit, and you don’t want to become cursed.
At the top of the stairs is a walkway over some lava, and at the other end of said walkway is a black knight. You can either fight him fairly, bait him to fall off the edge, or sprint past him. Straight ahead and over the other side of the walkway is a ladder, and if you’re quick enough you can get on it and climb up before he has a chance to knock you off it. After going up this ladder, and then another one, you’ll come out on a hill just below the ballista, but it’ll still move to aim at you from here. You might think that the remnants of ruined castle wall here are a handy bit of cover, and you’d be wrong, because the ballista will destroy them with one hit. Instead of hiding, head around to the left. You’ll take a path behind some rocks, which the ballista can’t hit. Keep follow the path around to the left and eventually (after running into some skeletons) You’ll come to the base of the ballista. At the bottom of it is a lever. Pull that and you can explore the open bit of the lake in peace.
How to find Horace the Hushed at the Smouldering Lake in Dark Souls 3
As mentioned in our area guide to the Catacombs of Carthus, you can run into Anri there and they’ll mention that they can’t find Horace. Well, Horace, it turns out, has gone mad with the hollowing and is hanging around in a little cave just off the edge of the Smouldering Lake. Start at the Untended Graves bonfire and go down to the edge of the lake. Hug the right hand wall and follow it around until you reach a tunnel entrance. Follow the tunnel and it’ll come out into the cave with Horace. He’s spoiling for a fight immediately, so you need to be prepared to kill him if you go in there. If you don’t and you tell Anri that you’ve found Horace then Anri will go down there and be killed themselves, and that interrupts their questline. You can always just not tell Anri you found him, or never go in there in the first place, but there are a bunch of crystal lizards in there so it’s worth a look.
Buy the official Dark Souls 3 Guide now.
About the Author