You can trust VideoGamer. Our team of gaming experts spend hours testing and reviewing the latest games, to ensure you're reading the most comprehensive guide possible. Rest assured, all imagery and advice is unique and original. Check out how we test and review games here
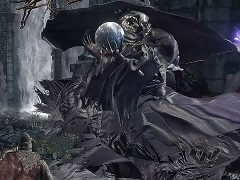
The Crystal Sage is a sage who deals in crystal themed magic. What a revelation. He hangs out around the back of the largest keep in the Crucifixion Woods, and has a pretty bitchin’ looking floppy hat, which would probably offer a lot of sun protection to someone who didn’t live in a world almost utterly consumed by darkness, of both the thematic and literal kind. The Sage isn’t an optional boss: you need to win this fight to get to the Cathedral of the Deep, and you need to beat the boss there to progress in the game.
1. The approach
The Crystal Sage has a more annoying run through than other bosses, mainly because it’s harder to get back to the boss area without taking some damage before you even get there. That being said, it’s still possible. So.
Start at the Crucifixion Woods bonfire and run down towards the keep wall. There’s a little gap in the wall here that means you can get inside and avoid all the crabs and that kind of nonsense. There are some hollows and a spellcaster to deal with but you can get past them and keep going, or hide behind the wall to draw them out one by one. That done, go up the stairs and out of the doorway at the top, onto a bridge between the two halves of the building. Run over that (watching out for the ambush on the right once you get to the other side) and keep going through, down some stairs and then into a room on your left. It’s got pillars down the sides (which hide some hollows) and another spellcaster at the end, plus some bonus holes in the floor to watch out for. Run the length of this room and out, past the spellcaster, and onto a short, steep path running upwards. There’s another spellcaster at the end, standing right in front of a narrow archway. Through this arch is the boss arena.
The Crystal Sage will spawn opposite where you come in, and will start prepping attacks almost immediately.
2. The Crystal Sage’s first phase
The Crystal Sage is primarily a spellcasting enemy, and when you first enter the arena you have time to get a few good hits in while the first load are being keyed up. They do deal some good damage if you get hit by them, however, so be prepared to dodge. You can use the pillars in the arena to put a block between you and some of the damage coming at you. The spells are all brightly coloured and crystal themed (every attack sounds like the start of an encounter in Final Fantasy). The main ones to watch out for are homing crystal orbs and the crystal soul spear, which fires a long thin projectile that can pierce you a good ‘un, and will travel through the pillars if you’re hiding behind one. Another good tactic is to just keep moving, because the homing spells won’t follow you that far. If you run straight at the enemy instead of strafing up to him then the spells are much more likely to hit, especially the soul spear.
The Sage has relatively low poise, so if you can deal a big enough hit it will stop his attacks – lightning damage is particularly effective here. Every time you do a block of damage he’ll disappear, and reappear somewhere else after a few seconds. When this happens crystals spike up from the ground to cover the Sage’s escape, so keep an eye out when this happens to make sure that you don’t hit, although they appear at some distance from him and should be pretty easy to avoid even for ranged players.
3. The Crystal Sage’s second phase
After you get the Sage down to about half health the next time he reappears he will have a bunch of illusion copies of himself. You can tell they aren’t the real one because the spells they cast are blue, whereas his are purple. Tempting though it may be to go for the Sage first, they have the exact same moves and spells as he does, and they deal the same amount of damage to you, so run around and take them out as a matter of priority. Luckily they’re much weaker than the Sage himself, so should go down in one or two hits at a push. This then leaves you free to go and shellac the real sage for a bit until he does the disappearing act again.
It’s good to play through this phase without locking on to the enemies if you can, because this focuses your view and you can lose awareness of what all the illusions are doing and which spells are flying, though we realise this can be a tough ask for players using spells and projectile weapons. On the whole this fight should be fairly easy, especially once you’ve taken out the copies. Your target(s) stay still; you just have to move around their spells. Well, we say ‘just’…
Once you’ve finished the fight a bonfire will appear. You can then exit through the back of the arena to get to the Cathedral of the Deep (spoilers: maggots).
Buy the official Dark Souls 3 Guide now.
About the Author