You can trust VideoGamer. Our team of gaming experts spend hours testing and reviewing the latest games, to ensure you're reading the most comprehensive guide possible. Rest assured, all imagery and advice is unique and original. Check out how we test and review games here
The boss for the Undead Settlement is the Curse-Rotted Greatwood, and he’s… well he’s a big tree, is what he is. Defeating the Curse-Rotted Greatwood gets you the Transposing Kiln, which you can bring to Ludleth of Corland to get some potentially kick ass weapons from boss souls you collect.
1. The approach
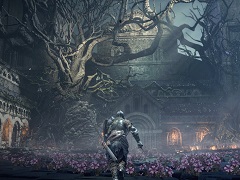
Getting to the Curse-Rotted Greatwood is easiest from the Cliff Underside bonfire at the Undead settlement. From the bonfire, go out onto the thatched roofs of the building and look left from where you’re standing. You should be able to see a big set of stone steps leading into what looks like a massive kind of stone temple. That’s where you’re going. The Greatwood is in a big stone courtyard . You’ll know as you get close because the ground becomes covered in roots and pink flowers, and once you step into the courtyard itself there’ll be pink petals floating upwards from the ground (it’s actually quite pretty, which is a shame considering what comes next). The doorway into the courtyard is on your right if you’re coming from this direction, but you can also get there by starting at the Dilapidated Bridge bonfire and going straight through the graveyard, in which case the courtyard will be on your left.
You can get a good way into the courtyard before anything happens, but don’t just keep running in unless you’re good and ready. The Greatwood is surrounded by a few hollowed undead and if they aggro at you, so does he. For the moment he’s happy hanging out in the left hand corner there.
2. The Curse-Rotted Greatwood’s first phase
The first phase of the Greatwood involves him shuffling out of his corner to start attacking, which can do damage at close and long range. He’ll sometimes lift himself into the air and do a butt slam on top of you, which also generates some acidic liquid around him that gradually corrodes away your health if you’re standing in it, until such point as it clears again. He’ll also use his spindly arms and legs to do wide sweeps and smash down on you, and will occasionally stand up and just… just try and fall on you, although this is fairly easy to avoid and makes the weak spots on his limbs more available for walloping. Ah, yes, the weak spots.
To get his health down you need to attack the things that look sort of like bulbous egg sacks on his body, although you can’t lock onto them specifically, only the Greatwood generally (so, not going to lie, this is a hard fight for spellcasters). There are some of these sacks on his ankles, wrists, and back, but the largest target, and the easiest to reach in the first phase, are basically right where his crotch would be if he had one. If you take them out you’ll go directly to phase two, do not pass go, do not collect £200.
Now. There are a couple of ways you can do this, and one involves a bit of what you might think of as ‘cheesing’, i.e using a feature of the game against it to win.
So if you’re doing it properly what’s meant to happen is you run in, aggro all the mobs who then waylay you getting to the Greatwood, and then have to try and deal damage to the boss while dealing with both the boss attacks and the mobs, who will keep spawning until the second phase (the easiest way to do this is to run in, swipe a few times, and run back out to avoid the inevitable swipe attack from his arm).
If you’ve got a bit of patience, and a few projectiles, you can do it the second way, which is to draw out the starting mobs one by one from range using e.g. throwing knives, and finishing them off far enough away that nothing else aggros. Going through like this means that eventually you’ll be left with no hollowed enemies to deal with, because they won’t start respawning yet, and the Greatwood still hanging out in his corner like there’s nothing going on. Then you can run up to him at your leisure, and the good thing is that he won’t start his actual attacks until he’s out of the corner. You can’t lock on to him either, but if your manual aim is even just ‘okay’ you can take out the weak spot on his crotch before he’s even had a chance to hit you. Which is incidentally how you also win in a pub fight.
3. The Curse-Rotted Greatwood’s second phase
In the second phase the Greatwood will butt-slam with such intensity that it breaks the very ground you’re standing on, and you fall into a massive pit that was under the floor the whole time. You and the Greatwood will fall in it together, and no more hollowed enemies will generate. You also don’t take any damage from the massive fall.
In the second phase the Greatwood sprouts a giant arm from inside his chest, which can grab you and crush you for some truly devastating damage, but it telegraphs when it’s about to do this by raising in the air and pausing like it’s trying to figure out where you are. It also swipes and slams at you, and can hit you if you’re standing at the main weak spot on the Greatwood’s groin, so again it’s a case of moving in and then backing off again – don’t get greedy and go for more hits than you should.
While the new, creepy arm is a nuisance it can also take damage, so you can watch for the times it slams on the ground and rests for a few seconds, or when it’s used to steady the Greatwood’s turns, and get some hits on it there.
This is probably going to be the toughest fight you’ve had so far, but if you hold your nerve and stay patient you’ll get through.
Buy the official Dark Souls 3 Guide now.
About the Author