
Video Gamer is reader-supported. When you buy through links on our site, we may earn an affiliate commission. Prices subject to change. Learn more
Before No Man’s Wharf
Before approaching No Man’s Wharf, it is best to have a ‘Pharros’ Lockstone’, this makes exploring the environment much easier and the more challenging enemies in the area will run and hide, rather than face you. You can buy a Pharros’ Lockstone form the Merchant sat by the Cardinal Tower bonfire for 4000 souls.
We’ll come onto how to use the Lockstone in more detail a little later.
Getting to No Man’s Wharf
From the Tower of Flame bonfire, head across the walkway and through the door. Under the spiral staircase is a fallen soldier holding a Monastery Charm, which cures poison and restores HP.
Head through the doorway and you’ll see two old knights: one in a wide open area and the other guarding a narrow passage. Take the Old Knight on the right first, the other one won’t attack. If you’re unsure as to the most effective strategies for beating the old knights, take a look at our Heide’s Tower of Flame walkthrough.
Now take down the second knight blocking the passageway, head down here and there will be two more dead bodies, each holding souls and one has an Old Knight Halberd. Head back along the walkway and through the door.
There’ll be two more knights at the bottom of these stairs, one directly in front of you and the other to the right. Follow the path to the right and you’ll come across a room with an elevator. Head through the door at the bottom of the elevator, this area has water up to your knees that restricts your character’s movement, so be aware of this when you take on the next old knight on the left. This guy is holding a sword and shield, so shouldn’t be too difficult. Head up the stairs and turn right, at the very end of this path is a chest with a full set of knight armour. It’s heavy, but will offer good protection once you get to No Man’s Wharf.
Back downstairs, head left and through the hole in the wall. Follow this path until you reach the ‘Unseen Path to Heide’ bonfire. Speak to Lucatiel, she’s not very welcoming at first, but keep initiating conversation and she’ll eventually promise to help you at some point in the future.
No Man’s Wharf
Continue down the path and you’ll reach No Man’s Wharf. Immediately across from you is a ghost ship which houses the boss of this area, the Flexile Sentry. Ignore the archer firing flame arrows at you for now and head left, there will be two hollow soldiers in the small room that rises from the dead as you pass. The visibility in this area is poor, so keep the camera at a high angle so you can always see the floor to avoid cheap deaths.
Take these out and head upstairs to fight a new type of enemy. These guards are relatively easy as long as you guard their opening attack. Failing to block the initial swipe will mean you’re on the end of what can be a devastating combo from these guys, so be careful.
Head back downstairs and along the path towards the archer, take him and the other guard out. To the left are two huts, there is a guard on top of the one on the left waiting in ambush. Run into the hut on the left and kill the hollow soldier, wait for the guard to drop down and follow you inside before killing him. Pick up the Dark Pine Resin, head outside and kill the last hollow in the house on the right.
Head up the first flight of stairs and turn right, you’ll be greeted by a dog and another guard. The dogs are easy to kill but inflict bleed damage if they hit you. To the right of the guard and dog’s location is the slot for the Pharros Lockstone, use it and the entire Wharf will light up. You need to do this as it means that the toughest enemies in the area – black, monkey-like creatures with long arms will now cower into caves, huts and other shaded areas and will no longer attack you as long as you’re in the light.
Head into the house and kill all the sleeping guards as quickly as possible, before they get a chance to wake and return fire. Once one guard is hit, all will wake up, so try and whittle down the numbers. There’s a chest behind the bar with Brigand armour.
Head upstairs and kill the other two guards, jump the gap on the right towards the torch. There are a bunch of guards and a dog in the house ahead of you which you can fight, but don’t need to. Instead, head up the stairs and follow the path round, grab the soul and Emit Force from the fallen soldier on the precipice. If you want to sell items to the merchant, you’re going to have to take a detour.
Gavlan the Merchant
As you continue along this path you’ll see a hole in the side of a building, thanks to the Lockstone, the enemies that would have been along the walkway you’re on are now in this damaged house. Sadly, you have to go inside to get to the merchant. There are seven (yes, seven!) of the creatures inside this house in total, three in the first room, three behind the door on the left and one upstairs. Try and aggravate one at a time as best as possible, if at any time you get swarmed, turn and sprint away. These foes tend to forget the light when focused on attacking you, but once they lose focus, they’ll start cowering once again.
The three enemies in the next room, behind the door, will knock the wall down with their first attack, so don’t think the narrow entry provides safety.
Once these are down, head upstairs and the merchant will be in the corner of the room. Make sure you have everything you want to sell when you speak to him, as he will disappear after your transaction.
Opposite the merchant are two chests: the one on the left has a great sword while the one on the right is booby trapped but contains a silver talisman.
Back en route
Head back outside and up the stairs to the left. Kill the guard in the hut at the end and head upstairs, pull the lever to bring the ghost ship into the pier. Drop down onto the path of white bricks and grab the life gem and homeward bone. Keep dropping down the platforms until you’re back on the ground. There is a wooden door in an alcove, go through and head upstairs to open the iron gate to unlock the shortcut in case you die at any point, the route back to the ship will be far shorter.
Back outside, head down the flight of stairs and grab the human effigy and life gem from the battered lifeboat. Head onto the wooden planks and take the path to the right to find a sorcerer.
Carhillion of the Fold
On the wooden planks are two guards waiting in ambush, you can knock them back into the water as they climb onto the path. Head along the plank and speak to Carhillion. You’ll need a high level of intelligence in order for him to engage you, so this is a quest for mage builds. You’ll know if you qualify as he’ll say something along the lines of ‘I have no time for the magic impaired’, dismissing you entirely.
The ghost ship
The left hand walkway leads to the ghost ship. The ship is filled with guards that can quickly overwhelm you, but you can sprint straight past and down the stairs to the mist and avoid them entirely.
If you do choose to fight them, use the stairs leading to the front and rear of the ship to your advantage. There’s an archer to the left of the ship, kill him first, then try and take out one or two on the stairs before backing off to recover stamina and/or health. Continue this pattern until they’re all down.
Beating Flexile Sentry
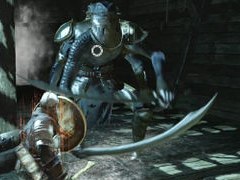
Flexile’s Sentry’s unique trick is that he is actually two enemies attached back-to-back, one of which has no legs, making it hard to counter attacks as you technically can’t exploit his back. One enemy is dual-wield katanas while the other clutches two giant maces. You’ll want to focus on the mace guy, his attacks are much slower and easier to dodge, plus the katanas inflict bleed damage.
Face the mace opponent and once it begins its attacks, run round to katana side and get a few hits in, quickly running back round to ‘mace face’ before the katana half has a chance to initiate a move, as his attacks are much more sweeping.
If the katana half of the sentry does start fighting, don’t panic, just bring your shield up and strafe until you’re facing the mace half again. He’s a relatively easy boss that won’t cause you too many problems.
Once the Flexile Sentry is down, head through the door, up the ladder and examine the crank, the ship will take you to the Lost Bastille.